Wersja z 2018-04-13
![]()
![]()
Indiana Jones and the Fate of Atlantis lub Indiana Jones IV to gra przygodowa wydana w roku 1992. Choć dziś może nieco razić, zwłaszcza graczy młodszego pokolenia, swą niezbyt nowoczesną grafiką i muzyką, to dzięki starannemu wykonaniu, świetnej fabule i niesamowitej grywalności wciąż wciąga i zachwyca. Zdaniem wielu osób pozostaje jedną z najlepszych gier przygodowych wszech czasów.
FoA, bo taki skrót często jest używany wobec omawianej gry, jest pod pewnymi względami typową przedstawicielką swojego gatunku. Stanowi zatem opowieść, której fabułę z wolna odkrywa gracz, sterując główną postacią, rozwiązując (niezbyt skomplikowane) zagadki i doprowadzając do szczęśliwego finału. Jak i w innych typowych przygodówkach, znikomą rolę odgrywają tu elementy zręcznościowe czy szybkościowe. W fabułę gry wpleciono walkę – jednak to gracz decyduje o ilości potyczek staczanych przez prowadzonego przez niego bohatera.
Bohaterem tym jest archeolog, doktor Henry Walton Jones Jr., powszechnie znany jako Indiana Jones, często nazywany zdrobniale Indy. Stateczny profesor jednego z amerykańskich koledżów ma też drugą, ukrytą osobowość. Uwielbia mianowicie przygody i kłopoty, z których udaje mu się wychodzić obronną ręką. Nieodłącznymi atrybutami tej awanturniczej odsłony Indiany są charakterystyczna fedora (rodzaj kapelusza), skórzana kurtka, bicz i rewolwer. W czasie swoich wypraw Indiana stawia czoło groźnym przeciwnikom (obłąkanym wyznawcom bogini Kali, nazistowskim Niemcom, sowieckim Rosjanom) reprezentującym siły zła i dążącym do przejęcia panowania nad światem.
Indiana Jones to postać fikcyjna, wymyślona przez światowej sławy scenarzystę George’a Lucasa. Nie jest to jednak postać fantastyczna. Pierwowzorem Indiany był bowiem Roy Chapman Andrews (1884–1960), amerykański paleontolog, wychowanek Beloit College, pracownik, a następnie kierownik Amerykańskiego Muzeum Historii Naturalnej. Podobnie jak Jones, także Andrews zasłynął z zamiłowania do wypraw terenowych. Do historii nauki przeszedł jako kierownik ekspedycji na pustynię Gobi, w czasie których po raz pierwszy odnaleziono jaja dinozaurów.
Zbieżności Jonesa z Andrewsem są wyraźne nie tylko w obszarze zainteresowań: upraszczając sprawę, paleontologia zajmuje się wykopywaniem z ziemi pozostałości pradawnych organizmów, zaś archeologia świadectw materialnej kultury pradawnych ludzi. Nazwiska każdego z tych panów pochodzą od pospolitych imion. Ten prawdziwy związany był z Beloit College, dla którego zdobywał eksponaty przyrodnicze, ten fikcyjny natomiast – z Barnett College, dla którego wyprawiał się po „artefakty” czyli zabytki materialnej kultury. Andrews skutecznie goni za mitami, za jakie musiano w jego czasach uważać jaja dinozaurów. Także Jones w swoich ekspedycjach ociera się o mity, natrafiając na przedmioty związane z siłami nadprzyrodzonymi, jak Arka Przymierza, Święty Graal czy kryształowe czaszki kosmitów. Nawet charakterystyczny strój Indiany wydaje się opierać na ubiorze stosowanym przez Andrewsa w czasie jego wypraw.
W latach osiemdziesiątych nakręcono 3 znakomite filmy o Indianie Jonesie, wyreżyserowane przez Stevena Spielberga. W rolę Indy’ego wcielił się w nich Harrison Ford, od tamtego czasu kojarzony powszechnie właśnie z tą postacią. Dzięki umiejętnemu połączeniu ciekawej fabuły, wartkiej akcji, specyficznego humoru, efektów specjalnych, doskonałej gry aktorskiej, a także świetnej muzyki, filmy te osiągnęły olbrzymi sukces i wpisały się na zawsze do annałów sztuki kinowej. Sama zaś postać Indiany (z twarzą Forda) stała się znana i rozpoznawalna na całym świecie.
Popularność ta sprawiła, że oprócz wspomnianych już 3 kultowych, pełnometrażowych filmów, nakręcono serial telewizyjny „Kroniki młodego Indiany Jonesa”, a następnie „Przygody młodego Indiany Jonesa”. Pojawiły się też liczne książki i komiksy. W roku 2008 spełniły się oczekiwania fanów – ukończono czwarty film o Indianie z udziałem Harrisona Forda.
Filmom o Indianie towarzyszyły niemal od początku gry komputerowe, mniej lub bardziej związane z ich fabułą. W roku 1989, niemal jednocześnie z trzecim filmem z Harrisonem Fordem, ukazała się dość jeszcze toporna przygodówka Indiana Jones and the Last Crusade: The Graphic Adventure (a także gra zręcznościowa oparta na tych samych wątkach, ale nią nie będziemy się tu zajmować).
Wkrótce potem musiała się pojawić idea stworzenia kolejnej, czwartej już opowieści o Indianie, tym razem związanej z mitem Atlantydy. Dziś mówi się, że nigdy nie istniały plany jej sfilmowania, co jednak wcale nie musi odpowiadać prawdzie. Faktem jest jednak, że Harrison Ford nigdy nie zagrał w takim filmie, i na długie lata zaprzestał wcielać się w wykreowaną przez siebie postać. Mimo to już dwa lata po „Ostatniej Krucjacie” (czyli w 1991) ukazał się czteroczęściowy komiks oparty właśnie na wątku Atlantydy, trwały też intensywne prace nad ukończeniem gry komputerowej, co ostatecznie nastąpiło rok później. Gra okazała się o wiele bardziej dopracowana od poprzedniczki, i do dziś ma liczne grono wielbicieli.
Nie ma chyba sensu dociekać, co sprawiło, że opowieści o zgubnym końcu Atlantydy (tak właśnie można przetłumaczyć na polski “the fate of Atlantis”) nie sfilmowano. Może istotnie nigdy nie było takich zamiarów. Jednak dziwnym trafem w roku 1994 pojawił się film MacGyver: Lost Treasure of Atlantis (MacGyver i zagubiony skarb Atlantydy), w którego scenariuszu jest aż nadto wiele nawiązań do opowiadania o Indianie Jonesie odkrywającym sekrety Atlantydy. Nie znaczy to bynajmniej, że obie historie są identyczne – mówimy tu przecież jedynie o (licznych) zbieżnościach, a nie o skopiowaniu scenariusza.
Faktem jest jednak także, że mimo iż niesfilmowana, historia Atlantydy stała się czwartą opowieścią o Indianie Jonesie. Dlatego do dziś „Indy IV” jednoznacznie odnosi się właśnie do niej (a nie do czwartego filmu z Harrisonem Fordem). Co ciekawe jednak, sama opowieść nie jest wcale jednoznaczna!
Okazuje się bowiem, że wydarzenia przedstawione w komiksie nie odpowiadają dokładnie temu, co można znaleźć w grze. Ważniejsze jest jednak to, że gra zawiera w sobie trzy różne fabuły (zwane ścieżkami), i choćby z tego względu nie może być pełnej zgodności między nią a komiksem, z natury rzeczy prezentującym tylko jedną fabułę.
Warto się przyjrzeć dokładniej tej zupełnie unikalnej właściwości gry Indiana Jones and the Fate of Atlantis. Otóż gry przygodowe często opowiadają zwykle ściśle ustaloną historię, a gracz musi postępować według narzuconej przez twórców sekwencji zdarzeń. Tego rodzaju opowieści powstają także i dziś. Jedynie niektóre elementy takich gier mogą wyłamywać się z liniowości akcji, albo też niektóre pojawiające się problemy można rozwiązywać na różne sposoby.
Oprócz tego istnieją gry, zwłaszcza nowsze, w których fabuła nie jest liniowa, lub też jest liniowa tylko w ogólnych zarysach, i to gracz decyduje o sekwencji zdarzeń. Często w grach tych pojawia się lista zadań. Gracz wybiera kolejność ich wykonania, ale już sposób, w jaki to robi, jest zwykle z góry ustalony.
Indiana Jones and the Fate of Atlantis jest grą, która nie mieści się w żadnej z tych kategorii. Gracz nie wybiera tu bowiem zadań, ale jedną z trzech ścieżek swojego dalszego postępowania. Scenariusz wybranej ścieżki jest już jednak w dużej mierze ustalony, liniowy. Jest to właściwość unikatowa dla typowych gier przygodowych – mimo upływu wielu lat od stworzenia Indy IV, trudno znaleźć inne podobne przykłady.
Najsłuszniej byłoby więc powiedzieć, że Indy IV to trzy różne, alternatywne opowieści wydane w postaci jednej gry. Te trzy ścieżki różnią się znacznie od siebie: na każdej z nich postać sterowana przez gracza odwiedza inne miejsca, korzysta z innych środków transportu, napotyka na trudności niespotykane na innych ścieżkach. Pierwszy i ostatni etap tych trzech historii jest jednak wspólny. Nie znaczy to jednak, że zawsze jest taki sam!
W grze występują bowiem elementy losowe, a gracz może rozwiązać niektóre (wybrane) problemy na kilka sposobów. O szczegółach będzie mowa w dalszych częściach tego opisu. W kilku przypadkach mamy też możliwość ominięcia pewnych trudności, co może wpłynąć (lub nie) na dalszy przebieg opowieści. Między innymi wybór jednego z dwóch możliwych zakończeń gry zależy od decyzji zupełnie niezwiązanych z wcześniejszym wyborem ścieżki.
Choćby już tylko z uwagi na obecność w grze trzech różnych scenariuszy wydarzeń, nie da się jej poznać podczas jednej rozgrywki. Pomocą w zapoznawaniu się ze światem gry mogą być punkty zdobywane za poszczególne trafne decyzje, posuwające akcję naprzód. Punkty te oznaczane są IQ, co nie oznacza jednak ilorazu inteligencji, ale „iloraz Indy’ego” – Indy Quotient. Każda rozgrywka ma swoją punktację bieżącą, a niezależnie od tego każde nowe rozwiązanie, zastosowane przez gracza po raz pierwszy, skutkuje zmianami w punktacji całościowej. Do uzyskania jest łącznie 1000 punktów, ale w czasie jednej rozgrywki można uzyskać od 496 do 634 punktów. Konkretna wartość zależy od wybranej ścieżki oraz od sposobu rozwiązania (lub ominięcia) napotkanych na tej ścieżce problemów.
W grze, tak samo jak w prawdziwym życiu, postacie nie są nieśmiertelne. Nie ma też żadnych magicznych wskrzeszających mikstur czy dodatkowych żyć. Jeśli więc doprowadzimy do śmierci bohatera, to chcąc grać uczciwie, powinniśmy rozpoczynać nową rozgrywkę.
Można jednak zapisywać stan gry. Jeśli zrobimy to w krytycznym momencie, a następnie nasza postać zginie, możemy rozpocząć grę od zapisu. Postępowanie takie można oceniać różnie. W każdym razie jeśli chcemy zdobyć wszystkie 1000 punktów, będziemy musieli stoczyć walkę z przeciwnikami, z których co najmniej dwóch jest naprawdę trudnych do pokonania. W takich sytuacjach wielokrotnie podejmowane próby, zaczynane od zapisanego stanu gry, są często jedynym sensownym rozwiązaniem.
Każda ze ścieżek dostarcza problemów, których poza nią nie spotkamy. Jest więc zrozumiałe, że chcąc zdobyć 1000 punktów za całą grę, musimy wykonać co najmniej trzy różne rozgrywki. To jednak nie wszystko. Otóż na każdej ze ścieżek pojawiają się problemy, które można rozwiązać na dwa sposoby, a każdy z tych sposobów jest osobno punktowany (czasem może dochodzić jeszcze trzeci, a nawet czwarty sposób, ale już bez możliwości zdobycia punktów). W zasadzie więc ktoś, kto ma ambicję zdobyć wszystkie możliwe punkty, powinien wykonać sześć rozgrywek (aby przejść każdą ze ścieżek po dwa razy). W kolejnych częściach tego kompendium zostanie dokładnie podane, które sytuacje wymagają dwukrotnego przejścia, jeśli chcemy zgromadzić wszystkie możliwe punkty za grę. Teraz tylko ogólnie sygnalizujemy problem.
Można by więc wręcz rzec, że Indy IV to nie trzy, ale sześć gier w jednej. Nie mnóżmy jednak bytów ponad potrzeby. Gdy dochodzimy do sytuacji, w której możemy zastosować dwa różne wykluczające się, punktowane rozwiązania, możemy przecież nagrać stan gry, rozwiązać sytuację w jeden ze sposobów, a następnie przerwać grę, wczytać zapisany stan, i zastosować rozwiązanie alternatywne. Punktów za bieżącą rozgrywkę nam oczywiście od tego nie przybędzie podwójnie, ale już do punktów za całą grę zostaną doliczone punkty za każde z dwóch rozwiązań.
Czy warto jednak stosować takie wybiegi? Gra jest naprawdę na tyle ciekawa i wciągająca, że rozwiązania polegające na co najmniej dwukrotnym przebyciu każdej z trzech ścieżek (czyli na łącznym rozegraniu co najmniej 6 rozgrywek) wydaje się naprawdę lepsze i przyjemniejsze.
Poza tym istnieją elementy gry, które umożliwiają zastosowanie różnych rozwiązań, co jednak nie prowadzi do otrzymania nowych punktów. Przykładem niech będą dialogi toczone między postaciami, często zawierające wiele różnych możliwości wyboru tekstu wypowiadanego przez sterowaną postać. Cała rozmowa może więc przybierać całkiem inną postać w każdej kolejnej rozgrywce. Zatem aby poznać wszystkie możliwości, które daje gra, należałoby rozgrywać ją wielokrotnie (niekoniecznie tylko sześć razy!).
Gra Indiana Jones IV została wydana wyłącznie w języku angielskim, i do jej rozegrania konieczna jest dość dobra znajomość tego właśnie języka. Niniejsze kompendium może służyć pomocą ludziom, którzy takich umiejętności nie mają, niemniej jednak dla zrozumienia wielu sytuacji i tak konieczna może się okazać przyjaźń z dużym słownikiem.
Można sobie zadać pytanie, dlaczego nikt dotąd nie spróbował gry przetłumaczyć. W istocie taka próba została podjęta, ale upłynęło wiele lat, i rezultatów nie ma żadnych. Uczciwie trzeba powiedzieć, że oprócz opracowania specjalnego fontu z polskimi znakami (bez których tłumaczenie jest po prostu nie do przyjęcia), należałoby przetłumaczyć kilkaset linii tekstu (objętość ta wynika z istnienia trzech ścieżek i zwykle wielu możliwości prowadzenia dialogów), w dodatku czasem pisanego dość idiomatycznym językiem. Pewnych elementów zaś chyba w ogóle nie da się tak przetłumaczyć, by oddać wszelkie niuanse zawarte w oryginale (przykładem niech będzie pojawiające się w jednym z dialogów zdanie „With a fez one becomes truly fez-tive” – określenie „fez-tive” wiąże się zarówno ze świętowaniem, jak i fezem).
Poza tym gra została wydana także w wersji mówionej. Głosu postaciom użyczyli aktorzy. Aby spolszczyć i ten element gry, należałoby także zatrudnić odpowiednio przygotowane osoby, co nie wydaje się w ogóle realne. Rozwiązaniem mogłaby być gra przypominająca obcojęzyczny film z napisami. Być może ktoś kiedyś te napisy jednak przygotuje…
For other uses, see Indiana Jones and the Fate of Atlantis (disambiguation).
Indiana Jones and the Fate of Atlantis is a graphical adventure game, originally released in 1992 and published by LucasArts. It was the seventh game to use the SCUMM adventure game engine. Based on writings by Plato, the game’s plot is an original story.
As was LucasArts’ adaptations of Indiana Jones and the Last Crusade, the graphic adventure game saw an almost simultaneous release with a version of the story that focused more on combat. Indiana Jones and the Fate of Atlantis: The Action Game loosely followed the same plot but in the arcade-adventure genre.
A four issue Indiana Jones and the Fate of Atlantis comic series was produced in conjunction with Dark Horse Comics and published in 1991, a year before the game’s own release. Despite being the same basic plot, there were some notable differences in the story.
The game was also included as an extra on the Wii version of Indiana Jones and the Staff of Kings in 2009, and later that year on July 8, was re-released for the PC via Steam. In 2014, the game was made available through GOG.com following GOG Ltd’s agreement with Disney Interactive to republish a number of LucasArts titles.
Contents[show]
Publisher’s summaryEdit
Fateofatlantisboxback
Back of box.
The Man With The Hat Is Back In His Greatest Adventure Yet!!
1939 — the eve of World War II. Nazi agents are about to get their hands of a weapon more dangerous than the atom bomb. Only Indy can stop them before they unleash the deadly secret that sank Atlantis.
Plot summary Edit
IntroductionEdit
Indy was asked by Marcus Brody and a certain Mr. Smith to find a particular strange idol from Barnett College’s museum. Due to a stairway being closed for repairs, Indiana Jones had to swing through a roof window using his Bullwhip to search the junk and fakes of the museum’s attic. As he looked at a a rather peculiar looking statue, he accidentally fell through a trap door that someone had left unlocked.
Indyfalls
Indiana falls through the trap door
Recovering from his fall, Indy found himself in another part of the attic which housed textiles from the Shawmut Collection, and beadwork from the Phoenix Collection amongst other things. As he picked up a rope to climb through another open trap door, a large totem pole fell on him knocking him through it, into the college’s library.
Searching the library, Indy came across some unfamiliar books on statues. Thinking they may aid in his search, he removed them from the bookshelf. Unfortunately, the shelf was unsecured and it fell over onto Indy and knocked him through the thin floor into the store room below.
In the store room, Indy found four cat figurines. As he examined them, one turned out to be a real cat, which hissed loudly, startling Indy and sending him reeling backward. Indy lost his balance and slipped down the coal chute into the boiler room.
Indy searched the boiler room, and found a Horned Statue in one of the lockers. This was the statue he had been looking for!
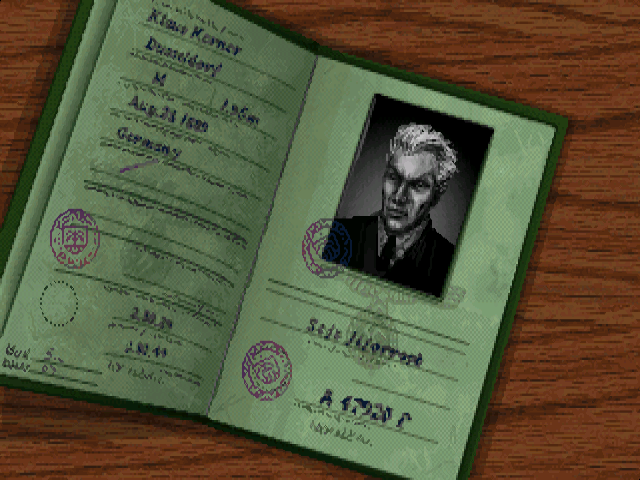
When Indy returns, inside the statue they find a small metal bead and Smith, to their surprise, steals the statue. Indy gives him a fight, but “Smith” escapes, without his coat. After searching his coat, it is revealed his real name is Klaus Kerner and he is an agent of the Third Reich and his next target is Sophia Hapgood.
Sophia Hapgood, an ex-colleague of Indy, now presents herself in New York as a psychic, giving seminars about Atlantis and communicating with the Atlantean god-king Nur-Ab-Sal. Kerner was after her medallion, which she and Indy found in Iceland during the Jastro Expedition, which helped her communicate with Nur-Ab-Sal. A race between Jones and the Nazis to find the mythical lost continent of Atlantis begins, which may contain technology vital to the future of the world, since Kerner discovered that the metal bead found in the statue was Orichalcum, the legendary metal that would give extreme power to machines and create bombs. Kerner finds this out after bringing the bead and statue to his mad scientist boss, Hans Ubermann.
On some point, the team must find Hermocrates, the lost dialogue of Plato discussing Atlantis further than his previous works (Timaeus and Critias). Indy and Sophia return to Iceland where Dr. Bjorn Heimdall directs them to two other scholars. In Tikal, Guatemala they meet Dr. Charles Sternhart who translated Plato’s “Hermocrates” into English. Inside the temple Sternhart takes care of Indy’s discovery of a tomb and a stone disk, which Sternhart recognises as a “Worldstone”. He grabs it and flees by a secret passage. Felipe Costa from Azores, on the other hand, tells the couple, after a bit of persuasion via an eel figurine artifact found back from Iceland, that a copy of the Hermocrates should be in one of the book collections at Barnett College.
The document speaks that in order to gain access to Atlantis, three stone disks, the Sunstone, the Moonstone, and the Worldstone, are needed. According to Sophia, one of two old associates had a Sunstone: either Alain Trottier from Monte Carlo or Omar al-Jabbar from Algiers.
It is at this point that the player has to choose between either the Team Path, in which Indy continues on with Sophia and the game consists mostly of puzzles involving tag teaming with her, the Fists Path, in which Indy goes alone and the game involves lighter puzzles and more fighting, or the Wits Path, in which Indy goes alone and there are harder puzzles and less fighting.
The Wits PathEdit
Indy goes to Monte Carlo and meets Trottier, acquiring his business card. He then travels to Algiers where he shows Trottier’s business card to Omar al-Jabbar’s assistant, but Indy still cannot see al-Jabbar. After giving the assistant a red fez, Indy is able to track the assistant to al-Jabbar’s house. Locking al-Jabbar in his own closet, Indy steals a map, several statues and a camel so he can venture to the dig site. After bribing patrols with the statues and asking nomads for accurate directions, Indy finds the dig site and an idol like the one from the opening sequence. He finds a note in a truck saying the Nazis are going after Trottier in Monte Carlo. Indy then repairs the truck and drives to Algiers. From there, he flies to Monte Carlo.
Indy arrives in Monte Carlo and tries to warn Trottier about the Nazis, but is too late and Trottier is kidnapped. Indy follows the Nazis’ car and crashes into it, scaring them off and saving Trottier. Trottier explains he knows the entrance to the lost city is in Thera and that he threw the Sunstone out of the car to protect it. After searching the streets, Indy manages to find it.
Indy arrives in Thera and heads for the mountains. He finds a cave, and inside he uses the Sunstone to acquire a stone carving. Inside an entrenching tool, Indy finds a note from Sophia saying that she’s been kidnapped and taken on board a Nazi U-boat heading to Crete. After trading the stone carving for a basket, picking up a net, and using an invoice to obtain a balloon, and hot air from the mountains, Indy creates a makeshift hot air balloon, and flies it onto the Nazis’ U-boat, knocking out one of the ship’s lieutenants and disguising himself with his uniform. Here, he manages to steal the Nazis’ Moonstone and create a fire in the aft torpedo room. Using the fire as a distraction, Indy fires himself out of a forward torpedo tube and, once on shore, uses the Sun and Moon stones to open the Labyrinth.
Inside, Indy finds a deceased Doctor Sternhart and takes his Worldstone. He finds a map room which leads to an old subway, which he powers up with orichalcum. The train takes him all the way to Atlantis.
The Fists PathEdit
Indy travels to Monte Carlo and meets Trottier, obtaining his business card. He then travels to Algiers, and saves Omar al-Jabbar from a Nazi soldier. With the map and the camel Indy gets from Omar, he reaches an archaeological dig, where he finds the Sunstone. Stealing a hot air balloon from a Nazi guard, Indy flies to Crete.
In Crete, Indy follows a diagram and uncovers a Moonstone. He uses both the Sun and Moonstones to open a labyrinth. Inside, Indy finds a deceased Sternhart and takes his Worldstone. He uses his brute strength and his trusty whip to get past several traps and Nazi guards, and finds Sophia in a hole, from which he frees her. They find a map room which leads them out. They then travel to Thera.
There, Indy and Sophia hire a boat and Indy dives down, looking for an entrance to Atlantis. However, the boat was a set up, and a Nazi U-boat arrives, after which Kerner kidnaps Sophia and leaves Indy to die underwater with only 3 minutes of air. Indy manages to find the entrance to Atlantis just in time.
The Team PathEdit
Indy and Sophia go to Monte Carlo and trick Trottier out of the Sunstone, before heading to Algiers, where they confront Omar al-Jabbar, a shopkeeper. Omar reveals that there is a dig by the Germans somewhere in the desert. Indy steals a touring balloon but the balloon is shot down by one of the Nazis who is guarding the dig. At the dig site they discover a mural that gives Indy directions for Crete, the Palace of Knossos as an Atlantean colony.
At the ruins of Knossos, using the hints from Hermocrates, Indy and Sophia dig out a hidden Moonstone. Working with both disks they open an entrance to the Labyrinth. There they find the body of Doctor Sternhart, who starved while unable to get out from a certain chamber. Indy and Sophia take the Worldstone from him. After a lot of searching they reach a map room containing a detailed model of Atlantis.
Meanwhile, a Nazi submarine surfaces off the island and the Nazis enter the labyrinth. They kidnap Sophia but Indy manages to get on the submarine and order the crew to gather in an out-of-the-way room by pretending to be the captain on the inter-com… He quietly frees Sophia and gets the stolen disks back. Then he steers the ship towards an underwater entrance and dock, which is none other than the entrance to Atlantis itself.
Sophia is again kidnapped when they arrive to Atlantis. Atlantis is found in the Aegean sea, and as expected, it is depicted in ruins but in a strange alien-like manner.
AtlantisEdit
After a lot of exploring and puzzle solving to rescue Sophia from a prison and enter Atlantis’ second ring, Indy finds out that Nur-Ab-Sal guided Sophia to Atlantis through the medallion, in order to reclaim his old kingdom. His ghost possesses Sophia completely. Indy takes the opportunity to snatch the necklace and hurl it into a pool of lava in Nur-Ab-Sal’s throne room.
Indy and Sophia continue on to the heart of the city, a massive chamber full of lava with passageways leading up and down. The two manage to navigate the chamber to the city’s centre. In the Colossus – a huge machine in the centre of the capital, which gave the Atlanteans god-like powers, they are ambushed by Ubermann and Kerner. Kerner decides he is the most worthy one around to transform into a god. Based on Plato’s tenfold error, Ubermann feeds the machine with 1 bead instead of 10, which turns Kerner into a grotesque horned dwarf, who falls into the lava below. The Nazis then force Indy to stand in the machine to be the target of the next experiment.
Jones manages to convince Ubermann not to use him as the experiment, lest Ubermann and the Nazis become targets of a godly Indiana Jones’ wrath. Rather, he appeals to Ubermann’s anger and lust for power to let him be transformed by the machine instead. He feeds the machine 100 beads and the machine turns him into a being of pure energy, who then explodes, activating the volcano that has been asleep for millennia. As the city is crumbling, Indy and Sophia make their way to the submarine and take it to the surface. The city collapses deeper under the water, while Indy and Sophia watch the sun set on the smoke.
Alternate endingsEdit
If Jones does not convince Ubermann to use the device, Jones himself undergoes the transformation and explodes; trapping the Nazis (and Sophia as a result) in the ruins.
If Indy leaves the ghost of Nur-Ab-Sal in Sophia, or if Indy doesn’t rescue Sophia from the Nazis and instead continues into the inner ring, then instead of Ubermann experiencing the final transformation, Sophia/Nur-Ab-Sal does. Ubermann is knocked into the lava pit by the exploding energy of Sophia. Indy escapes on his own and is left wondering why Sophia didn’t listen to him.
Appearances Edit
CharactersEdit
Arnold
Indiana Jones
Marcus Brody
Sophia Hapgood
Colonel Klaus Kerner
Doctor Hans Ubermann
Charles Sternhart
Omar al-Jabbar
Alain Trottier
Nur-Ab-Sal
Fritz
Biff
Felipe Costa
Dr. Bjorn Heimdall
ArtifactsEdit
Horned Statue
Sophia’s necklace
Hermocrates
Orichalcum
Egyptian Statue of Horus
Christopher Columbus’ Chest
Stone Carving of Shiva
Masai Warrior Statue
Funeral Urn
Medieval Gargoyle
Peculiar Statue
Textiles from the Shawmut Collection
Potlatch Indian Totem Pole
Beadwork from the Phoenix Collection
Crate of Unidentified Potsherds
Arrowhead from the Shawmut Collection
Siamese Cat Idol
Fertility Idol of Bast
Ancient Mesopotamian Cat God Figurine
Tutenkhamen’s Cat (Mentioned only)
Behind the scenes Edit
Technical details Edit
More innovative than the earlier Indiana Jones adventure game, Indiana Jones and the Last Crusade, Fate of Atlantis featured a nod to originality by including three differing paths to the completion of the game and many alternative ways to solve puzzles. The player who finishes all of the puzzles in all three paths and all of the alternative solutions, receives a full IQ (Indy Quotient) score. At one point in the game, during a dialogue sequence, the player chooses between three paths: The Wits path concentrates on puzzles, the Fists path is more dependent on fist fights (the game includes a rudimentary engine for such fights), and the Team path combines both elements and features Sophia Hapgood as a sidekick.
It is also significant for breaking with the LucasArts adventure game tradition of not allowing the player to die (though it was also possible to die at some points in Last Crusade and Zak McKracken and the Alien Mindbenders). After the player’s death, a short “what happened next” plot summary and a score appear. To the player’s advantage, the game conveniently alerts the player of impending danger so that he or she can play more cautiously.
The project was led by Hal Barwood; Barwood wrote the story and designed the game together with Noah Falstein. The music was composed by Michael Land, Clint Bajakian, and Peter McConnell, based heavily upon the works of John Williams.
The game was re-released on CD-ROM with a full voiceover soundtrack in 1993.
Trivia Edit
Game resource editing programs like ScummRev have revealed that there is an unused (“secret”) room in the game code that didn’t make it to the final version. This room is Sophia’s bedroom, and lies next to her ransacked office. The programmers must have originally planned some more action in Sophia’s apartment, but then thought that the presence of such a room and an additional sequence would not be vital to the gameplay. In the final version, all that takes place in Sophia’s apartment is an extended dialogue in her office.
In the “secret” bedroom, some objects can be identified with ScummRev; this indicates that the programmers intended some puzzle to be solved by the player, apart from the office dialogue. In that bedroom, perhaps Sophia made her introduction as a playable character, so that the player had to guide her to, for example, find the orichalcum bead. One of the useable objects is labeled as Chuck the Plant, which is an inside joke at LucasArts and a nod to several previous LucasArts games.
The adventure game was released simultaneously with Indiana Jones and the Fate of Atlantis: The Action Game, a remake loosely following the same storyline, and belonging to the arcade-adventure genre. The Action Game never enjoyed great popularity.
There were unsubstantiated rumours that the Fate of Atlantis franchise (known as Indiana Jones 4) was the official precursor to a fourth movie. This is especially born from a confusion about the game’s executable file name, “indy4.exe”.
The epilogue of the game mentioned the return of Indiana Jones’ adventures, however “in a much younger age”, thus advertising The Young Indiana Jones Chronicles which aired around the same time.
While Fate of Atlantis never had a proper sequel, Sophia Hapgood would eventually return in Indiana Jones and the Infernal Machine.
LucasArts had planned on developing this game for the Sega CD, but canceled the game after its Sega CD edition of “The Secret of Monkey Island” failed to be much of a commercial success.
Sequels Edit
There were plans for a sequel to be developed by LucasArts called Indiana Jones and the Iron Phoenix but it was discontinued in 1995 without being released. A comic of the same name was published by Dark Horse in 1994 based on the plot of the game. Since the games discontinuation, a few fan groups started developing fan-games, but as of 2010, none of them had finished.
LucasArts later released three 3D action titles using the Indiana Jones license: Indiana Jones and the Infernal Machine (which also features Sophie Hapgood), Indiana Jones and the Emperor’s Tomb, and Indiana Jones and the Staff of Kings.
Indiana Jones and the Fate of Atlantis
314 stron na tej wiki
Edytuj Dyskusja0
IJATFOA.jpg
Indiana Jones and the Fate of Atlantis
Producent LucasArts
Wydawca LucasArts
Data wydania 1992
Gatunek Przygodowa
Platforma Amiga, Mac, PC
Indiana Jones and the Fate of Atlantis (pol. Indiana Jones i Przeznaczenie Atlantydy) – gra przygodowa wydana w roku 1992 na platformy: Amiga, Mac, PC. Gra posiada własną fabułę, nie bazującą na żadnym z filmów.
Spis treści[pokaż]
Opis gry Edytuj
Jest to typowa gra „Point’n’Click”. Sterowanie gry jest dokładnie takie same jak w jej prequelu (Indiana Jones and the Last Crusade: The Graphic Adventure). Znacząco polepszono grafikę i uporządkowano menu czynności oraz ekwipunku. Możliwe jest sterowanie dwoma postaciami, Indianą Jonesem, a także jego towarzyszką Sophią Hapgood.
Głównymi przeszkodami, z którymi przyjdzie ci się zmierzyć są rozmaite zagadki logiczne, a także takie, w których liczy się spostrzegawczość. Dostępna jest, znana z prequelu opcja, podróżowania dzięki, której możesz przechodzić misje w różnej kolejności.
Gra została uznana za bardzo dobrą, ze względu na poprawioną grafikę i sterowanie, a także na oryginalną fabułę, długość gry i oczywiście dużą grywalność. Podobnie jak poprzedniczka doczekała się także wersji zręcznościowej: Indiana Jones and the Fate of Atlantis: The Action Game
Opis Fabuły Edytuj
Rok 1939. W przededniu drugiej wojny światowej naziści chcą odnaleźć zaginioną Atlantydę – miasto, które przed wiekami zostało zmiecione z powierzchni Ziemi w tajemniczych okolicznościach. Podobno w ruinach Atlantydy znajduje się potężna broń, dlatego Indiana Jones i Sophia Hapgood, podążają tropem Niemców, by nie dopuścić do jej odnalezienia i wykorzystania przeciwko ludzkości.
Opis Poziomów Edytuj
Opis poziomów bazuje na solucji do gry napisanej przez Szuję
Początek Edytuj
Barnett College (cz. I)
Wprowadzenie do gry.
Nowy York
Musisz porozmawiać z Sophią Hapgood.
Islandia (cz. I)
Musisz porozmawiać z doktorem Heimdallem o zaginionym dziele Platona.
Musisz dostać się do grobowca króla Atlantydy.
Islandia (cz. II)
Musisz wydobyć z bryły lodu figurkę węgorza.
Azory
Musisz wydobyć od profesora Costy informacje, gdzie znajduje się miejsce ukrycia dzieła Platona.
Barnett College (cz. II)
Musisz odnaleźć zaginione dzieło Platona.
Gabinet Indiego
Musisz zdecdować, który tryb dalszej rozgrywki wybierzesz.
Tryb „Fists” (Dalsza gra opierać się będzie głównie na walce)
Tryb „Wits” (Dalsza gra opierać się będzie głównie na rozwiązywaniu zagadek)
Tryb „Team” (Dalsza gra opierać się będzie głównie na współpracy między Indym, a Sophią)
Tryb Fists Edytuj
ScreenThefateatlantis.jpg
Screen z gry – Algier
Musisz porozmawiać z Alainem Trottierem.
Algier – miasto
Twoim głównym celem jest znalezienie domu Omara al-Jabbara
Algier – pustynia
Misja, w której podróżując na wielbłądzie, musisz dotrzeć do wykopalisk.
Algier – wykopaliska
Musisz odszukać kamienny dysk, który jest rodzajem klucza.
Algier – lot balonem
Poziom zręcznościowy, w którym to odpowiednio manewrując balonem, musisz dolecieć na Kretę.
Kreta – ruiny
Misja, w której musisz znaleźć drugi dysk i dostać się do podziemnego labiryntu.
Algier – labirynt
Twoim zdaniem jest odszukanie trzeciego kamiennego dysku i odczytanie inskrypcji dotyczących wyspy Thera.
Wyspa Thera
Musisz odszukać wejście do zaginionej Atlandyty.
Tryb Wits Edytuj
Monte Carlo (cz. I)
Musisz porozmawiać z Alainem Trottierem.
Algier – miasto
Twoim głównym celem jest znalezienie domu Omara al-Jabbara.
Algier – pustynia
Misja, w której podróżując na wielbłądzie, musisz dotrzeć do wykopalisk.
Algier – wykopaliska
Musisz odszukać kamienny dysk, który jest rodzajem klucza.
Monte Carlo (cz. II)
Twoim zadaniem jest odbicie Alaina Trottierna z rąk Nazistów, a także znalezienie drugiego kamiennego dysku.
Wyspa Thera
Poziom, w którym Naziści uprowadzają Sophię.
Morze Śródziemne – lot balonem
Poziom zręcznościowy, w którym odpowiednio manewrując balonem, musisz dopłynąć do niemieckiej łodzi podwodnej.
Morze Śródziemne – łódź podwodna
Początkowo, musiałeś uwolnić Sophię, jednak ta wraz z Nazistami wyszła na ląd. Teraz musisz znaleźć sposób, aby wydostać się z niemieckiego U-Boota.
Kreta
Twoim głównym celem jest znalezienie wagonika stworzonego przez Atlantydów i dotarcie nim do zaginionego miasta.
Tryb Team Edytuj
Algier – miasto (cz. I)
Twoim głównym celem jest zdobycie dwóch przedmiotów, zabytkowego noża i szkaradnej maski.
Musisz zdobyć kamienny dysk od Alaina Trottiera.
Algier – miasto (cz. II)
Porozmawiaj z Omarem al-Jabbarem.
Algier – lot balonem
Poziom zręcznościowy, w którym odpowiednio manewrując balonem, musisz dolecieć do wykopalisk.
Algier – wykopaliska
Twoim głównym celem jest odnalezienie kilku przedmiotów i uruchomienie ciężarówki.
Kreta – ruiny
Misja, w której przyjdzie ci się zmagać z trudnymi zagadkami w ruinach na Krecie.
Kreta – labirynt
Musisz odszukać mapę ukazującą wejście do zaginionej Atlantydy.
Łódź podwodna
Poziom, w którym musisz odnaleźć wszystkie potrzebne ci przedmioty, a także odpowiednio kierując U-Bootem, wpłynąć do zatopionego miasta.
Atlantyda Edytuj
ScreenThefateatlantis2.jpg
Screen z gry – Atlantyda
Wejście
Musisz otworzyć drzwi prowadzące do wnętrza Atlantydy
Labirynt
Znajdujesz się w labiryncie. Twoim zadaniem jest odnalezienie kilku niezbędnych przedmiotów, a następnie przedostanie się do kanałów.
Kanał
Twoim głównym celem jest uratowanie Sophii, a także musisz otworzyć drzwi prowadzące do dalszej części zatopionego miasta.
Komnata z lawą
Musisz pokonać ducha Nur-Ab-Sala.
Wielka maszyna
Twoim zadaniem jest uruchomienie ogromnej maszyny, dzięki czemu dostaniesz się do centrum Atlantydy.
Centrum zaginionego miasta
Musisz odszukać właściwe przejście do serca zaginionego miasta.
Kolos
Finałowa misja, w której musisz perswazją przekonać nazistów do użycia kolosa – maszyny, która daje nadludzkie siły. Niemców jednak zabije ze względu na to, że nie znają dokładnej liczby orichalcum, których trzeba użyć.
Uruchamianie na Windows XP Edytuj
ScummVm Edytuj
Najprostszym sposobem jest ściągnięcie darmowego programu ScummVm ze strony www.scummvm.org
DOSBoxEdytuj
Aby uruchomić grę Indiana Jones and the Graphic Adventurę na systemie Microsoft Windows XP (na którym nie ma programu DOS) należy zakupić program DOSBox.
Stwórz folder na dysku C i nazwij go np. „INDY”.
Następnie skopiuj zawartość gry do tego folderu i uruchom program DOSBox.
Wpisz następujące komendy:
mount c c:/indy (Enter)
c: (Enter)
Teraz wpisz nazwę okna uruchamiającego grę np. Atlantis
atlantis (Enter)
Jeśli zawartość gry znajduje się w jeszcze jednym folderze o nazwie np. „IJFoA” wpisz:
cd ijfoa (Enter)
Jeśli jednak nazwa folderu przekracza 6 liter np. „Indiana” wpisz:
cd indian~1 (Enter)
Teraz wpisz atlantis
Po wpisaniu wszystkich komend uruchamia się gra.
Video Game: Indiana Jones and the Fate of Atlantis
Watch
Main
Awesome
DrinkingGame
Funny
Headscratchers
NightmareFuel
Trivia
VideoGame
YMMV 1 Reviews + Create New
“If you want to experience the greatest Indy film that was never actually a film, Fate of Atlantis is where it’s at”.
—Sotenga
Two 1992 video games by LucasArts, based on the popular Indiana Jones movie series.
The first (and the most well known) is an Adventure Game with painted cinematic screen-by-screen backgrounds, while the second was subtitled “the action game” (it was more like an Action Adventure, viewed from an faux 3d isometric perspective, and based solely on a few select moments from the point and click adventure version). The action game is mostly forgotten today. This article, for the most part, discusses the adventure game, the second Indiana Jones SCUMM adventure, released three years after Indiana Jones and the Last Crusade.
Set in the months prior to World War II, the storyline sees Indy team up with an old flame, Sophia Hapgood, who is an expert on the mythical city of Atlantis, and in particular its god Nur-Ab-Sal. This being an Indiana Jones story, it of course turns out that Atlantis was real, and our hero finds himself in a race against time to get there before Those Wacky Nazis can harness its power to Take Over the World.
This game was the first time that an Indiana Jones graphical video game had featured an entirely original storyline, not based on one of the films. Given the reluctance of Steven Spielberg and George Lucas to confirm a proper Indy sequel following The Last Crusade, many fans came to refer to this game by the informal title Indiana Jones 4. For years afterwards, lazy journalists used this as conclusive proof that the next movie sequel would feature Atlantis, a rumour which continues to pop up even post-Crystal Skull.
The game’s storyline was also later adapted into a four issue comic book series. A sequel to the game was planned under the title Indiana Jones and the Iron Phoenix, but was eventually cancelled, and the Indiana Jones game series would not continue until 1999’s Indiana Jones And The Infernal Machine. Iron Phoenix, however, saw a comic book adaptation after its cancellation.
The Nintendo Wii version of Indiana Jones And The Staff Of Kings also features the complete full version of The Fate of Atlantis as an unlockable bonus game.
Tropes featured in this game include:
Accidental Pervert: Or is it? When Indy and Sophia enter completely dark rooms the “Look at” command is replaced with “Touch”. Indy can “touch” Sophia, to which she’ll respond with a smart remark (e.g. “Hands off, Jones!”, “Is that a ship rib in your pocket, Or Are You Just Happy to See Me?”)note or even an audible slap to Indy’s face.
Action Prologue: The game starts with Indy looking for an artifact in the university’s large collection, with absolutely no other information being given. The plot is set up later.
All There in the Manual: The comic adaptation explains a lot, like the connection between the Atlanteans’ Schizo Tech and the reason for the God Machine. It was aliens. They had horns, gave the Atlanteans some technology and Orichalcum, and when they left, the Atlanteans, misguided souls that they were, tried to bring them back by turning normal people into “gods”. Unfortunately, it didn’t work and they became mutants.
As Long as It Sounds Foreign: The controls for the Nazi submarine are labeled “Ausgeschnitzel”, “Flugeldufel” and “Krauskefarben”. They’re not geniune German words.
Asshole Victim: Dr. Heimdall, Dr. Sternhart, and the Nazis themselves at the end.
Baleful Polymorph: The Atlantean ascension machine is very bad at making gods and very good at making monsters.
Bamboo Technology: Powered by orichalcum.
Beethoven Was an Alien Spy: It’s about Atlantis. Guess who built the Mayan pyramids, the Labyrinth of King Minos, etc?
Bittersweet Ending: The bad ending – the Nazis are defeated and Atlantis is destroyed, but at the cost of Sophia’s life.
Body Horror: The innermost sections of Atlantis are littered with the twisted skeletons of people mutated by the Atlanteans’ failed experiments with their ascension machine. When Klaus Kerner decides to try the machine himself, he ends up transforming first into a giant, then into a stunted minotaur.
Breaking the Fourth Wall: One interpretation of the ending is that the newly ascended Eldritch Abomination discovers the nature of the universe, and doesn’t take it well.
Broken Pedestal: Nur-Ab-Sal is not as nice as Sophia believes at first. In a room full of horribly mutated skeletons, he tries to take over Sophia’s body; Indy manages to save her by disposing of his Soul Jar in a conveniently-placed pool of lava.
Chekhov’s Gun: pretty much every single object you can pick up. Especially the ship rib, which has about a million uses throughout the game.
Convection Schmonvection: Indy and Sophia have to cross a lava flow at one point, using stepping stones that were previously buried in the lava flow – and will be again if you waste too much time getting across.
Dummied Out: The game code features several rooms which are never even seen in the finished game, including an entire section based around Sophia’s apartment (which was relegated to only being an unplayable Cut Scene in the final version).
Dungeon/Dungeon Crawler: The Labyrinth at Knossos.
Eldritch Abomination:
Anyone who successfully uses the Ascension Machine.
The halls Atlantis are full of glowing statues of Eldritch Abominations.
Follow the Leader: When LucasArts failed to make this a film, Disney made a film with the same plot instead.
A God Am I: The goal of Klaus Kerner and Dr. Hans Ubermann, using the Atlantean ascension machine. It doesn’t work out very well for either of them.
Grand Theft Me: Nur-Ab-Sal takes over Sophia’s body in Atlantis.
Have a Nice Death: Game Over screens will usually be accompanied by a text explaining Dr. Jones’ death and/or what happened after. An example: “Indy’s failure to subdue a sixty-year-old U-boat captain allowed the Nazis to conquer the world”.
Historical In-Joke: Indy wonders why the Minoan civilization had this obsession with bull-headed figures (like the tale of the Minotaur living in a labyrinth underneath Knossos); it’s implied that the Minoans tried to imitate the style of Atlantis and it’s very likely that they got their hands on a few of the Atlantean horned mutants product of their failed experiments (maybe the King Minos’ Minotaur was one).
Hoist by His Own Petard: The Nazis’ plans are ultimately foiled by the very thing they sought after. This is an Indiana Jones story; what did you expect?
I Love Nuclear Power: The Nazis, The Atlanteans. The good guys are afraid they want orichalcum for nefarious purposes, since a single bead contains enormous power. It turns out They want to use it to turn on the god machine.
Imported Alien Phlebotinum: Atlantean artifacts all around the globe. Orichalcum averts this oddly enough, since it does actually originate from Earth, but is exceptionally rare and requires some advanced technology to mine and process.
It May Help You on Your Quest: Everything you pick up is either unexpectedly useful or a fits this trope. There’s even the Maltese Falcon.
It’s a Wonderful Failure: Game Over screens will usually be accompanied by a text explaining Dr. Jones’ death and/or what happened after. An example: “Indy’s failure to subdue a sixty-year-old U-boat captain allowed the Nazis to conquer the world”.
It Will Never Catch On: In the comic book adaptation, Indy says that he considers continental drift a nutty idea (although still more plausible than the existence of Atlantis)— an opinion a lot of 1930s scientists would have shared. Of course, later in the story, he ends up in… well, look at the title.
Karmic Transformation: Happens to both Kerner and Ubermann in the Colossus. Kerner gets transformed into a midget minotaur and Ubermann into a being of pure energy that dissolves shortly after.
Last Lousy Point: The game’s “Indy Quotient” score keeps track of points found in each of the three paths players can take, so you have to play all three routes (multiple times each) to get a perfect score. And some of the points involve fighting the biggest, toughest guys in the game instead of getting around them through puzzle-solving.
MacGuffin Delivery Service: Several times. In the prologue Indy finds the first bead of oricalchum only to have it stolen at gunpoint, then Indy goes around the world to collect the keys needed to open Atlantis only for the Nazis to show again and steal them at gunpoint. At the end Ubermann even comments that he knew Indy would activate the god machine for them.
The Maze: the opening labyrinthine library sequence turns out to be the attic of Indy’s college library.
Misplaced a Decimal Point: Plato’s ten-fold error shows up as a plot point, both in regards to the distances Plato gave, as well as the number of Orichalcum beads required to make the Atlantean ascension device work properly.
Offscreen Inertia: Played with. When you meet the Norwegian archaeologist, he constantly digs in the same spot (as is common of adventure games of this era). When you leave and come back, he has frozen to death, apparently never having left the cave.
One True Sequence: Averted. If the Nazis know anything, it’s that they should let Indiana Jones do all the dirty work. Depending on the path you take, sometimes the Nazis get to scene before Indy. A prominent example is the Fists Path version of the Labyrinth.
Orichalcum: It’s radioactive Bamboo Technology. One of the few works that not just uses it, but uses it as Phlebotinum.
Painting the Medium: In a manner of speaking. One puzzle involves Indy turning on a generator in a darkened underground dig site. If the player waits, Indy’s eyes will adjust and you’ll be able to see what you are doing.
Pixel Hunt: Has some very infuriating examples, like the dark rooms and finding the 1–pixel-width screws on the back of a collapsed bookcase.
Save Scumming: The only post-Monkey Island LucasArts adventure game where this is necessary. You generally don’t have to worry about it on the “Teamwork” and “Wits” paths unless you’re thinking of doing something really stupid, but it’s practically a requirement for getting through the “Fists” path.
Scenic Tour Level: The opening sequence has Indy appear to be breaking into a secret stash of artifacts… only for it to be gradually revealed that he’s in Barnett College and only swung through the window because the door was blocked. He then falls through multiple floors slapstick-style.
Shout-Out:
Indy’s trademark fear of snakes is referenced a few times.
The orichalcum machine is modeled after the iconic machine Metropolis
The Maltese Falcon gets a nod in the line “It’s the stuff that dreams are made of”.
The “oddly familiar-looking”. boulder found on the Fists Path.
Shown Their Work: The developers clearly went on researching everything about the myth of Atlantis, designing the architectural style of Atlantis as if the Real Life Minoan was inspired by it. The manual cites all the books and sources the developers consulted.
Smug Snake: Kerner and Ubermann, who are convinced that the very same machine that horribly mutated scores of Atlanteans will work on them because of their superior Aryan qualities. They find out the hard way that they are wrong.
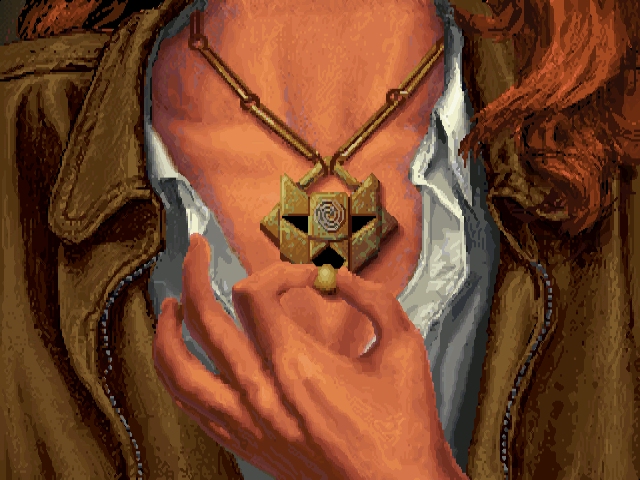
Soul Jar: Sophia Hapgood channels the spirit of the last Atlantean King through her necklace. It’s a reliquary for Nur-Ab-Sal, and Indy has to take it from her by powering it up with orichalcum, whereupon it morphs into a demonic face.
Story Branching: Early on the player must choose one of three paths: The “Team” path has Sophia Hapgood join Indy as backup, the “Wits” path has a plethora of complex puzzles, and the “Fists” path has lots of action sequences and fist-fighting. Each path has a different plot, including different cutscenes and locations to visit. Some needed items in a given path become useless in another one. Story and gameplay converge again in Atlantis, with some room for Multiple Endings as mentioned above.
Teamwork Puzzle Game: The team path, where Indy requires the assistance of Sophia in many puzzles. A lot of bickering is to be expected.
Took A Level In Jerk Ass: Omar on the Wits path. On every other path, he’s friendly and helpful, but on this one, he’s one hostile SOB.
Took a Shortcut: Played for Laughs early on – Indiana jones has a jungle separating him from a mayan temple early on. Sophia waits behind while Indy goes and solves a puzzle wherein he gets a snake to attack a capybara and climbs a tree to scale a cliff. Sure enough, Sophia is on the other side of the cliff, and if the player asks “how did YOU get here?”. Sophia says she took a bridge while you were bushwacking.
Ungrateful Bastard: If you free Sophia from her holding cell, she admonishes Indy for taking so long to rescue her. Which, of course, leads to a Slap-Slap-Kiss moment.
Unobtanium: The adventure begins when the Nazis steal a bead of orichalcum from Indy; it’s portrayed as an incredibly powerful energy source (and a set of Interchangeable Antimatter Keys for many of the game’s puzzles), and most of the game is a race for the motherlode at Atlantis itself.
Unwinnable: You can break the doors to the middle ring by trying to open them without boiling away the water. Possibly due to an oversight of LucasArts’ policy.
Vapor Ware: The adventure game ends on a screen promising a sequel which ultimately never ended up seeing the light of day. The sequel, named Iron Phoenix, was eventually adapted into a comic book, and a different game, Indiana Jones And The Infernal Machine, was eventually released instead.
Walk into Mordor: While Atlantis is inaccessible for justified reasons, to get to the Third Circle of Atlantis you have to use an orichalcum-powered Bronze Age tunnel-boring machine, which promptly falls into the lava.
With Great Power Comes Great Insanity: An implied side effect of the Atlantean ascension machine; Dr. Ubermann does not survive long enough after his transformation for this to be certain.
Title Directed by Written by Original air date
Lost Treasure of Atlantis Mike Vejar John Sheppard May 14, 1994
MacGyver and his former college professor (Brian Blessed) search for the Lost Treasure of Atlantis.
In 1994, two years after leaving the Phoenix Foundation, MacGyver returns in a fast-paced, action-packed adventure in order to find the mythical city and civilization of Atlantis. Teaming up with a college professor, he must dodge great perils, a team of ruthless Englishmen, ancient curses, deadly secrets, and explosive volcanoes for his greatest adventure yet.
1939 — the eve of World War II. Nazi agents are about to get their hands on a weapon more dangerous than the atomic bomb. Only one man can stop them before they unleash the deadly secret that sank Atlantis.
And all he’s got is a jar of mayo, a wax cat, a fish on a string, a balloon invoice, a spare plunger, some beads, a few statue parts, some used chewing gum…
What a game this is! Indiana Jones and the Fate of Atlantis, first released in 1992, got a lot of people hooked on the point-and-click-adventure genre – or even on gaming itself. The scenic backgrounds and art style were peerless, the puzzles were thoughtful and challenging, and it still boasts a better narrative than at least two of the films.
The game has been available on Steam since mid–2009, patched for compatibility with modern-day operating systems without the need for utilities like ScummVM or DOSbox. I couldn’t believe there weren’t any guides up on the Steam Community; I think it’s about time I fixed that.
This is a complete guide for the game. Every place, Path, puzzle and point are listed here, along with a big helping of bonus material and additional stuff about the making of the game. Because this is a point-and-click adventure, and because most of the satisfaction comes from discovering clever solutions by yourself, the answers to most of the game’s puzzles and dilemmas will be spoiler-tagged. For some of the tougher ones, a hint or two will be given right before the solutions, covered by spoiler tags… can you resist the temptation to mouse over them? (Didn’t think so…)
First off, I’m going to jump right into the playable intro sequence before explaining the controls and gameplay mechanics. This is because the game’s controls are ultra-simplified during that part, and it’ll give you a good idea of what to expect from the rest of the game. So let’s get right to it!
[This brief sequence serves largely as a clever means to display the opening credits. You should go through it if you’ve never played the game before, but everyone else can skip it at any time by pressing Escape. Pressing Escape once more during the ensuing cutscene will take Indy right to New York, where the game begins in earnest.]
The game starts you off nice and simple; as I mentioned previously, you don’t even need to know most of the controls yet. To move Indy somewhere, just click on the floor and he’ll walk there if the way is clear. Move your mouse over various objects. If an item’s name appears above the cursor, that means Indy can interact with it; simply click the item, and he’ll perform an action automatically. Usually, he’ll just say something brief about the object.
We begin with Indy’s dramatic (well, for 1992) entrance into a mysterious, artifact-laden room. From his first line of dialogue, it’s clear that you’re searching for a statue of some kind.
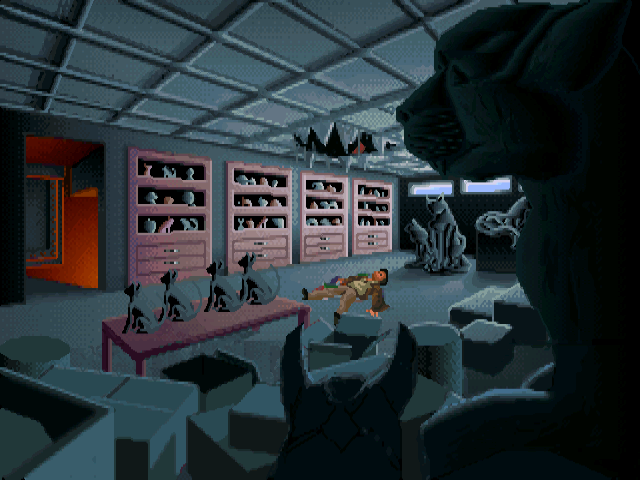
Click around and see what Indy has to say about the objects in the room. To proceed, examine the peculiar statue on the left side of the screen. In the next, examine the rope.
If Indy examines the staircase here, he’ll note that it’s closed for repairs, so you can’t leave the area that way. Look at the “books on statues” at the far left to continue Indy’s bad day. In the next room, examine all the cat sculptures on the table for a crazy surprise.
Last room. You can’t walk back up the coal chute, and Indy isn’t going to leave until he’s got the statue, so it’d better be here. Fortunately, it is – in one of the lockers at the back of the room. The statue will always be in the third and final one you open, no matter what. As you’ll shortly find, however, Indy’s streak of bad luck is only just beginning…
Before you can find the lost city of Atlantis, you should know how to control the game itself.
To access the game’s save/load menu, press F1 or F5. To save, click a save slot and type in a name for your game, and hit Enter to finalize the save. If you’re saving over a previous spot, just click the file and hit Enter. Be careful if you’re saving over an existing file, as there is no prompt to overwrite the save.
Pressing Space, or clicking anywhere outside the window, will pause the game. Pressing Alt+Enter will toggle between windowed mode and fullscreen.
Clicking the game’s window icon (while in Windowed mode, of course) will give you a menu with a few options:
Here’s a list of some good controls to remember:
Indiana Jones and the Fate of Atlantis is a game where you interact with a series of environments (and the many characters and objects they contain) in order to find the lost city of Atlantis, and – of course – put a stop to the Nazis’ diabolical plans in the process. Good stuff.
The game primarily takes place on the Action Screen – that’s the big part of the display where all the scenes and characters are shown. You control Indy by constructing actions on the Sentence Line, just below.
You have nine verbs with which to make a sentence, in the lower left. For the vast majority of the game, these verbs are: Give, Open, Close, Pick up, Talk to, Look at, Use, Push, and Pull. (Sometimes, in places like extremely dark areas, “Look at” will be replaced with “Touch”.) If you want to, say, open a door in the game, you would first click “Open”, then click the door.
The verbs all have keyboard shortcuts, which I highly recommend using. The keys are the first letter of the verb, with two exceptions: Push is S (think “shove”), and Pull is Y (think “yank”).
The game also has a very handy “quick verb” feature. When you move the cursor over an object, one of the nine verbs will be highlighted; simply right-click, and Indy will automatically perform the action with the highlighted verb. For example: upon arriving in New York, you’ll start by a ticket booth. Mouse over the ticket taker, and you’ll see that “Talk to” is highlighted. Right-clicking on the ticket taker will automatically make Indy talk to her. In some cases, the quick verb for a given object can change if Indy discovers something interesting or useful about it. Always pay attention to which verb is highlighted; it might just nudge you in the right direction.
To the right of the verbs list is your Inventory screen. There’s no limit to how many items you can carry; if you have more than ten, you can use the up/down arrows to view the rest. To solve most of the game’s puzzles and dilemmas, you’ll need to make good use of what’s in your inventory. You will predominantly be using items with various objects on the Action Screen, but there will also be a few occasions when you’ll need to use one inventory item with another. Experiment intelligently, and the way forward may reveal itself!
Lastly, pressing the I key will replace the Inventory screen with your Indy Quotient (“IQ”) display. Your IQ Points are a representation of how many things in the game you’ve seen and done, a system not unlike the achievements and trophies of modern gaming. There are a total of 1,000 points to earn; while many are earned simply by finding a way forward, some of them cover optional tasks which are very difficult. To learn more, and to see a table of all actions and the points they earn you, check out the IQ Points section towards the end of the guide. (Beware, however, as a few action descriptions are somewhat spoilery.)
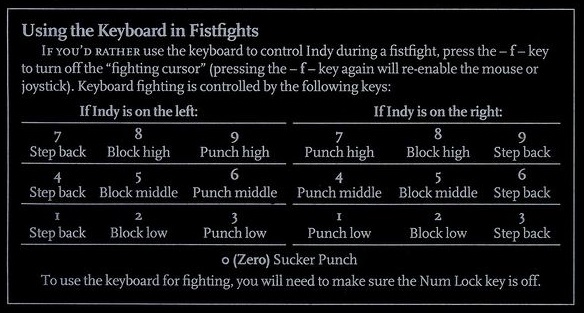
You’ll encounter quite a bit of opposition on your way to Atlantis, and that sometimes means Indy will get into a good old fistfight (If you choose the Fists path, change “sometimes” to “almost always”). This little mini-game is tricky to learn and much trickier to master. Plus, a lost fight is almost always a Game Over. Thus, this part of the game deserves a section all its own.

Each combatant has two bars: a Health bar and a Power bar. Landing a successful punch on your opponent will reduce his health bar by a little or a lot, depending on how full the Power bar was when the blow was thrown (and how effectively your opponent blocked the hit). The Power bar recharges slowly at first, then quickly. Don’t ever throw a punch when it’s half-full, unless it’s enough to end the fight.
Indy can punch high/middle/low, block high/middle/low, or step backwards. The latter action will very briefly make Indy out of reach of an opponent’s punch, buying him a little more time to recover punch power (while it does, watch your opponent’s arms carefully and be ready to quickly block in that direction). Stepping backwards too many times, however, will make Indy retreat from the fight, which you don’t always want. That said, you should definitely bid a hasty retreat if your health bar goes into the red.

One last important note: if fighting’s not your thing, you can always sucker-punch enemies to instantly KO them (press 0 on the keypad). Note that doing so will not earn you any IQ Points, if you care about that sort of thing.
There are also two extra-tough enemies you can’t sucker-punch. One is only found on the Fists path, but dealing with the other is mandatory. Thankfully, there exist alternate means for the thinking man (read: the player who doesn’t want to reload their save several thousand times) to instantly take both of them out.
There are two ways to control the fighting minigame: the mouse, and the keypad. The latter is strongly recommended, unless you’re playing on a machine that doesn’t have a keypad.
If you use a mouse, click your enemy high/middle/low to punch him at that height, click Indy high/middle/low to block at that height, and click behind him to step back. It’ll require some dexterous clicking to win most fights. The keypad controls are simple enough. From the game’s reference card:
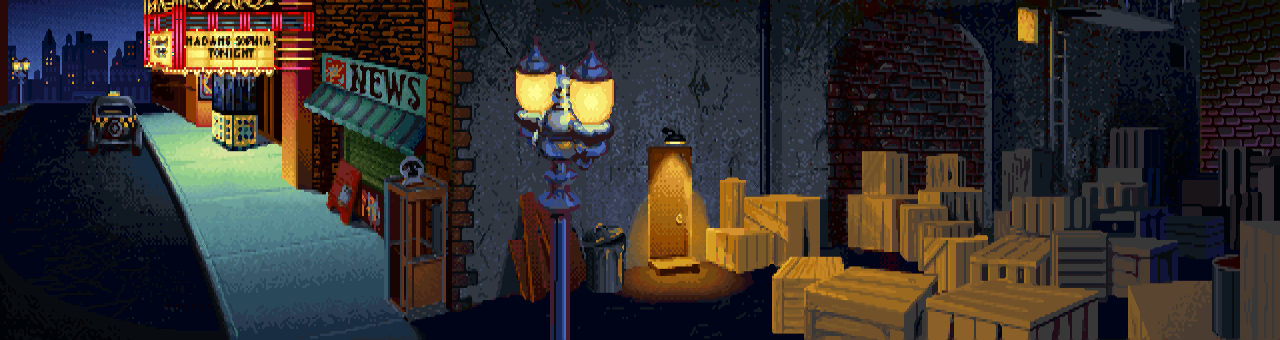
Because the Nazis have already made a connection between Indy and Sophia, Indy’s first goal is to get to her before they do. She’s putting on a big show in New York; unfortunately, the ticket taker isn’t about to let anyone else into the sold-out event. You’ll have to find another way in.
Head down the street and to the right, going behind the theater. The back door is open, but it’s also guarded by Biff, a large doorman whom you’ll have to deal with – one way or another – if you try to go in that way. There’s also a fire escape ladder at the far right, but quite a few crates block the way, with little room to maneuver them.
There are three ways to get into the theater:
(Note that no matter which way you choose to get into the theater, you’ll never encounter Biff again. Yes, even if you unsuccessfully tried to get by him then resorted to using the fire escape. He just sort of… vanishes.)
You’re finally backstage, but Sophia’s just beginning her presentation. If you try to walk towards her or mess with the levers on the left, you’ll be stopped by the stagehand. Talking to him (or trying again to walk to a restricted area) will trigger a cutscene where Sophia describes the marvels of Atlantis, and the mystery that led to it sinking beneath the waves.
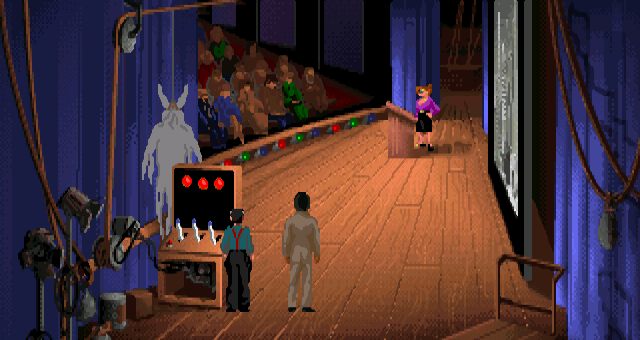
Unfortunately, you can’t just wait the show out; even if you go to Barnett College and back again (nice try!), Sophia’s just going to keep talking and talking. You need to get her attention, but that means finding something to distract the increasingly-pesky stagehand. Talk to him, and he might reveal to you that reading is one of his hobbies, and that he’d much rather be doing that. You can’t give him your old issue of National Archaeology, though; he’s long since read it. You’ll need to find something a little more current. To distract him, grab the newspaper on the newsstand outside the theater, and give it to him.
Although the stagehand is distracted, he’s still not too far offstage, and he will still catch you if you try to walk to Sophia. Importantly, however, his gaze is now away from the stage’s prop machine. The control panel has three levers on it, as well as a small red button on the lower-left corner. If you can figure out how to work the machine, you’ll get Sophia’s attention for sure; all that’s left is a little trial and error. To start the machine, push the left and right levers back, with the middle lever remaining forward. The three lights on the machine will turn green, and the mechanisms will make a little more noise overall. After that, just push the button.
Watch the scenes that unfold. Don’t worry about dialogue options here, as they all lead to the same outcome. As with the game’s prologue, you can press Escape here to rapidly skip through everything, but I once again recommend watching if it’s your first time or two through the game.

Indy and Sophia’s first stop is a remote dig site in Iceland. There’s nothing to do outside the dig site, so head on in. You’ll meet Heimdall, who isn’t much in the mood for company. Nevertheless, you need information from him, so just go along with his crazy stories until you can get him to point you towards Costa and Sternhart in the Azores and Tikal, respectively. After that, just get back in the truck. We’ll head to Tikal first.
You need to go through the jungle to reach Sternhart. Sophia won’t follow you into the wilderness, but don’t worry; she’ll find her own path and reunite with you soon. A chasm just beyond the small stretch of jungle separates you from your goal. You might be able to cross by climbing the tree… if only there weren’t a big hungry anaconda wrapped around it.
To clear the anaconda off the tree, you’ll have to lure the jungle rodent to the jungle path that leads to the tree (it’s the one in the center, furthest to the back). If you’re in range and use your whip with it, it will go down the path it’s currently in front of. You can also get it to move elsewhere simply by walking close to it. Pay attention to how it moves, and you’ll have it on the right path before long. After that, just “use” the tree, and Indy will cross the gap – accompanied by the most random use of his theme ever, no less.
You’re reunited with Sophia, and there’s a rather talkative parrot nearby as well. Attempt to enter the temple or mess with anything on the nearby souvenir stand (note the kerosene lamp on it), and Sternhart will reveal himself. He won’t let you into the temple unless you know the name of Plato’s Lost Dialogue. The trouble is, Indy really doesn’t know, and no amount of guessing is going to do him any good…
To get inside the temple, admit you don’t know the title. The parrot will say “Title!”. Go over and talk to it. There are some amusing dialogue options/responses to be explored here, but if you’ve told Sternhart you don’t know the title, the option to say “Title?” to the parrot will open up. The bird will cheerfully divulge the title to you (the Hermocrates), which will then be an option the next time Sternhart asks you.
Once inside the temple, look at the spiral designs on either side of the big door on the right side of the screen. One of them is a little darker than the others, and Indy will note that it looks like something that can be completely separated from the wall – at least, if not for all the tarnish gumming it up. Some kerosene from the lamp outside would probably do the trick, but Sternhart is incessantly following you everywhere. He won’t let you take anything from the souvenir stand unless you can somehow keep him busy. To do so, talk to Sophia and tell her to distract Sternhart for a minute. That’ll buy you enough time to go outside and swipe the lamp.
Now you can get the spiral stone. (You’ll need to open the kerosene lamp before using it on the spiral design.) Sternhart will be rather annoyed that you took his lamp, but his vexation quickly turns into amazement when the kerosene does its work. After that, simply pick up the spiral design, and it’ll go into your inventory. Your next goal is to find a way to use that spiral stone to open up the door. Do so by placing it into the elephant-shaped stone on the left. The spiral design now functions as a switch; simply pull it to open the door.
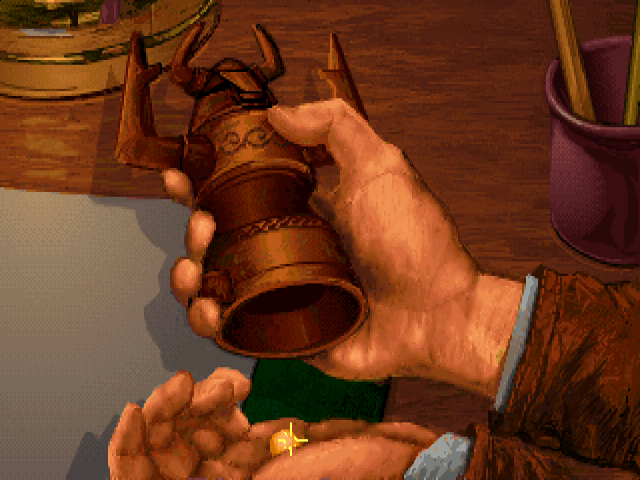
The not-so-secret-door is now open! Unfortunately, Sternhart takes this opportunity to nab a mysterious stone disk from the tomb, before making his escape through an actually-sort-of-secret door. You can’t reopen it and follow him, no matter what you do (not that you likely miss him all that much). Before you leave, however, notice there’s something glimmering in the tomb. Pick it up: it’s a bead of orichalcum, and it’ll come in handy very soon.
Return to the dig site. Poor Heimdall. At least he managed to expose the head of the Atlantean eel statue before the cold got to him. From the prologue, you should remember that Atlantean objects were powered by orichalcum beads. Use the bead with the statue’s exposed mouth to discover that the bronze figurine is actually a heating coil, which promptly melts the remaining ice around it!
Head back to the truck after you pick up the eel statue – we’re all done here.
Time at last to meet Heimdall’s other lead. Felipe Costa probably knows a thing or two about Plato’s Lost Dialogue, but he’s quite cranky around Indy. Besides that, he won’t divulge such valuable info unless he receives a valuable artifact in return. To get on Costa’s good side, have Indy ask Sophia to talk to Costa. You’ll take control of Sophia briefly for this part. Have Sophia ask Costa if he wants to do business with Indy. Control Indy again and trade the eel figurine from Iceland to Costa. In return, Costa will tell you the name of the collection in which the Lost Dialogue resides. (The name of the collection is different from game to game.) After Costa returns inside, Indy realizes that Barnett College owns that exact collection, and the two return there at once.
A cutscene will play automatically after this. If you want to see the scene again whenever you want, press F1 at the beginning of it and make a save there.
Following a sarcastic jab of your choice from Indy, Sophia decides to go back across the street to Indy’s office, while he searches for the Dialogue. First things first: go follow her to the office, open up the ice box at the bottom right, and grab the jar of old mayonnaise inside. (Oh, don’t give him that look, Sophia, we’re in an adventure game here.)
The stairway in Barnett is now repaired, but take the other one down to the boiler room first. Pick up the dirty rag in the lower-right, and also a lump of coal from the furnace. Go upstairs to the library and investigate the desk. Indy will note there’s some gum stuck to the underside. Yes, you can (and should, believe it or not) pick that up too. You can use it to give yourself enough traction to climb up the coal chute and reach the room above.
From the library, climb up the rope to get to the room above. It’s also possible to climb up even higher to the game’s very first room, though that’s a bit tricky. That totem pole looks like it could serve as a ladder, but unfortunately there’s a bit too much friction to move it anywhere. To fix that, use the jar of mayo with the totem pole to make the floor slippery enough to pull it over. Also, yuck.
You now have access to every room where the Dialogue might be. The book is in one of three randomly-chosen places each game. Do some sleuthing and experiment with your inventory, and you should have it before long. (It helps if you remember the name of the collection Costa told you, but it’s by no means necessary.)
The three locations are:
You’ll automatically read the Dialogue when you return to Sophia, but you can go through it right now if you wish. There are five pages to read, marked with paperclips, and each hold valuable information about where Atlantis is, how to get into it, and how to unlock its biggest secrets. Much of this information is randomized each game.
(A full transcript of the Lost Dialogue is available in this guide as well, including all parts that are randomized. If you ever need help solving a dilemma that requires some knowledge contained within the Dialogue, you can refer to that section if you need.)
Go back to Sophia when you’re ready.
Indy and Sophia eventually make sense of Plato’s tenfold error, and correctly deduce that the remains of Atlantis are in the Mediterranean. She also gives us our next two leads: Alain Trottier in Monte Carlo, and Omar al-Jabbar in Algiers.
After that, it’s time to pick a Path. The game splits into three different storylines from this point onward until you reach Atlantis:
I highly recommend making a permanent save here; after finishing the game on one Path, you can reload this save and instantly go on another one.

Sophia will suggest a Path for you based on how you managed to enter the theater’s backstage area in New York: Team if Biff let you in, Fists if you knocked him out then went through the door, or Wits if you ultimately used the fire escape to gain entry. Her suggestion, however, is just that. No matter what you’ve done up until this point, you can choose whatever Path you wish.
To continue this guide, select a section appropriate to the Path you picked. For the Team Path, simply read on. For the Wits and Fists Paths, go to the first sections that say “Act II [Wits]” or “Act II [Fists]”.
When you choose the Team path, you’ll partner up with Sophia in your search for Atlantis. This path will revolve around various puzzles and situations that will often require both Indy and Sophia’s unique talents. The two of you will have to build up trust if you’re to find the Lost City in time, and in one piece.
A long, dusty road from the airport will eventually bring Indy and Sophia to a bustling marketplace in search of Omar al-Jabbar. There’s an apprentice knife-thrower at work here, who’s been having trouble getting volunteers in the wake of a recent “accident”. Eek.
The grocer near the knife thrower will direct you to Omar’s shop – the alley at the far left of the marketplace will take you there. To say the least, Omar is not helpful. He won’t even give you his name, much less what you need… not unless you’ve got a certain locking stone that will open the gates of an Atlantean Lesser Colony. Right now, you don’t. Before you go, however, take a look around the shop. Anything catch your eye? Pick up the demonic-looking mask near the center of the screen. You can have it for free; Omar says it’s been scaring customers away. Could this possibly help you find a locking stone? Time will tell…
You arrive at a hotel in downtown Monte Carlo in search of Alain Trottier. Sophia’s plan, much to Indy’s skepticism, is to lure him into a séance, where she’ll ask him for the locking stone as a token to set the mood. For now, follow Sophia up to the hotel room; maybe you can come up with a crazy plan of your own. Look for things you can open and pick up: there’s a flashlight in the dresser, a bedsheet you can pick up, and a fuse box to turn the lights on and off.
(Side note: turn off the lights and use the flashlight for a funny scene.)
You need to find Trottier. Ask around, and passerby will eventually describe him well enough: he wears a brown suit and has grey hair. (If you still can’t figure it out, he’s the guy Indy’s talking to in the pic.) Have the Talk To command ready, then click Trottier before he walks away.
There are several important aspects of this conversation that need to be covered:
Once Trottier comes up, Sophia will begin her séance, and Trottier will put the stone disk on the table. This thing needs to be yours when all is said and done, and there are two ways to do it:

You now have a Sunstone! This is the biggest of the three stone disks, and it alone can unlock the doors and mechanisms of various Atlantean outposts. Head back to Algiers.
Show the Sunstone to Omar and he’ll take you seriously, formally introducing himself and giving you a desert map and his last two camels. With that, Indy and Sophia head out for an intrepid expedition into the desert!
(…) Or not. Their camels both die a mile into the trip, and Indy and Sophia are forced to retreat to the city, lest they starve out in the middle of nowhere. Time for another approach.

There’s a balloon-ride service if you go to the roof on the far-right side of the marketplace. Unfortunately, you’ll need a ticket to get in; maybe someone can help you there. To get a balloon pass, talk to the beggar in the streets sitting near the balloon ride. It stands to reason he might have one, but you’ll need to give him food before he’ll trade. (And no, the used gum from the Barnett College desk won’t work, but it does elicit an amusing response.) The nearby grocer doesn’t accept anything Indy currently has on him. Go back to Omar, and tell him about your disastrous trip. There’s not much more he can do for you, but he does offer to trade you something for the scary mask. One of Omar’s items is something the grocer’s looking for. Keep trying to trade with the grocer and he’ll give you hints about what he wants. You can also relay these hints to Omar to speed things up. Once you finally get what the grocer’s looking for, he’ll trade you Omar’s item for a squab-on-a-stick. Give that to the beggar to get the balloon ticket.
You’ll need more than just a ticket, however. The balloon is tethered to the ground with a rope, and Indy doesn’t have anything to cut it loose. You’ll have to get a knife of some kind. The amateur knife-thrower in the middle of town has some, obviously, but his were a gift from his father. The only way he might even consider giving one to you was if either you or Sophia decided to be his assistant. Indy can volunteer, but the knife-thrower says it has to be a woman (show business and all that), and Sophia is understandably extremely opposed to the idea. You can eventually convince her, but she still gets hesitant when she walks over. When this happens, simply give her a little push. She’ll still object, but the knife-thrower eventually makes her go up against the board. Thankfully, he’s gotten good enough to perform a successful show, and rids himself of evidence gives Sophia a knife as a souvenir!
Go on the balloon ride and cut the rope. It’s time at last to find that dig site…
Now that you’ve got a balloon, it’s time to find the dig site for real. There are only two things you can do to control the balloon: Vent hydrogen and Drop ballast. The former will make the balloon descend and change your direction counterclockwise; the latter will make the balloon ascend and change your direction clockwise. If you want to land somewhere, just rapidly vent hydrogen when you’re directly above your destination.
The desert beyond Algiers is a 3x3–screen area containing a variety of nomad camps. Land in them and show your map to the people there; they’ll tell you about where the dig site (the “X”) is. Here’s how to interpret what they say:
A red X should appear in the desert when the latter dialogue is triggered. Approach it to trigger a scene.
A Nazi gunman attacks the balloon and sends it plummeting helplessly toward the dig site. His demise is about as karmic as it gets, but now the two of you are stuck here for the time being. At the very least, there aren’t any other enemies around. Presently, however, Sophia follows a message from Nur-Ab-Sal right into a pit from which she won’t easily be able to escape. Head on down into the site itself.
It’s dark down here. Notice that the “Look at” command is now “Touch”. Use this new command to feel around the room, and Indy will try to make sense of things. That “sharp wooden thing” to the left of the entrance is a ship rib. You can, and should, pick this up. Feel around for a hose and clay jar, and pick those up too.
You might also notice a generator here; unfortunately, it’s out of gas. You will need to get this generator running again if you want to rescue Sophia and proceed. The truck up top probably still has some gas – do you think you can retrieve some with what you can find in the room?
To siphon some gas from the truck and into the generator, open the truck’s gas tank and use the hose with it, then use the clay jar with the end of the hose. Feel around the generator for a metal cap – that’s the gas intake pipe, so open it. Use the gas-filled jar with the pipe, then find and press the generator’s button to turn it on. Finally, the lights are on. One other thing of note here: there’s a small wooden peg on a nearby table. Pick that up if you haven’t already.
Have a look around the room. Of particular interest on the right side of the screen is a large crumbling wall, in front of what appears to be some kind of mural. You’ll need to remove all that rock that’s caked on first, though. To do that, use the ship rib with the wall. This won’t be the first time you use it for that purpose, believe me. You’ll uncover the mural… but it has an odd hole in the middle. Put the wooden peg in the hole, then place the Sunstone on the peg.
You’ll need to set the Sunstone to the right combination here. Go to the third paperclipped page of the Lost Dialogue to see how. (If you need specific help, check out the Lost Dialogue transcript section near the end of the guide, where all the solutions are provided.) Once you’ve aligned the proper symbol with the horns, a door will open up. It’s Sophia – and she’s got a distributor cap. That could be just the thing to get the truck running again!
Take a look under the truck’s hood. The spark plugs go in first, then the distributor cap on top of them. However, one spark plug isn’t enough to get the truck moving; you’ll need to find a second one. Specifically: the one in the generator. Turn it off, open its side door, and take out the plug. Put the plug in the truck, then put the distributor cap over both plugs.
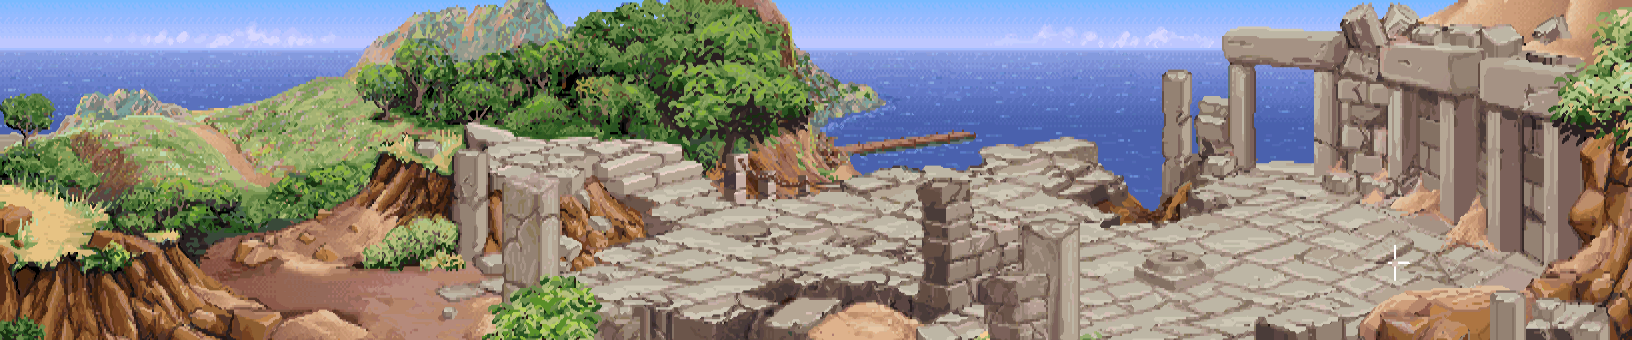
Head off the docks and onto the island proper, where you’ll come across some ruins with a spindle out front. The Sunstone fits on the spindle, but it alone won’t open the doors. The reason why can be found in the Lost Dialogue; Crete is the site of the Greater Colony, and thus you’ll also need a Moonstone. Head to the path on the far left side of the area to go to another abandoned dig site.
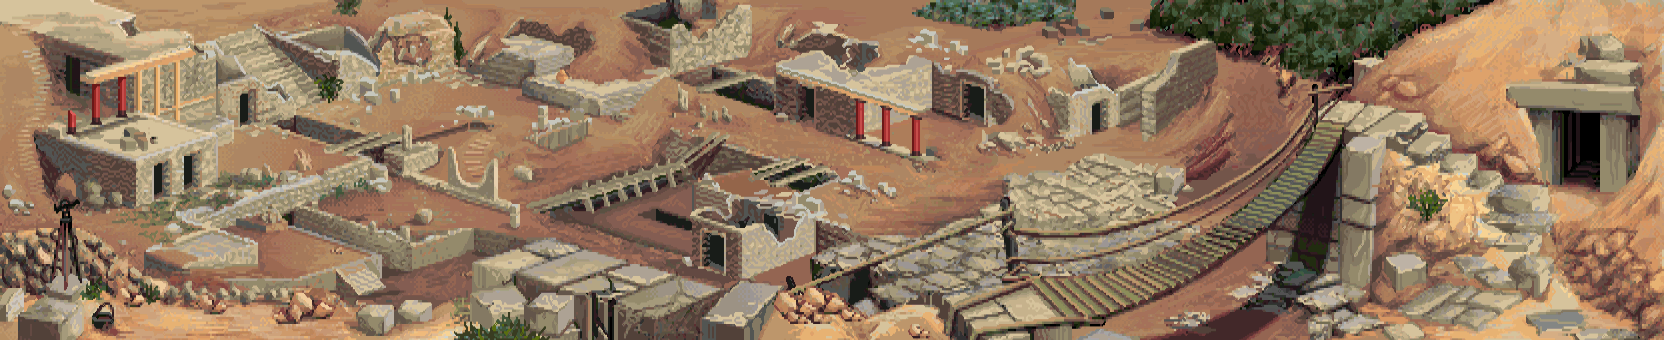
There are a lot of small rooms to enter here. Before you do anything, however, head up onto the bridge, go all the way left, and pick up the surveyor’s transit.
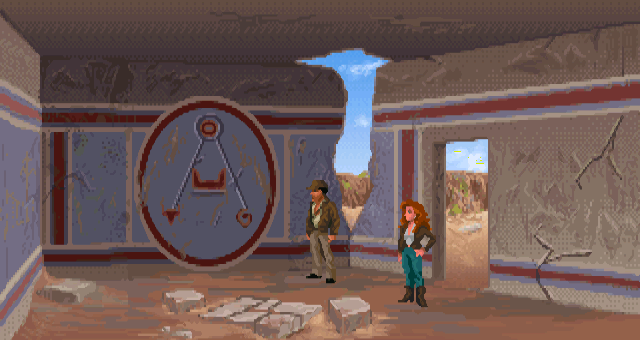
Most of the rooms have nothing but pottery and/or rubble in them. One room, however, contains a mural depicting a line emerging from both a bull’s head and its tail. These lines converge on a single spot. The horns in the middle of the mural represent the big horns in the middle of the site. All you have to do now is find the statues of the bull’s head and tail, which are randomly placed each game. Simply push the various stones dotted around the excavation until you uncover them both.
To find the Moonstone, place the transit on the bull’s head and use the controls until the crosshairs are over the left horn. (Click anywhere on the main screen to exit the interface.) Indy should say “I see the left horn” when you leave the screen – if not, fine-tune the crosshair’s position until he does. An imaginary line will extend from the statue. Go to the tail statue and align the transit with the right horn to make another imaginary line, as well as an “X marks the spot” where the two lines intersected. Use the ship rib with the X to uncover the stone.
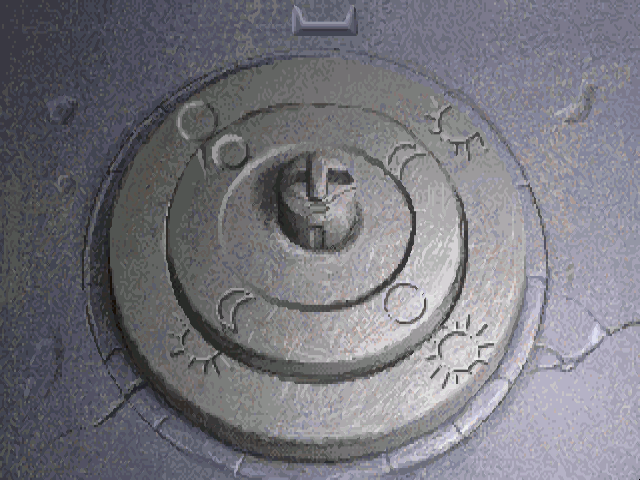
Place the Sunstone on the pedestal near where you arrived in Crete, and place the Moonstone on the Sunstone. The Sunstone should be positioned exactly as it was back at the dig site; the Moonstone needs to be placed so that it matches with whatever description the Dialogue gives on the third paperclipped page. (The descriptions should be clear enough, but once again, the Lost Dialogue transcript section is there if you get stuck.)
If you wish, make a small note of the correct combo. You’ll have to use the stones quite a few more times, and it’ll make things much easier when the Worldstone is thrown into the mix. Be sure to pick both stones up before entering!
Make a save here. You’re heading into the Labyrinth of Knossos, and one of the first things you’ll have to do to proceed is to lock yourself inside…
The Labyrinth is aptly named, but the final locking stone is likely here, and there’s no getting into Atlantis without it. There are three busts in the first room. You’ll need all of them, but the door closes if all three are picked up. To get all three past the gate [WARNING: you will not be able to leave that way after doing so], pick up two of the busts, then go past the gate into the next room and use your whip on the third.
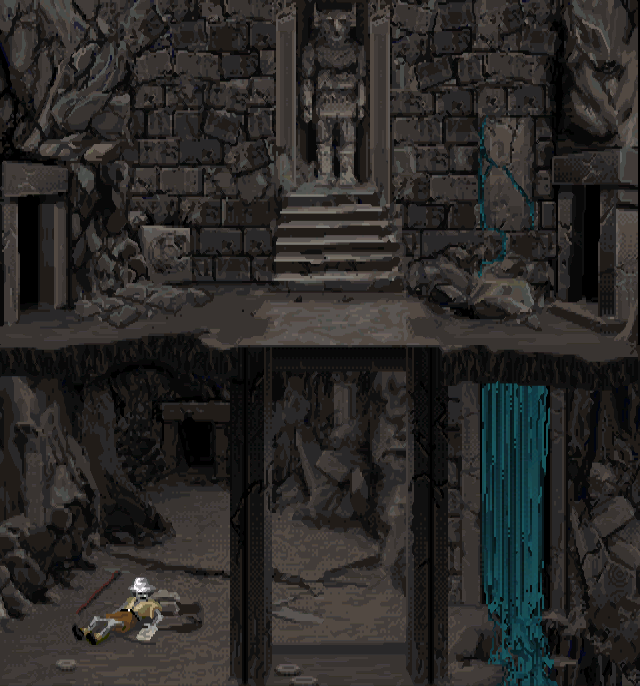
You’ll now need to find another way out of here. There are a lot of dead ends in this place (the room on the far left is an example). Explore around until you find a similar mechanism and gate as the one you encountered at the entrance. You’ll need to place the three busts on the platform to open the gate, of course, but first: from that room, see the two doors in the back? Enter the left one to come across a big minotaur statue, as well as a platform in the middle. If Indy and Sophia both stand on it, the elevator will descend.
Pick up the Worldstone and Sternhart’s staff. Poor guy. Even worse news for him: there was a way back up all this time. To get back to the room above, investigate the waterfall; Indy will find the elevator’s counterweight and chain. Simply climb it to get back up. To be able to get back down, you’ll need some extra weight on the platform, and the busts won’t cut it. The solution is to use your whip with the big minotaur head. Indy will now be able to ride the platform down whenever he steps on it. Don’t go back yet, though: you have some unfinished business.
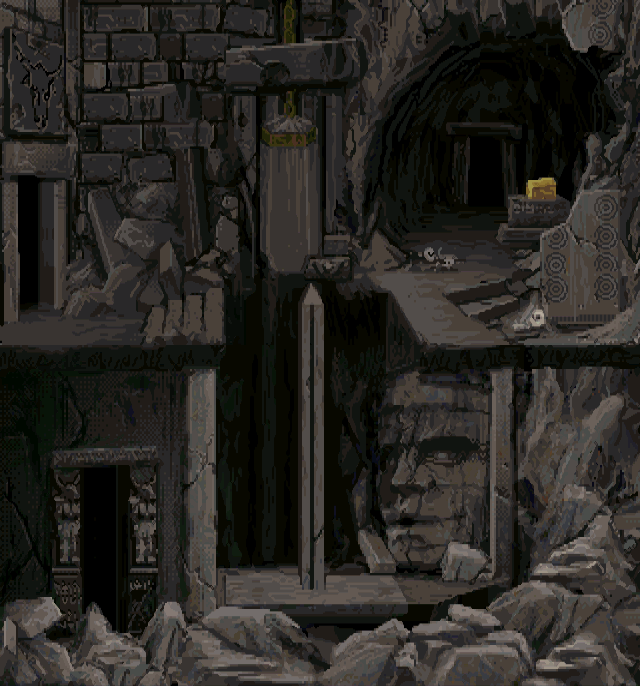
Return to the room with the gate and pedestal, and place all three busts on the platform to open the gate. In this new area, take the upper path to eventually find a room with a gold box. Unfortunately, there’s a big elevator shaft preventing you from reaching it, and the elevator is stuck. To get the elevator working and get to the box, use Sternhart’s staff to free the chock. Now the counterweight can move. Take the path to the lower room to find a big statue head. Shove the staff into the statue’s mouth, and the elevator will ascend.
Head back to Sophia. The room north of Sternhart contains a big gate, as well as a hole above. The hole’s too high up for one person to reach, so you’ll have to boost Sophia up. She’ll need to be convinced, though. Emphasize to her that this is the only way to proceed, and eventually she’ll agree to it and find a pulley on the other side that opens the gate.
The path beyond the gate goes around in circles. That’s… rather suspicious, to say the least. There’s got to be some sort of secret passage, but there’s nothing to investigate on any of the walls. Remember that you’ve got that amber fish on a string; it detects the nearest source of orichalcum, and there might just be some nearby. There’s a problem, though: if you use it, it’ll point at Indy (as it’s detecting the orichalcum beads he has in his pockets). To prevent that, have a look at the gold box; Indy notes that it’s lead-lined. Open the box, put all the beads in, then close the box.
Another dilemma: now the amber fish points at Sophia’s necklace. You’ll have to convince her to put it in the box as well, and she doesn’t want to part with it. Once again, you need to make it clear to her that doing so is the only way they’ll avoid sharing Sternhart’s fate. Use the amber fish in each of the four rooms beyond the gate; one random room will make the fish point to the back. Use the ship rib on the wall to find the secret passage, as well as a single orichalcum bead just beyond.
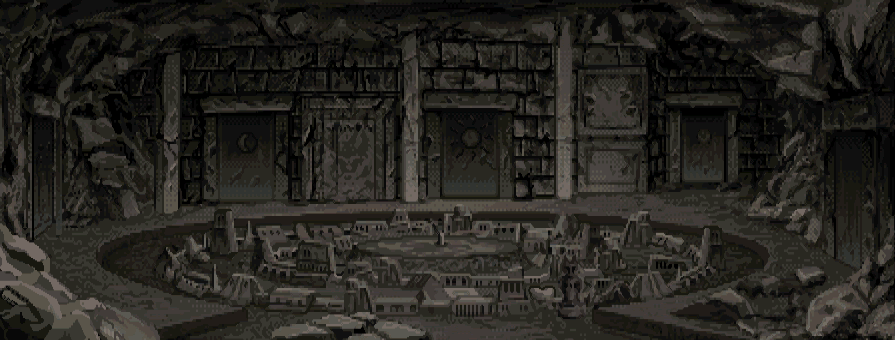
Indy and Sophia will presently walk into a giant room, complete with a stone scale model of Atlantis. In the center is a spindle – you know what that means. Whip out the Lost Dialogue and pay attention to the description of the Worldstone alignment on the third paperclipped page. There are at least eight possible phrases here, all of them documented in the Lost Dialogue Transcript section. When you get it right, the map of Atlantis will move around for a while, and one of the room’s three doors will open. (Different doors open on different Paths.)
(…) Unfortunately, going through this door yields quite a nasty surprise.
Kerner has Sophia, and he’s got you at a dead end, at gunpoint, demanding the locking stones. You have no choice: you must give all of them to him. Anything less and he will shoot you, leading to the very first possible death you can have on the Team path (see the “All Game Over Messages” section for the rest!). Comply and Kerner will spare you, at the cost of trapping you in the room. You can’t do anything at all to re-open the door: better hope you can make another way out. To escape, use the ship rib with the rock wall at the right side of the room. (I told you that thing was going to be repeatedly useful…)
Indy is outside again, and not a moment too soon. There’s a Nazi U-boat docked just outside, with Sophia, Kerner and Ubermann on board. Hurry over to the conning tower and open up the hatch, where the sub’s frail 60-year-old captain will emerge. Most dialogue options here will result in Indy punching him out, but choosing the “sub captain or merely sub-human?” option will put you right into the fistfight minigame with him (where, again, a single punch will do).
Once you’ve dealt with the captain and climbed in, the sub will leave Crete and dive under the ocean. Not much farther now…
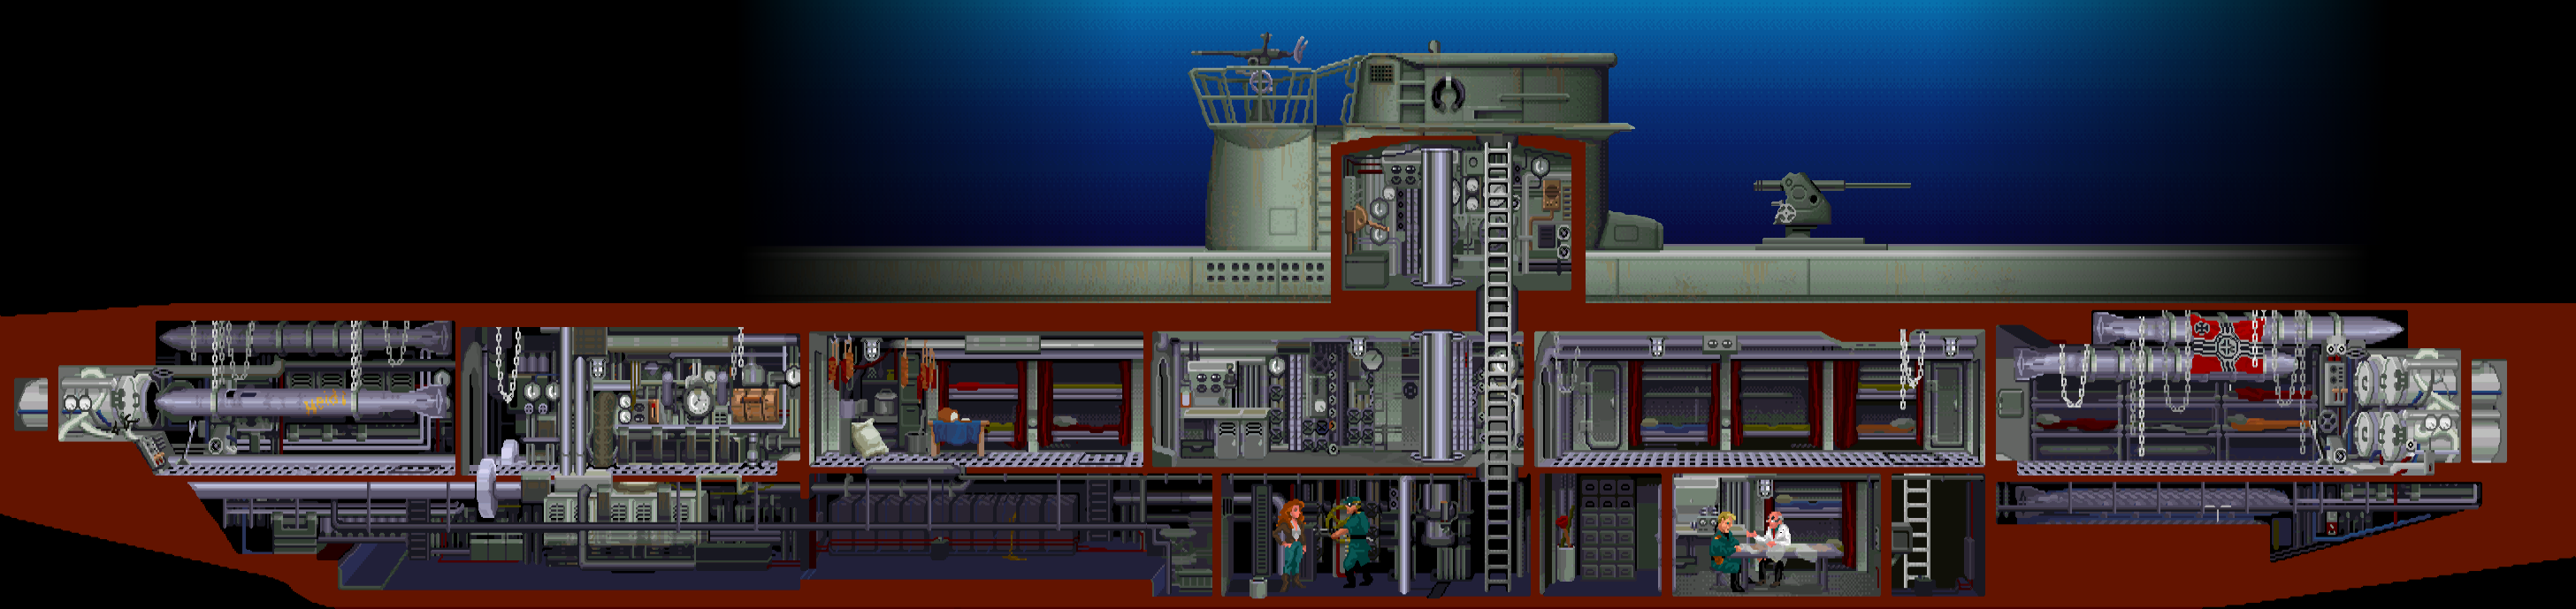
The U-boat is headed into the depths of the Mediterranean, straight for Atlantis. The locking stones are securely stored away somewhere, and Sophia is being held captive. Indy needs to turn this situation around quickly, but he’ll need to be very careful: the sub is crawling with Kerner’s men.
Fortunately, Indy disposed of the sub’s captain just before the sub dove into the water, and the crew are none the wiser. You can use the intercom to order most of them around (the one who’s guarding Sophia will stay put, no matter what). Order them to the stern or bow. Do NOT order them midship, as that’s directly below you. If that happens and you climb down, Indy will be sleeping with the fishes.
The sub’s mostly clear now. With the crew all in one place, however, you’re going to have to steer the sub to Atlantis yourself. Start by pulling the lever to your left… which will promptly break off. Oops. Hopefully there’s a replacement somewhere.
You can head down from the conning tower once you’ve ordered the crew out of the way. You can also see Sophia on the bottom deck below you. For now, head left into the galley. Pick up some of the bread and cold cuts; if you like, you can make them into a sandwich (and even eat it by “using” it).
Pick up that green porcelain mug as well; it’s on the rightmost part of the shelf between all the loaves of cold cuts. It’s very easy to miss, and you’re going to need it soon…
Head to the bottom deck via a nearby trap door. Get to the wall behind Sophia and talk to her. Tell her to distract the guard, and that you’ve got a plan. Head back above deck, down the ladder to Sophia, and walk up to the guard. You need to clue Sophia in to knock the guard out using that bucket by her feet. Any of the first three options will do just that, but do NOT select the one about selling leather jackets – it’s Game Over if you do.
Sophia will stay behind, in case her captor wakes up. In the room just to your right, you can hear Kerner and Ubermann discussing their approach to Atlantis. During this conversation, Kerner reassures Ubermann that the locking stones are being stored in the captain’s lockbox in the room to their right, so go there and investigate.
You won’t be able to open the box the usual way. If you look at the box, Indy remarks that it doesn’t seem all that secure. You can’t break open the walls, as you’d run the risk of Kerner hearing you. There’s got to be something you can use to quietly get to the safe’s contents…
The solution is to dissolve one of the walls. Go back to the lower deck of the ship to the left of Sophia’s room, and you’ll find that one of the sub’s batteries is leaking acid. The porcelain mug can safely contain the acid, so Use it with the acid to fill it. Then simply use the acid-filled mug with the safe.
The safe is open! There’s also a tiny key in here; might as well take that too.

Sophia is no longer captive, and the locking stones are yours once again. The sub is getting close to the Atlantis airlock, however; with the crew all in one place, you’re going to have to steer the sub into the airlock yourself…
There are four different controls you need to accomplish this. Once you push each one of them, your viewpoint will change to the Mediterranean sea floor, where you’ll be able to control the sub. It’s important to note that, in order for a control to appear on the panel, you must first activate it (by using/pushing/pulling it) in addition to repairing or unlocking it. You’ll want to back out of the sub-steering screen until you’ve done this with all four controls if you want to maneuver the unwieldy submarine into the airlock. That will be covered shortly. For now, here’s a rundown on all four controls. From left to right:
Once you have all four controls working, it’s time to get into the airlock, the location of which is randomized each game. (The image at the top of this subsection shows you all the possible locations.)
The submarine will have to be at a very specific distance from the camera (your viewpoint of the seafloor during this sequence) in order to successfully dock. Unless you’re lucky enough to get the extremely-close airlock at the lower left, you probably won’t get this right on your first try. Just keep at it, take it slowly (as there’s no time limit), and focus on one control at a time; eventually, you’ll get the sub to a point where you can simply use the depth and speed controls to successfully dock.
(This is the end of the Team Path. To continue the walkthrough, skip to Act III.)
Welcome to the Wits Path! You’ve chosen to go it alone to Atlantis; along the way, you’ll face not only some tricky scenarios that demand a cerebral workout, but also a few big action-packed sequences that will require some cunning, concentration, and/or fast thinking. Are you ready?
Read through Plato’s Lost Dialogue if you haven’t already. There will be a quiz shortly…
You’re looking for a man named Alain Trottier here. Ask around about what he looks like; eventually some people will tell you that he has grey hair and a brown suit. Talk to him and introduce yourself as Dr. Indiana Jones, and as a simple professor. If you bring up Atlantis, he’ll ask you a question about Plato’s Lost Dialogue. Answer it right and he’ll give you his business card. This could be of use to Sophia’s other contact; time to head to Algiers.
There are quite a few people out walking the hot marketplace streets. Omar’s shop should be around here somewhere. Walk around and you’ll eventually see a back alley on the far-left of the market. Take it and you’ll find the shop… but Omar’s not here. Instead, you’ll find his servant, Paul. You could have him arrange a meeting with Omar, but he’s not going to do that for just anyone. Fortunately, you’ve got Trottier’s business card. Give that to him and he’ll take you a bit more seriously – enough to go to Omar.
Once he returns, however, he’ll tell you Omar doesn’t want to have anything to do with you. This is bad; you need Omar’s help, whether he’s willing to give it to you or not. Paul will, fortunately, go see Omar again if you ask him. Perhaps this time you could follow him into the streets, and see where he…
(…) goes?
Paul quickly becomes one with the bustling crowds out here. If you have a decent eye, you can follow him to Omar – he’s a slightly bigger and darker dot than the others. If you’re having trouble, though, there’s another way. You’ll quickly notice there’s a moving red dot on the map that stands out very well… Enter the marketplace when it does to see that the dot is a jovial man in a bright red fez. Talk to him and keep bringing up the fez. Tell him it’s “better than a sharp stick in the eye” and that it’s festive. He’ll give you the fez, that you might better join in the fez-tivities (his pun, not mine). To have Paul wear the fez, give it to him by saying it’ll make him look taller.
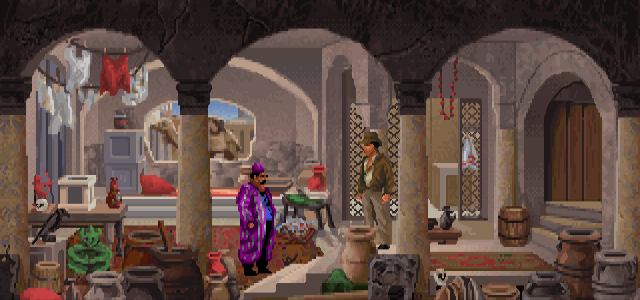
Omar is none too pleased to see Indy at his doorstep. He sends Paul to notify the authorities, and refuses to help Indy. Talking to him makes it fairly obvious he sided with Kerner a long time ago, giving the Nazis info about the location of an Atlantean outpost buried somewhere in the desert. There are several things in Omar’s house that could be of use here, but you’re going to have to deal with Omar first, by locking him in his closet. Simply move into his closet; Omar will run in with you and tell you to leave his things alone. Then just step out and close the closet door.
Take a look around. That hanging cloth is actually a map; to obtain it, pick up the bamboo pole in the foreground and use it with the map to get to it. Before leaving on Omar’s camel, pick up the two statues on the left side of the screen.
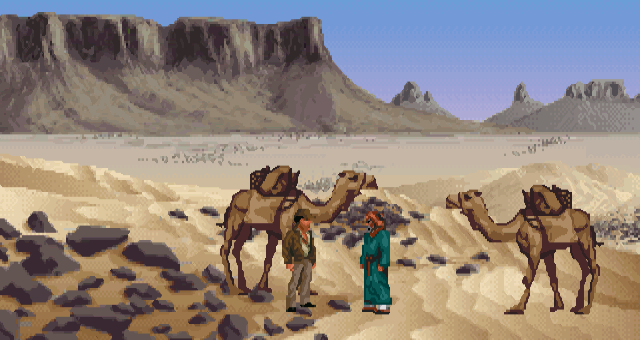
You’ve got a map to the dig site, but it’s useless without some further help from the nomads that populate the desert’s various camps and oases. Give them your map and they’ll help tell you where the map’s X is. If they say the X is “considerably” in one direction, that means it’s two screens away; if they simply name a direction, it’s one. If they say “you are very close to the site”, it’s on the current screen – a red X will appear on the map when you know the dig site’s location.
Along the way, you’ll be hounded by various “officers”. They’re easy to evade, but they’ll send you back to the city gates if you don’t bribe them (with one of Omar’s statues).
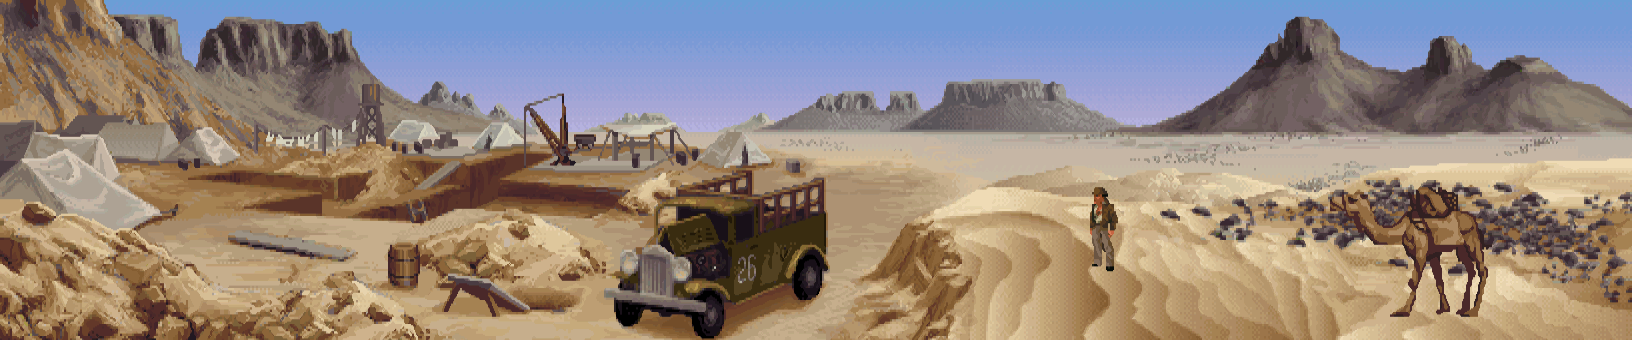
The dig site is fortunately abandoned. Your camel, however, abandons you too, and the truck doesn’t work. For now, head out of the sun inside the dig site. It’s dark down here; you’ll have to feel your way around. There are lots of things to pick up. Feel around for, and pick up: a ship rib (the “sharp wood thing” near the entrance), a hose (the “long, tubular thing” near the bottom of the screen, below the entrance), and a clay jar (the “clay thing” to the lower-right of the entrance).
Feel around to the lower-left of the entrance; there’s a generator here, but it’s out of gas. The truck outside probably has some left; the trick is finding a way to siphon it out. To do so, head out to the truck, open its gas tank, use the hose with it, and use the clay jar with the other end of the hose. Pick up both the jar and hose afterwards. Back in the dark, feel around for the generator’s gas cap (the “metal cap”), open it up, fill it with the gas, and turn it on by pressing the “metal thing”.
With the lights back on, turn your attention to the painting on the left side of the screen. It looks like two figures holding something – possibly a stone disk, as Indy notes. Below them is a chest-like object that almost looks like it could be a secret compartment. To proceed, push the circular object on the wall. It’s actually a button to open the stash below. The opening contains a statue that resembles the one Kerner swiped in the prologue. Use your orichalcum bead in this statue’s mouth as well, and it’ll power up. You can probably use this to get the truck’s engine running again, but you’ll need another spark plug as well. Open the generator’s side door, turn the generator off, and pick up the spark plug. Up top, put this second spark plug in place and use the statue with the truck’s engine.
Open the truck’s driver-side door and read the telegram on the seat. Uh-oh. Looks like you weren’t the only one looking for Trottier. Time to head back to Monte Carlo.
Find Trottier again. You can try to warn him, but he won’t believe he’s in any danger. After three attempts by Indy, the Nazis will find and kidnap him. Indy says a classic line, and the chase is on!

The Nazis will drive around in circles a lot here in an attempt to lose you. Your objective is to ram into them a few times until they crash. Just click on the road to move there. Stay relatively close to the car, and eventually you’ll ram them enough to cause a wreck.
Trottier survived the crash, fortunately. Better still, he’s quite a bit more grateful to Indy now that he’s seen the reality of the matter. He reveals that an entrance to Atlantis is at Thera, and that his Sunstone can be used to open the way. Unfortunately, he tossed the stone into a random street drain during the chase. He writes the street’s location down on a telegram before entrusting the stone to Indy.
The streets of Monte Carlo have complex names, but they’re also in alphabetical order, both from left to right and from bottom to top. Once you’ve found the right street, have Indy open the drain (or both, if there are two).
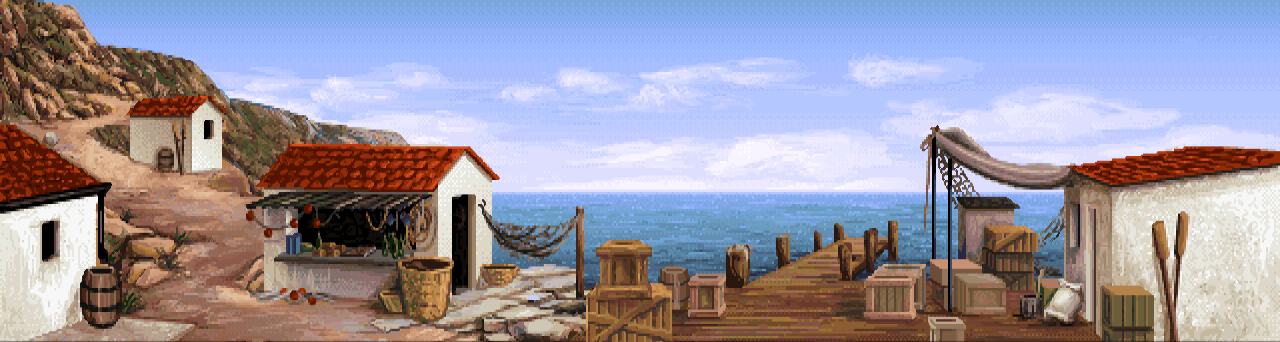
Talk to the port authority; eventually he’ll reveal that there won’t be any way off the island for at least a week. Oops. Might as well explore the island and see if there’s any truth to Trottier’s theory. Walk to the path on the far left of the screen to leave the area.
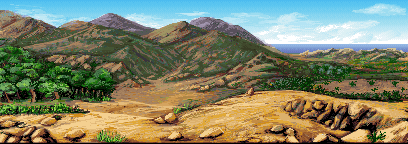
In the distance, there’s a gap, notch, and cleft in the mountains. Two of them are (randomly, of course) dead ends, but one of them contains another dig site. Before heading in, have a look at the crate. It’s empty, but closing it will reveal an invoice for a balloon bladder still attached to the lid. Pick it up; that could be your ticket off the island.
Go inside the dig site and head into the adjacent room. There’s a door here, but it appears whatever it led to was walled off long ago. Close the door and you’ll see a secret compartment open just to the right. There’s a spindle just inside it, meaning it’s time to use that Sunstone. (Check the third paper-clipped age of the Dialogue to find the correct combo for the stone; if you need further help, look at the Lost Dialogue section towards the end of the guide.) Set the stone to the right combo and you’ll hear a click. Open the door again and you’ll see there’s now a stone tablet with ancient writing on it. Indy can’t decipher it, but maybe there’s someone who can – go ahead and pick up the tablet. Be sure to retrieve the Sunstone afterwards, obviously.
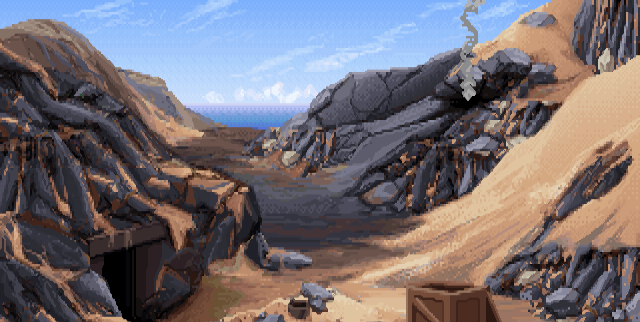
During the events above, the entrance will cave in. There are some tools in the crates, including a folding military entrenching tool. To use it, first you’ll have to unfold (open) it. Unexpectedly, there’s a letter from Sophia inside… the Nazis have taken her into their custody. Use the entrenching tool on the caved-in entrance to escape.
You need to get off this island, and you can’t exactly wait a week for transportation. Bring the balloon bladder invoice to the port authority and the balloon bladder will be yours. It’s in the crate just to the right of the pier – open it and pick up the balloon. You’ll need a basket as well. There’s a huge one outside one of the stalls, but it doesn’t belong to you. To get it, give the carved sign to the port authority in exchange for the balloon. As it happens, he can translate the symbols for you, which will reveal to you that Crete is another way to Atlantis. Now you just need to make a balloon. To do so, pick up the nearby fish net, use that with the balloon bladder, and use the balloon/net combo with the basket. To inflate the balloon, go back to the dig site. See that natural gas fissure? You need something to connect the balloon rig to the vent. Use the hose from the dig site with the rig, then use the rig with the vent.
You’re now over the ocean. Kerner and the U-boat can’t be far behind; you need to catch up with him while you can. The balloon has two controls: Vent hydrogen and Drop ballast. The former will make you descend and turn you 45 degrees counterclockwise; the latter will make you ascend and turn you 45 degrees clockwise. It’s probably better to try it for yourself. Once you find the sub, get relatively close above it, then vent hydrogen like crazy.
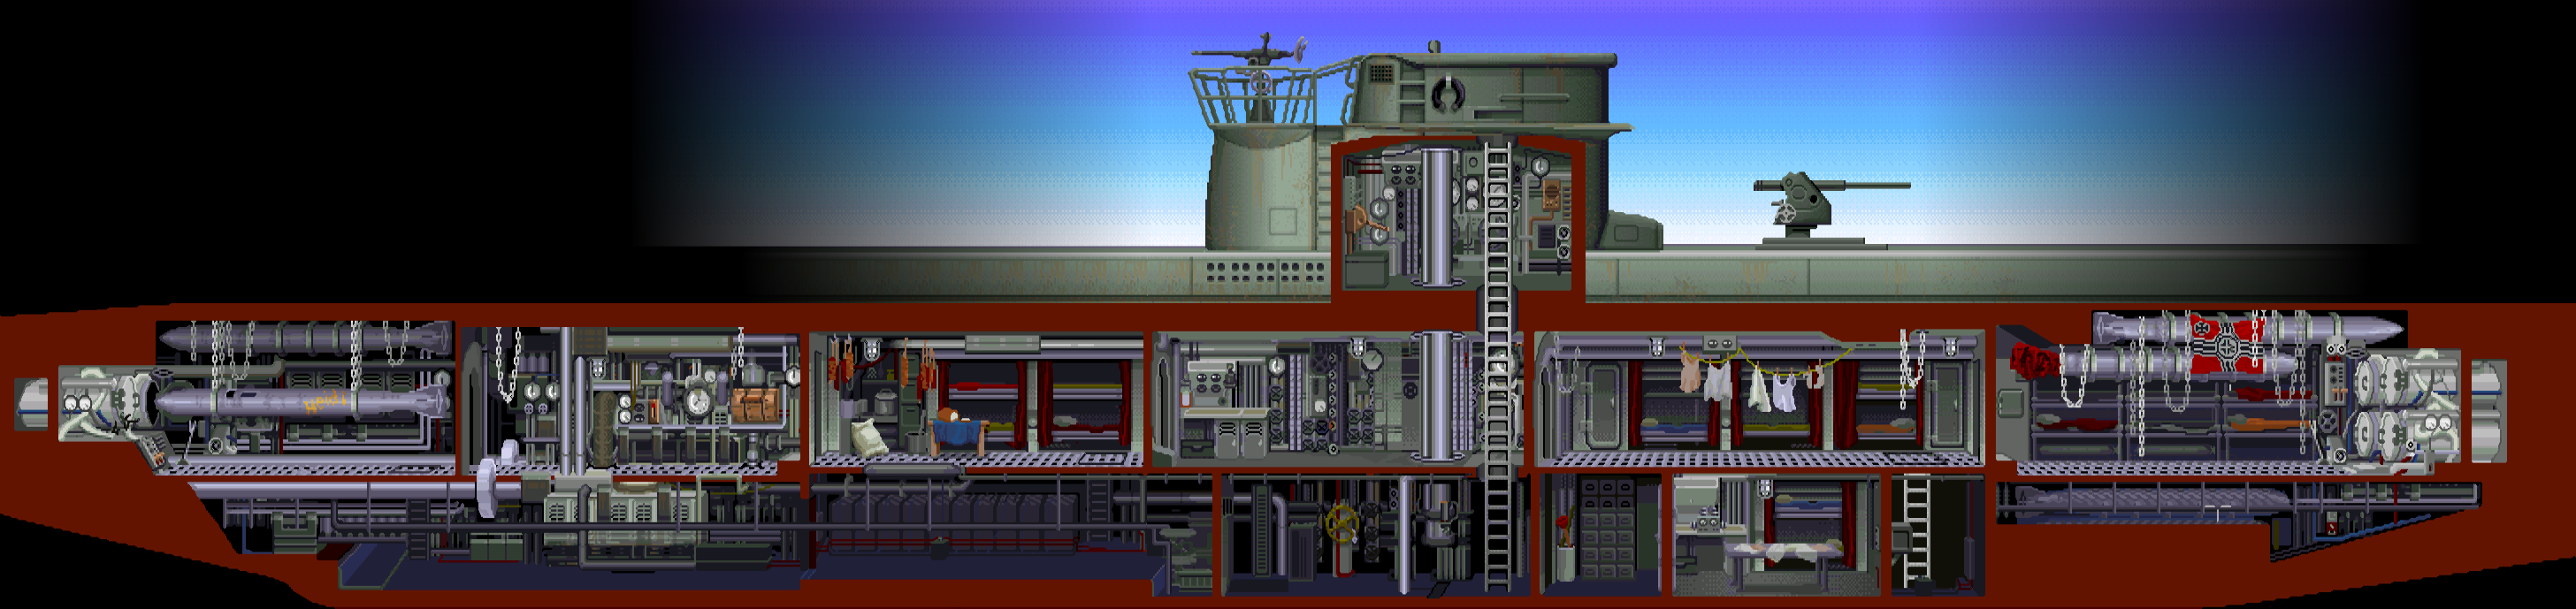
Indy manages to land the balloon alongside the submarine, and gets a new set of clothes in the process. The U-boat is on its way to Crete, where its crew will find the underwater entrance to Atlantis shortly after. Seems like Kerner’s always one step ahead of you… now it’s your turn to pull a fast one on him, by stealing the keys to the Greater Colony.
Go into the conning tower and continue climbing down. Talk to the guard standing by the lockers, who says he’s been guarding a “rock” for much longer than a normal shift. He’s probably really hungry by now. To get rid of him and into the locker, make a sandwich using the cold cuts and bread in the galley, then eat it in front of the guard.
Inside the locker is a Moonstone, which is required (along with your Sunstone) to enter the Greater Colony on Crete. There’s also some torpedo instructions underneath the stone; pick those up too. Not long after you do that, however, Indy will realize the sub is now headed for Crete. Watch the scenes that follow.
Kerner’s none too happy about the theft of the Moonstone. While he and Ubermann explore Crete for a way into Atlantis, he’s ordered the sub locked down; if you attempt to escape via the hatch, an armed guard will either order you back inside or kill you, depending on whether you’re wearing your disguise. You’ve got to find another way out.
Come to think of it, you did pick up a pamphlet telling you how to use the torpedo system. Might as well try that; there aren’t really many other ways off a submarine. Going all the way to the aft torpedo bay, however, reveals another obstacle; there’s an officer reprimanding two crew members. Besides that, the sub is being patrolled by half its crew.
The torpedo tubes in the bow, meanwhile, don’t work. A nearby sailor explains the wires are crossed, and they could easily start a fire if tampered with. That would make for a good distraction. The torpedo tube’s control panel is too difficult for Indy to figure out on his own, so use the torpedo instructions with the panel. When the torpedo tube is ready to fire, push the lever.
Hmm… close, but no cigar. The wires did make some sparks, but not quite enough to start a fire. You’ll need an extra catalyst – look around the sub for something that would definitely help out. Specifically, pick up the oily rag located in the aft torpedo bay, and drape that over the wires. Pushing the lever after that will cause a fire and distract the sub’s crew.
You can now (and will automatically later, if you don’t) change back into Indy’s regular attire. Attempting to leave the sub through the hatch after doing so will result in the one and only death you can die on the Wits path.
The aft torpedo tube bay is now clear. Use the torpedo instructions with this control panel as well to get everything ready. Now you need to pull the lever from inside the tube. If you could tie a string to the lever, that might work, but Indy’s not about to give up his whip to do that. Once again, look around for something you can use. You won’t have to look far. To launch yourself from the sub, grab the clothesline in the room adjacent to the torpedo bay, tie it to the torpedo tube’s lever, climb inside the tube and pick up the other end of the clothesline, close the tube’s door, and pull the clothesline.
Head south from the docks away from the sub to find a pedestal. You’ll need to place both the Sunstone and the Moonstone, in that order, on it. The third paperclipped page of the Lost Dialogue explains why (Crete is the site of the Greater Colony), and it also tells you the correct combo for the Moonstone – which, again, is random each game. The Sunstone should be set to the same configuration as the one you used in the Theran dig site.
The tablet you found in Thera clearly mentions that Crete contains a road of some kind to Atlantis. The many Atlantean symbols and stonework scattered around the Labyrinth indicate that you are indeed getting closer. The trick is finding a way there – and it won’t be easy. The old passages have not improved with time, and they’ve already claimed the life of someone you’ve met before…
You begin in a room with three busts on a scale-like platform. If you pick up all three of them, the gate will close. The problem is, you’ll need all three on the other side to be able to open a gate later on, and you don’t have anything nearly heavy enough to weigh the platform down in their place. To get all three busts on the other side of the gate, pick up two of the busts, then go through the door and use your whip with the third head in the adjacent room. This will effectively lock you inside, but there’s no other way to proceed.
As befitting a labyrinth, there are a lot of dead ends here. Head through the circular passage in the top-center, then into the one on the left. As you may have guessed, the platform in this room is where the three busts go. You can put them there if you want, but for now head into the left door at the top of the stairs; it’s the door just adjacent to the one you entered from. You should now be in a room with a big minotaur statue. Note that the floor below it dips slightly when you walk on it. If the platform had some extra weight, you might be able to ride it down to wherever it goes. To do so, use your whip with the minotaur head. Head to the base of the statue to ride the elevator down.
Poor Sternhart. You can read his note if you wish, but be sure to pick up the Worldstone he swiped from you, as well as his staff, comb and scarf. Respect for the dead be damned; you need to find a way up again if you want to avoid sharing his fate. Search around the room and you’ll find an unconventional way back. Specifically, examine the nearby waterfall – there’s a chain there that holds the elevator’s counterweight. Simply “use” the chain to go back up. Carefully make your way back to the door on your left; be careful not to step on the platform and ride back down in the process!
If you haven’t done so yet, place the three busts on the shelf to open the door. In the room beyond, take the upper passage and you’ll eventually find a room with a gold box on the other end of what appears to be another elevator shaft. Notice there’s a wedge (chock) holding the counterweight in place. If you want that gold box (and you do), you’ll need to free the counterweight by using Sternhart’s staff with the chock.
Head back two rooms, and this time take the lower passage. This leads to the bottom of the elevator shaft, where the platform currently rests. There’s a big statue head right by it with an open mouth – it must be the key to operating the elevator. To ride it up, use Sternhart’s staff with the statue’s mouth. There are two more orichalcum beads underneath the box, which Indy also picks up.
Go through the door in the back, behind the gold box. There’s a “microtaur” machine here, though Indy will note that a part seems to be missing if you investigate the machine’s hatch. Fortunately, you have everything you need to get the microtaur running again: place the statue into the hatch, then place an orichalcum bead in the statue’s mouth.
The microtaur will dig a hole through the wall. Follow it to find the labyrinth’s “map room”, a big hall with a scale model of Atlantis. There’s a spindle in the center, which will require all three locking stones. Open the Lost Dialogue up to its ever-useful third paperclipped page to find out how to align the Worldstone. (The Sunstone and Moonstone should be aligned exactly the same way as you did to enter the Labyrinth.) If you got it right, the whole map will come alive, a little statue will rotate around the miniature city… and most importantly, a door will open.
There has to be more to this short passage beyond the map room door. Maybe Sternhart’s things could help out. Think especially about why he took a wool scarf and a comb into a place like this – it wasn’t because he liked following the latest archaeological fashion trends. Using the two together will charge the comb with static electricity, but that alone won’t get you anywhere. Try combining the comb with something else in your inventory. Specifically, tie the clothesline to it to make a crude detector device. The comb appears to be pointing towards sources of orichalcum – namely, Indy, because he still has some beads on him. The comb isn’t going to be particularly helpful unless you find some way to hide them from the detector. To do so, put the beads in the gold box, then close it.
Note that you’ll have to recharge the comb with the scarf every time you want to use it. Give it another go and it’ll point towards the dead-end room (or simply down, if that’s where you currently are). Investigate the bones in the dead end to find two more beads, which Indy will also conceal. Charge up the comb once more in the waterfall room and use it. The comb will now point towards the back wall, which Indy notes is crumbling a little. There must be something here; to reveal it, use your ship rib with the wall.
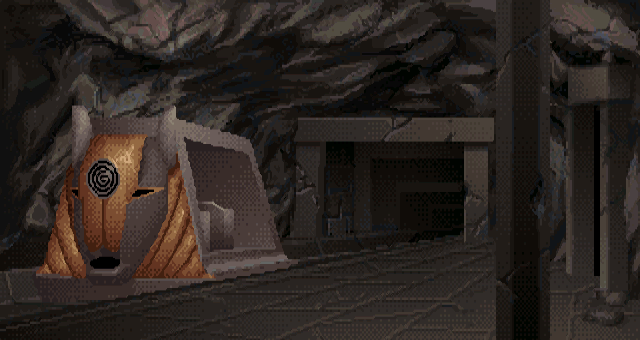
The secret passage leads to a room with an Atlantean subway car. There’s also an orichalcum bead on the floor, which you should pick up. The subway track is far too long to walk down, but the car will take you right to Atlantis if you can get it working. That, fortunately, is a simple matter. Use an orichalcum bead in the car’s mouth and you’ll be on your way.
The subway car eventually crashes into a mysterious dark room. After stumbling out of the wreck, Indy quickly realizes he’s in some kind of airlock, deep below sea level but with sufficient pressure to prevent any flooding. There’s only one place he could be…
(This is the end of the Wits Path. To continue the walkthrough, skip to Act III.)
By choosing this path, you’ve decided to let your fists do the talking. Puzzles will generally be easier and more straightforward on this route, but you will have to deal with a number of Nazi goons, and it’s Game Over if you lose to any of them. If things look bad, remember that you can retreat from most fights by backing away several times!
Due to the often-frustrating nature of the fighting minigame, this is potentially the most difficult path if you intend to fight everyone directly… or the easiest, if you abuse the sucker-punch mechanic. Just keep in mind that you won’t get any Indy Quotient (IQ) Points for sucker-punching enemies, if that matters to you.
Read up on Plato’s Lost Dialogue if you haven’t done so. There will be a quiz shortly…
You’re looking for a man named Alain Trottier. Ask around and you should quickly get a decent description of what he looks like: he wears a brown suit and has grey hair. Talk to him once you’ve spotted him. Be humble; Trottier won’t deal with you if you aren’t. Ask about Atlantis, and he’ll ask you a question to “prove you’re worth dealing with”.
You’ll get Trottier’s business card if you answered correctly. That’s all you need to do here!
Omar al-Jabbar’s shop is around here… somewhere. You’ll find it on the far left side of the market, down the alleyway. The shop is currently only being tended by Omar’s assistant, a man in a red fez called Paul Abdul. (Go ahead and make whatever jokes you need to about that.)
You can arrange a meeting with Omar, but Paul won’t take you seriously unless you show him you’re really into dealing with Atlantean artifacts. Give him Trottier’s business card and he’ll head off to Omar’s house, telling you to wait for his return. When he does come back, however, he’ll tell you Omar still doesn’t want to see you. You really need to see him, though – perhaps you should try a more devious approach. Talk to Paul and arrange another meeting, but tail him this time. Follow him into the the city streets once he exits the market; that red fez of his will make him easy to spot. Stay as close as you can to him at all times; he won’t spot you no matter what.
Uh-oh. Seems the Nazis are a few steps ahead of both Indy and Omar. You can’t sneak up behind Horst, as a noisy floorboard will give you away. Time for the first of many fights on this path. Save beforehand; Horst is fairly tough, and – again – it’s Game Over if you lose. Don’t be afraid to run (or sucker-punch him if you aren’t a completionist).
You’re now alone in Omar’s house while he and Paul alert the authorities. Before you can make your escape, you need to find that map he mentioned. Take a look around, and Indy will presently notice that one of the clothes hanging from the ceiling isn’t laundry at all. Now you just need to find some way to get it down. To do so, grab the bamboo stick from the pot in the foreground, and use it with the map.
The map is unfortunately rather vague, but it’s better than nothing. Use the camel to head out into the desert.
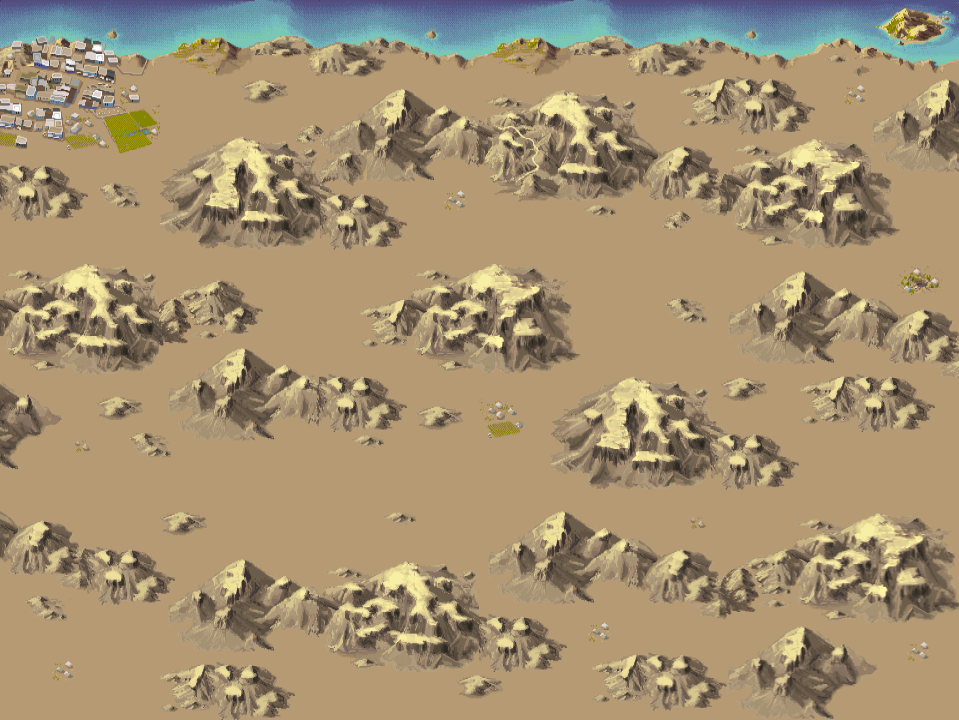
Watch out for enemies here. If one catches up to you, you’ll have to fight him. (Those looking to maximize their IQ Points, however, should beat at least one in a fair fight.)
There are nomad outposts scattered across the desert: at least one in each screen, other than the one with Algiers in the upper-left. Hurry to one of them as fast as you can. Once you’re there, show your map to one of the locals, who will be happy to point you in the right direction. If he says the X is “to the east” (for example), then the dig site is one screen east. If he says the X is “considerably” in one direction, that means it’s two screens away. When you find a nomad that tells you “you are very close to this site”, a red X will appear on the desert map. Head to it.
The dig site looks abandoned, but a few steps in the wrong direction will quickly prove otherwise. Someone is shooting at Indy from that observation balloon to the left. Not good. You’re going to have to find some cover – hopefully the dig itself is abandoned. Climb down the ladder in the middle of the site to head in; you’ll have to approach the ladder from the right side.
Once you’re inside, you won’t be able to get back up the ladder. The gunman has you pinned down here in this dark room. Note that “Look at” has been replaced by “Touch” here. Feel around the site to see if Indy can identify anything. Of particular note is the “metal thing” at the bottom of the screen – it’s a portable generator, which is hooked up to some lights. To turn it on, feel around the generator for a “little metal thing”, which is the generator’s on/off switch. Then simply push the switch to turn the lights on.
Look at the painting to your left. The round shape the two figures are tossing around looks suspicious to Indy. There’s more to this painting than it seems. Specifically, that round object is a button. Push it to open up a secret compartment. There’s a Sunstone inside!
This Sunstone is one of the three stone disks you need to obtain. As the Lost Dialogue will tell you, it alone is enough to open doors at various outposts, and you’re standing in one right now.
First, though: some item collection. Pick up the objects you see on the table: the wooden peg and the clay jar (with a bead of orichalcum inside!). There’s a crumbling wall to the right. Something’s definitely behind it, but you’ll need to remove the rock first, by picking up the ship rib near the entrance, then using it on the wall. The mural is a map of Crete with a hole in the middle. Indy will note there’s a space for the Sunstone on the mural, but nothing to hold it in place – use the peg with the mural, then use the Sunstone with the peg.
Looking at the Sunstone now will show you a closeup. You need to correctly align one of the stone’s symbols with the horns engraved at the top-center of the screen. The third paper-clipped page of the Lost Dialogue will tell you the right combination. Hit the peg in the center once you think you’ve gotten it right; if you were, another door will open nearby. Pick up the Sunstone and head through it.
You are quickly confronted by Rolf, the Nazi who was shooting at you earlier. You need to deal with him, but he’s got a gun pointed at you and won’t let you move. You need to disarm him first, by using your whip with him. (Note: believe it or not, there is a time limit here, though an extremely lenient one. If you don’t disarm him within 15 minutes, Rolf will shoot Indy.) Punch him out, and then it’s off to Crete!
You can’t use the truck, but have Indy look at the ladder to the left – it leads to the observation balloon. The balloon controls are quite simple: vent hydrogen to descend, and drop the balloon’s ballast to ascend. (Be aware that both of these actions will also alter the direction you go in, and that your speed is dependent upon your altitude.) To proceed, just move north over the ocean and off the map.
The balloon has carried Indy to Crete, and it isn’t going to go any farther. There’s a pedestal to the far right of the area, but setting just the Sunstone won’t get you anywhere. Because Crete is the site of the Greater Colony, you’ll also need to find and correctly set a Moonstone as well. The path to the left of the area (right by the balloon) will take you to yet another dig site. This one really is abandoned – promise.
There’s a Moonstone buried somewhere in this area, and you’re going to have to solve quite the puzzle to get to it. Before you do anything, however, go up onto the bridge and head all the way to the bottom-left of the area, where a surveyor’s transit rests on some flat rubble. Pick up the transit and head back to where you entered the area.
The next step is to search the rooms for clues. Most rooms only have empty pots in them (if that), but one particular room has an unusual mural. A bull’s head and tail are at the bottom, and a pair of horns are in the middle. Straight lines are drawn from the head and tail through the left and right horns, respectively, converging on an upper figure that looks suspiciously like a stone disk…
Exit the room. By now you might have noticed there are quite a few stones around the area that you can interact with. Try pushing as many as you can find; most of them won’t move, but two of them will reveal the statues of a bull’s head and tail! The huge horn-shaped structure in the middle of the site is a dead ringer for the horns in the mural – can you figure out the rest?

To get the Moonstone, put the transit on the bull’s head statue, use the transit, and line up your view with the left horn. Indy should say as much. If he doesn’t, fine-tune your view using the two smaller buttons. Once the left horn is correctly identified through the transit, an imaginary dotted line will be drawn. Set up the transit on the tail statue, and repeat the process with the right horn. Another line will be drawn, but this one will stop where the two lines meet. Use your ship rib on this spot to dig up the Moonstone.
Head back to the pedestal. It’s on the right side of the screen where Indy first landed on the island, near the docks. Place the Sunstone on it, then the Moonstone. The Sunstone should be set exactly the same way it was in Algiers. Remember to look at the third paperclipped page of the Lost Dialogue to see which way to set the Moonstone. Refer to the Lost Dialogue section if you’re having trouble with either.
A door opens in the nearby ruins once you get it right… and out comes trouble. Klaus isn’t too hard to beat in a fair fight, but the sucker-punch option is always there if you need it.
You would be wise to suspect Klaus was not alone in this foreboding maze. Many of Kerner’s men are holed up deeper inside. You won’t get to them for a while, but when you do, it’s going to be fight after fight. If you’re not one for sucker-punching, good luck. This section of the guide will cover everything in the labyrinth before that part.
There are three busts of various gods sitting on a scale-like device. You’ll need all three for a section later on, but the door closes if you pick up the third. To proceed into the Labyrinth with all three in your possession, pick up two of the busts, head into the next room, and use your whip with the bust on the other side. Be warned: this will effectively lock you inside, and the only other way out is through a lot of Nazis. First things first, though…
There are quite a few dead ends in this place. Head through the circular passage in the top-center, then into the one on the left. As you might suspect, this is the scale where the three busts go. You can put them there if you want, but for now head into the left door at the top of the stairs; it’s the door just adjacent to the one you entered from. You should be in a room with a big minotaur statue. Note that the floor below it dips slightly when you walk on it. If the platform had some extra weight, you might be able to ride it down to wherever it goes. To do so, use your whip with the minotaur head.
Ride the platform down. Poor Sternhart. You can read his note if you wish, but be sure to pick up his walking staff – it’ll be useful shortly. You’ll need to find a way back up, unless you want to end up like him. Do so by examining the nearby waterfall – there’s a chain there that holds the elevator’s counterweight. Simply use the chain (right click!) to go back up. Go back through the door on your left; be careful not to step on the platform and ride back down in the process!
If you haven’t done so already, place all three busts on the shelf to open the door. In the following room, take the upper passage and you’ll eventually find a room with a gold box on the other end of what appears to be another elevator shaft. Notice there’s a wedge (a “chock”) holding the counterweight in place. If you want that gold box – and you do – you’ll need to free the counterweight by using Sternhart’s staff with the chock.
Head back two rooms, and this time take the lower passage. This leads to the bottom of the elevator shaft, where the platform currently rests. There’s a big statue head right by it with an open mouth – it must be the key to operating the elevator. To ride it up, use Sternhart’s staff with the statue’s mouth. There’s another orichalcum bead underneath the box, which Indy also picks up.
Retrace your steps back to the big minotaur statue; this time, enter the door on the right side of the room (again, be careful not to ride the elevator – though if you do, climbing the chain once more will put you on the right side of the room). The middle door of the room beyond is blocked by a stone slab. If you try to push it, Indy will remark that the slab is very heavy, but the area through that door is the only way into the section ahead. The solution is very simple: just keep pushing the stone slab. It’ll move a tiny bit more each time until it finally falls over on the fourth try.
The room beyond is… a dead end? Well, not quite. Take a look around and see if there’s a way to cross. Specifically, there’s a stone outcropping just above and to the right of the middle door. If you look at it, Indy will wonder if it’s mounted securely. Time to find out. To cross to the other side, use your whip with the stone outcropping.
The area beyond is packed with Kerner’s men. You’re on the Fists path, so you know what that means. The next section will cover this second (and very different) half of the Labyrinth.
Head through the middle door first. There are two Nazis talking down the hall. Move a few steps forward and one of them, Hans, will investigate. Watch out if you decide to fight him legitimately; he’s got about twice Indy’s health and can match him in punching power (less so if you use the “tour group” line beforehand). There’s an easier way to get rid of Hans without fighting him, though: hide behind the stone slab before he walks into the room, then push it over onto him when he’s right behind it.
Head down the hallway to find Franz. (Say “Other foreign advisor?” to lower his punch power a little.) Once you deal with him, head past him to come to a room with four more doors. The two leftmost will take you to a room with Otto, an easy fight (ask him why he isn’t at his post to make it even easier). The third of the fourth doors will lead you to Karl (an easy fight), and Kurt (a fighter with about the same stats as Indy – call him a patsy to lower his speed and power). If you manage to take them out, the room beyond Kurt is right above Anton, a tough fighter that you will have to get past. He can be sucker-punched, but there’s a better way to take him down. To effortlessly take Anton out, push the big stalactite above him.
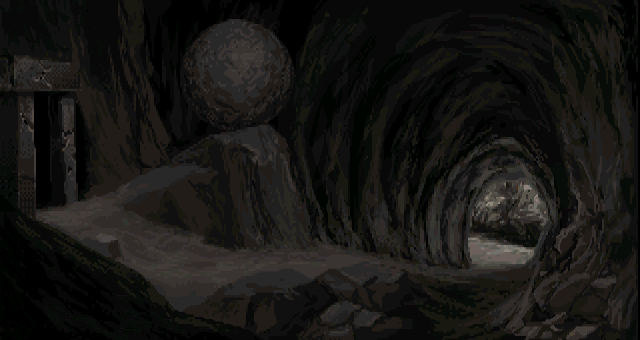
You’ll hear yodeling in the room past Anton. That’s Arnold. He likes to sing. He can also kill you with two full punches. If he decides to fight you, RUN. He will utterly flatten you if you try to fight back, and he’s one of only two enemies in the entire game that can’t be sucker-punched. It is possible to beat him in a fight, but expect to reload your save many, many times. Fortunately, there’s another way. The room next to him contains a big boulder at the top of a slope. Indy can’t push it without some extra leverage, though. To flatten Arnold with the boulder, use the ship rib with the boulder. The boulder will roll right into the doorway you came in from, so you’ll have to retreat from Arnold. Pick up the stalactite that you used to take out Anton (if not, go up to the stalactite past Karl and Kurt, and push it down), and use it on the boulder from the other side.
Whichever way you used to dispose of Arnold, look at him afterwards to search him. He has a couple of orichalcum beads, and… an amber fish on a string? If you use the amber fish, it’ll point towards Indy. (Read the Lost Dialogue’s fourth paper-clipped page to see why: amber is an orichalcum detector.) Unfortunately, it’s only detecting Indy’s orichalcum beads, making it rather useless right now. There’s a way to hide your beads from the detector, though: put the beads in the gold box, then close it. Now use the amber fish. If it doesn’t point anywhere, retrace your steps. You may have to use the amber fish in quite a few rooms you were in before; in particular, try it in the rooms Anton and Otto were in. When the fish points downward, yell “Hey, down there!” into the big pit. It’s Sophia! The Nazis apparently left her down there, but her necklace had enough orichalcum residue for the detector to pick up. Get Sophia out of the pit by using your whip with it. Not as good as a rope, but it gets the job done regardless.
Sophia has the Worldstone with her, which she gives to you. The room Arnold was guarding will require you to use it. Head over there and place all three stones on the central pedestal. Read up, as always, on the third paperclipped page of the Lost Dialogue to see how the Worldstone should be aligned (naturally, the Sunstone and Moonstone should be set exactly the same way as before, when you first opened the Labyrinth). Get it right, and a door will open to the Labyrinth’s exit – and a stone column pointing the way to your last stop before Atlantis.
The captain of the salvage boat is willing to take you into the sea above the Lost City, but there are two problems. One: you need to figure out exactly where that is, so you can give the captain directions. Two: the captain’s only diving suit is punctured, and needs repair before Indy can use it to reach the bottom of the sea. We’ll begin with the latter problem. You won’t find what you need to repair the suit here at the docks, so have Indy leave the area to the left.
Sophia won’t follow Indy into the wilderness, but that’s all right – you won’t be gone long. There is a gap, a notch, and a cleft in the mountains ahead. One of these passages (it’s random every game) will take you to the remnants of a small dig site. There’s a truck parked here with a bad tire, as well as a tire repair kit. That could be just the thing. Pick it up and head back to the docks.
Your other task was to find out where to direct the salvage boat. The answer to this requires a little thinking, but is fairly simple. The ever-useful third page of the Lost Dialogue will tell you most of what you need. Read the part about Atlantis founding two colonies, and remember three things:
As an example: if the Lost Dialogue says the Lesser Colony was 260 miles northwest of Atlantis, then you should tell the captain to go 26 miles southeast. Make sense?
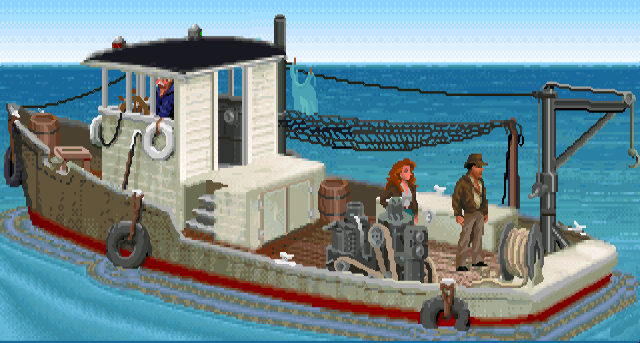
Open up the big storage locker, and use the tire repair kit with the punctured diving suit inside. It works well enough; now it just needs some air. Use the air hose with the suit to connect the two, then use the air compressor switch (it won’t work if you simply try to use the compressor itself) to start filling up the suit. Once that’s done, simply use the suit to put it on. Indy can’t move too well in the diving suit, so you’ll now briefly control Sophia. All she needs to do is use the boat’s hook with Indy to lower him into the water.
(…) And right on cue, here comes Kerner’s sub. Doesn’t help that the salvage boat captain has been working with him the whole time. Whoops. Kerner captures Sophia and severs Indy’s air hose, dropping him helplessly to the sea floor.

You have three minutes to find the entrance to Atlantis before Indy runs out of air. There are seven caves to try: a group of three to the right, three in the middle, and a single one far to the left. Fortunately, Indy can walk along the sea floor at a fairly decent pace; you’ll more than likely spend around thirty seconds to a minute looking, depending on how lucky you are.
Thankful to be out of the wet suit at last, Indy finds himself in a dark room – an airlock with enough pressure to keep the Mediterranean from flooding the place. He’ll soon find it’s hardly Atlantis’s only surprise…
No matter which Path you chose, they all converge here. The Nazis have beaten you to the Lost City, and are scouring its ruins thoroughly towards an unspeakable power that lies at the center of the doomed metropolis. If Indy doesn’t stop them here, the world will be under their heel forever…
This first room is very dark; you’ll have to feel your way around again, just like at the dig site. You can’t get to the right side of the room – it’s elevated quite a bit relative to where you are. Feel around for a “wooden thing” below the airlock’s entrance. When you find it, Indy will note that it’s a ladder. Pick it up and use it on the rubble to reach the elevated area. Feel around up here to find a metal box. If you open it, you’ll find a metal rod inside it. To restore light to the area, feed the wand an orichalcum bead.
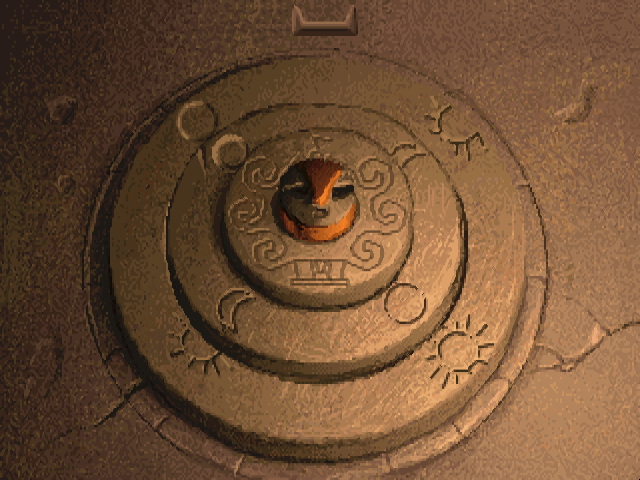
There’s a spindle on the bottom of the bull statue to the right of the door. Because this is Atlantis, you’re obviously going to need all three locking stones. You may be surprised to find, however, that the usual combination won’t work. What gives?
Take another look at the third page of the Lost Dialogue. It’s helped Indy so many times before – and as it happens, it has one last cryptic piece of information for you. The last sentence on the page tells you that the final entrance to the city (and, yep, that’s this one) “yielded only to contrary minds”. What sort of combination would best reflect that?
To access Atlantis, set the locking stones to the usual combination, but align them with the bottom instead of the top (i.e., turn them all around 180 degrees). The mouth of the statue will then open; feed it an orichalcum bead to open the doors.
Be sure to pick up the ladder once you’re done! You’ll need it for two other things later.
This is the largest of the three rings that make up Atlantis, spanning four screens (which I’ll refer to as “quadrants”). Nazi guards are patrolling the area; if you run into one, you’ll have the option to fight or flee. It’s recommended to fight at least one; the first guard you fight will have some rations on him, which can be useful shortly. For those looking to max out their playthrough score, you’ll need to win a fair fight against one guard in each quadrant.
Notice the slightly-darker areas on the map, as well as anything else marked with a “?” when you mouse over them. Some of these rooms are just that: empty and unremarkable. Many of them, however, contain grates that link – randomly, of course – to other rooms. Go into every room, and through every grate, to see where you end up; there’s a section of rooms in the northeast quadrant that can’t be accessed any other way.
Here’s a list of major rooms you should find in the Outer Ring, as well as what you can do in them:
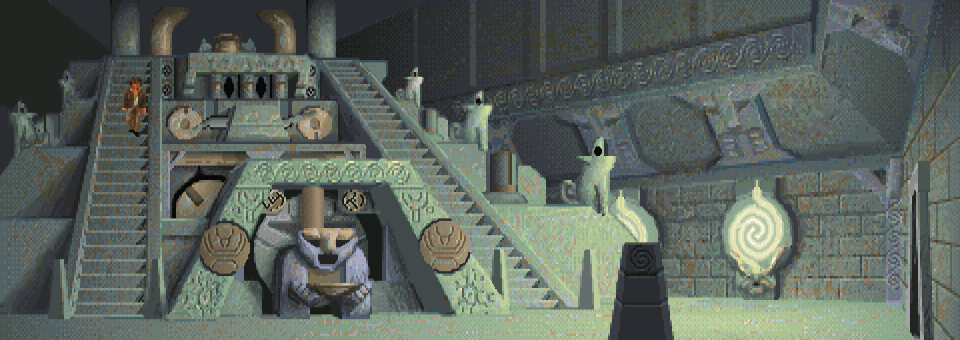 The Machine Room – A big room containing a large pyramid-like machine. It isn’t operational at the moment, but fixing it is a relatively simple matter once you’ve searched around for some equipment. To repair the machine, use the bronze spoked wheel, found in one of the rooms (usually, it’s one of the rooms you can only access by crawling through the various grate tunnels), on the empty spot to the right of the big statue. You can manufacture some more orichalcum beads here by pouring a cup of lava into the machine’s topmost funnel. This isn’t just for show, either – you will have to do this at least once to have enough beads to complete the game’s remaining puzzles. For most players trying to figure things out on their own, I recommend making at least two batches.
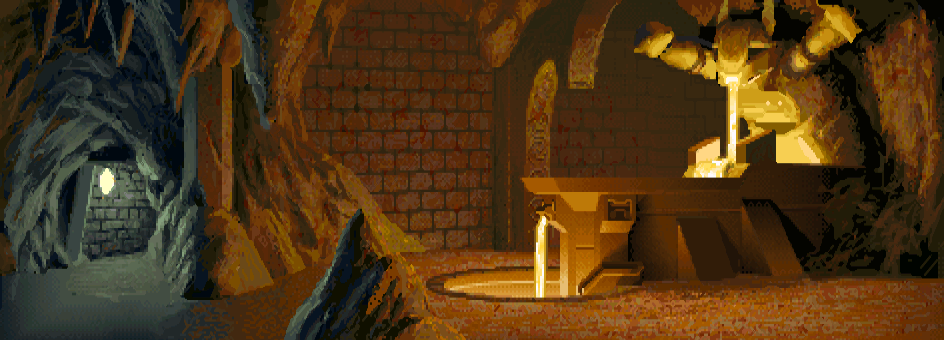 The Lava Room – A side room containing an imposing lava-spewing statue, which flows into a secondary pool. One statue head appears to be missing. If you have the stone cup (see Statue Room, below) as well as the statue head (found in another random room), you can fill the cup with lava by placing it on the pedestal, then placing the statue head in the slot beneath the big fountain. Trying to collect lava using the clay jar or porcelain mug will destroy them.
 The Sentry Room – This room separates you from getting to the prison and the Middle Ring (how the Nazis got past it remains something of a mystery). You’ll need to clear the water before you can open the doors. To do that, find an eel figurine in a random room (you might have to go through a grate to reach it). Once in the sentry room, feed the eel statue a bead.
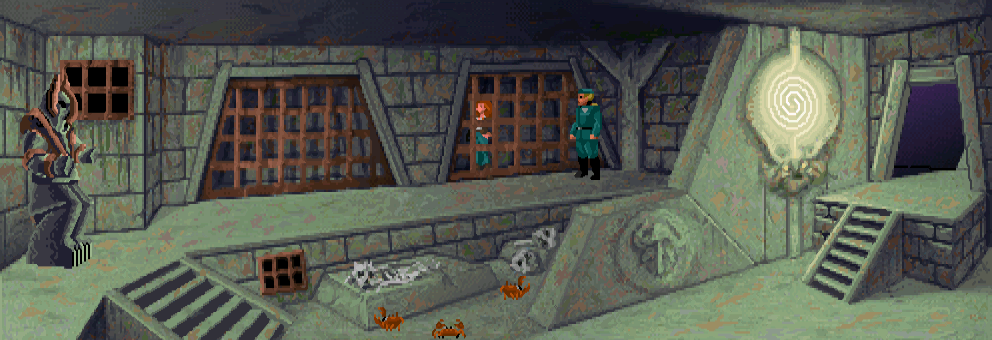
You can’t free Sophia just yet. If you pick up the heavy cage door, Sophia will be too afraid to go out from under it. You’ll need to find something further within Atlantis to brace the door. Right now you have no choice but to leave her. Whether or not you come back later to save her is your choice, and will affect the game’s ending.
Before proceeding into the canals, make sure you have the following:
There’s a huge octopus between you and the crab-like raft on the other side of the canal. You’ll need to get rid of him somehow. To do that, throw the trapped crab into the canal.
You can now swim to the raft. It doesn’t seem to be working… or is it simply out of power? To get it running again, put an orichalcum bead into its mouth. Now you just need to find a way to get those gates open. If you look closely, you can see there are spindles below the lights above each gate. All you need to do here is to use one of your locking stones with the gate – no combination is needed. The canal is comprised of six segments; the further you are from this room, the smaller the required stone must be. Thus: if you want to open all six gates, just go in either direction and use the Sunstone, Moonstone, Worldstone, Worldstone, Moonstone, and Sunstone.
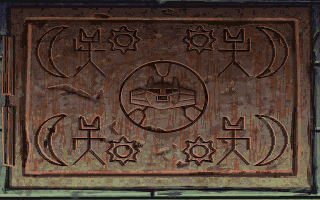
While you’re traveling down the canal, you should eventually come to a screen with a staircase on the right side. Go up there to find a room with a crescent-shaped gear. Pick this up too. You may have noticed it’s in some sort of cupboard. Close it and look at it to find a rather interesting pattern, which I’ve screencapped here. Pay close attention to it.
There’s an archway at the far end of the canal. Go through to find a room with a closed door, and a big robot on the right. The robot was clearly once used to get the door open, but it’s in bad shape right now. Get up to the robot’s breastplate by using your ladder (you do still have that, right?), and open it up.

As the design in the center of the cupboard instructed, place the bronze wheel onto the center four pegs, then place the robot part on top of it. The four crescent moons on the cupboard symbolize the crescent-shaped gear, which can be placed on either the left two or right two pegs to move the robot’s left or right arm, respectively. Because the robot’s left arm can no longer move, you will need to place the crescent-shaped gear on the rightmost two pegs.
You have two components remaining: the small bronze gear and your orichalcum beads.
(I highly advise making a save here; it’s possible to easily run through your remaining stock of beads if you don’t know what you’re doing, and it’s a long way back to the Machine Room…)
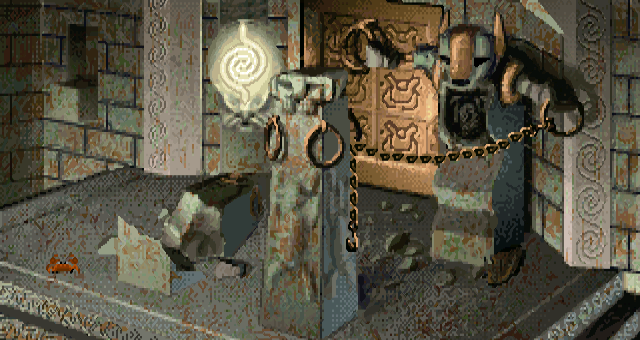
Your goal here is to open the door using the only arm of the robot that still works. Naturally, this isn’t the arm that would normally open the door, so you’ll have to get creative. There’s a sturdy chain on a nearby pillar, but it isn’t quite long enough to connect the two arms together… yet. To open the door, use the chain with the robot’s working arm. Move the arm forward by placing the small bronze gear onto the upper-left peg, then feeding an orichalcum bead into the center component. The arm will move forward, giving the chain just enough slack for Indy to attach it to the immobile arm. Once both arms are connected with the chain, place the bronze gear on the lower-left peg and feed the robot one more bead.
The door comes crashing down after this. Without spoiling too much, I will tell you that it is now possible to rescue Sophia (and thus get the better ending). To free her, check the ground in this room to find a hinge pin from the destroyed door. Head back to Sophia and give her the pin through the cell door. Open the cell’s grate, and tell her you’ve got a plan: to brace the door with the pin. Be sure to retrieve the pin afterwards by opening the cage door a little.
The remainder of the walkthrough will assume that you freed Sophia.
If you look at Sophia’s necklace, you’ll notice its eyes are slowly pulsing with an ominous yellow glow. As you head through the canals together and past the door at the far end, she will start acting very strangely, occasionally speaking in a voice that clearly isn’t hers. She walks away on her own, though probably not of her own will. Go down the hall, and “Sophia” will beckon you through the door. On the other side, things take a turn for the scary.

In a large hall filled with the skeletons of horribly mutilated men, Nur-Ab-Sal speaks through Sophia, welcoming you to his “humble abode”. Talking to him (them?) won’t get you anywhere, though it can give you some clues – namely, that Sophia’s necklace is acting as the catalyst for her possession. Sure enough, looking at it will reveal the eyes are now pulsing red.
It’s possible to leave Sophia here, although that will also result in a bad ending later on. You can save her, but first you’ve got to get rid of that necklace. To free Sophia of her possession, look at the necklace and feed it an orichalcum bead. The necklace will contort into a more sinister face and become extremely hot. Sophia will hold it up in pain, but Nur-Ab-Sal still won’t let her release it. Before it cools off, use your gold box with it to be rid of the Atlantean god-king for good. Afterwards, be sure to search around the room for anything that might be useful. The remainder of the walkthrough will assume that you once again freed Sophia.
Head further down the hall. It seems this gigantic machine is the only way to get into the Inner Ring, so you’d better find out how to get it working. You can power it up by placing an orichalcum bead in the “mouth” on the control panel, but you’ll need to do more than that. There are three lever slots left of the mouth, and all the levers are missing. There are two objects you can use as levers, both found nearby. They are the hinge pin, found in the wreckage of the door the robot tore down, and a scepter found at the far-left end of the room where Sophia was possessed.
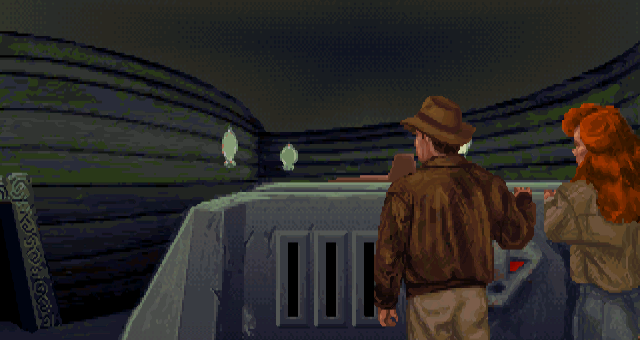
Now that you have the levers, you need to know the correct way to position them. The controls for the machine are very close to it. There’s one diagram just outside the room, and another to the left of the machine on the floor. The former diagram shows you how to start the machine; the latter will instruct the machine to dig through to the inner ring. Each diagram is a 3x3 grid representing the three lever slots; the two bigger dots show you the correct placement for each lever.
Memorize the pattern outside the room first, then climb up and set the two levers to the pattern. Now make a mental note of the diagram on the floor. When you’re ready, feed an orichalcum bead into the mouth of the machine. During the ride, match the levers to the floor pattern to make the machine bore through to the innermost section of Atlantis.

On the other side of the wall, the machine falls a mile below into an immense pool of lava. Indy and Sophia thankfully jumped off at the last second, but they are still far from safe. Their greatest challenge awaits in the fiery heart of Atlantis, a place where man once attempted to ascend to the realm of gods…
A large maze of doors and passages spans the perimeter of the ring. The maze can be frustrating, so if you’re not one for trial and error, refer to the map below to make your way through the maze. (Click it for a larger version if you need to.) While doing so, keep an eye out for anything that looks like it might be important to remember later on…
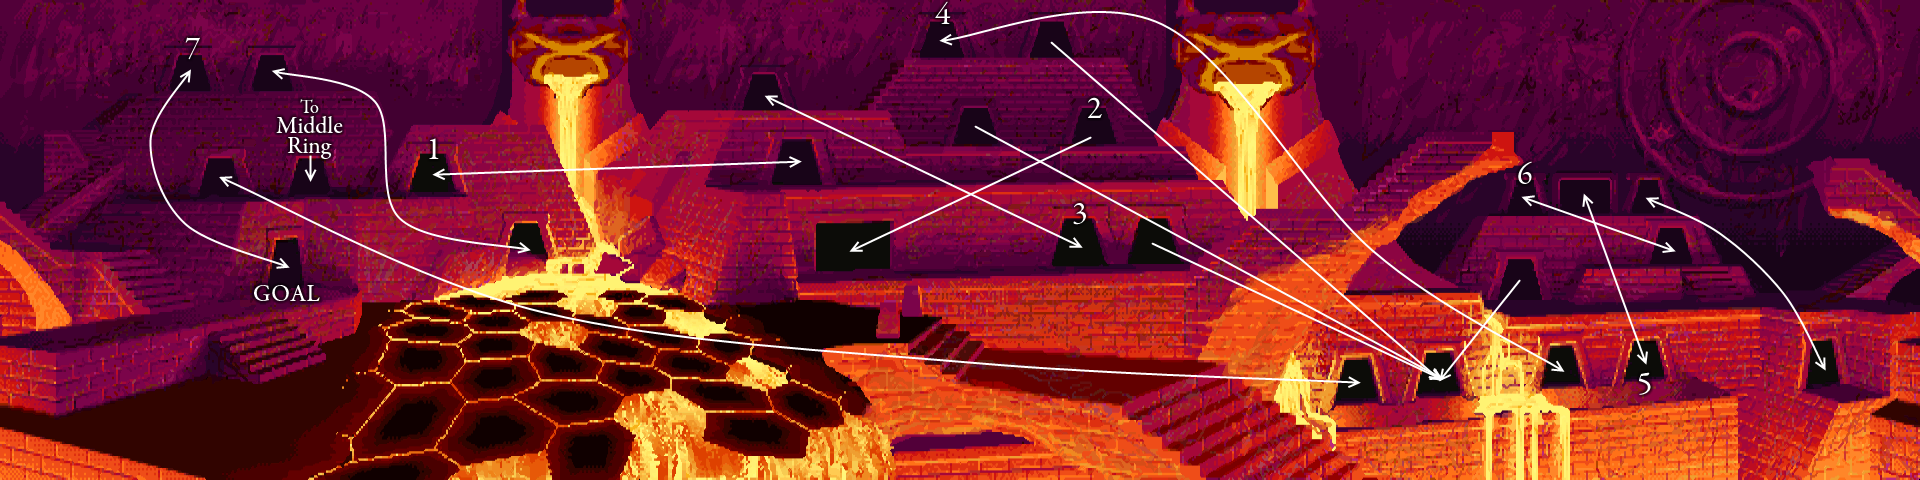
As you can see, there are a lot of dead-ends and one-way drops; four of them even lead to the same door. The numbers on the map above show the correct sequence of doors to enter to solve the maze. (To go from door 6 to 7, use the staircase to the right; the map is a panorama that loops around on itself.)
Save once you’ve reached the end of the maze – this next part is very dangerous, even for experienced players. The only way forward is to cross a series of lava tiles. There are a few rules to this puzzle:

After untold centuries and the disaster that sunk the city, the imposing machine at the very center of Atlantis is still active, replete with lights and mechanisms that lend it a menacing beauty.
If you have not yet rescued Sophia (from either the dungeon or her possession), this is your last chance to go back and do those things. It’s quite a hike from here, but you still haven’t passed the point of no return.
Ready to go? Head on inside. Save your game if you haven’t – as your intuition might tell you, you’re about to enter an extremely perilous situation, one befitting the climax of any good Indiana Jones story.
The room at the heart of Atlantis is eerily quiet. There’s a spindle for the locking stones near the center, so go ahead and set all three on the pedestal one last time. You’ll quickly find, however, that the usual combination doesn’t work, nor does the “contrary” combo you used to get into the Outer Ring.
There’s a cryptic hint in the Lost Dialogue that could help you out. Go to the final paperclipped page, which is almost entirely dedicated to the place you’re in right now. Specifically, take a look at the sentence that describes how this machine was used “at times when the celestial spheres were well-aligned”. The phrase “celestial spheres” surely refers to the three locking stones. It stands to reason that a machine this big and important would have some sort of special combination…
To correctly set the locking stones and activate the Colossus, align the stones to the huge pattern that was engraved on the walls of the Inner Ring’s door maze. This pattern is randomized each game, and tells you where to align the Noon Sun, Full Moon, and Volcano. (You can see an example above, on the right side of the door maze map.) If you didn’t see the pattern, or forgot it, you’ll have to re-cross the lava tiles and backtrack through the door maze a bit to get to a position where the pattern is visible again.
As the machine hums to life, Kerner and Ubermann make themselves known, along with several armed guards. The Nazis have been manufacturing enough orichalcum to send the Third Reich to victory in the coming war – and not, as Indy suspects, by using the metal to create bombs. They will use the Colossus to transform into gods, and use their unstoppable power to rule the entire world forever after.
It quickly becomes clear, however, that Ubermann doesn’t have plans for godhood for anyone but himself. (He doesn’t think Kerner is “prepared” for it, but it’s heavily implied he wants to rule unchallenged.) Kerner will shortly object to this for similar reasons as Ubermann – he walks onto the central platform and demands Ubermann activate the machine. Before he can, Indy interrupts and reminds Kerner about Plato’s tenfold error. Instead of ten beads, Kerner orders Ubermann to use only one.
The machine starts, and it’s revealed to work almost exactly as you thought. The machine transfigures Kerner into an impish horned creature. Horrified with his new self, Kerner jumps off into the lava below… and then Ubermann orders Indy onto the platform.
This last section is a dialogue with Ubermann. Be warned that many choices here will result in Ubermann activating the machine on Indy, which is Game Over no matter the outcome. The key to the conversation is to never tell Ubermann (or even imply to him) how many beads he should feed into the machine, or that they should just get it all over with. It’s okay to bring up Plato’s tenfold error again to stall for time, but never give him a number or consent to activating the machine. Eventually, a conversation option will turn up.
Tell him: “For your sake, I hope this doesn’t work”.
He’ll ask you why not.
Say: “Once I’m a god, I’m sending you straight to hell”.
Losing patience, he protests he’s offering you immortality.
Lastly: “Ever hear the term ‘angry god’? Wait ’till you see me!”
At this, Ubermann considers the possibility that Jones has been playing him, so that he’ll intentionally go first. Afraid of what Indy might do to the Nazis should he become a god, Ubermann orders Indy off the platform, throws one hundred beads into the machine and steps into the center. The colossus transforms him into a glowing horned specter, which flies around the room uncontrollably before exploding in a shriek of agony.
The energy used in transforming Ubermann triggers a violent chain reaction; the whole place is coming apart. Indy (and Sophia, if she was rescued) narrowly escape the final destruction of the Lost City, and pilot the Nazis’ U-boat out of the airlock just before a volcanic eruption annihilates the whole place, piercing the surface of the Mediterranean… and sinking beneath it just as quickly, with the sun not far behind.
Congratulations on beating the game! If this is your first or second time through, try going down a Path you haven’t experienced yet!
What follows is a list of all actions in the game that give you IQ Points, as well as the number of points they give you. (See the final IQ Points section for a list of totals across all acts.)

Indy Quotient (IQ) Points are a representation of your accomplishments in the game. At any time (after the game’s prologue) in which you have movement control over Indy, press I to toggle the IQ Points display over your inventory. This panel tells you three things: what path you’re currently on, the amount of IQ Points you’ve earned in your current playthrough, and the total number of IQ Points earned across all of your saved games.
There are a total of 1,000 IQ Points to be earned. You’ll earn the majority of them simply by solving puzzles needed to progress the story, but a few of them are earned by completing optional objectives, or by completing required objectives in an alternate way. Still others are earned by winning fights, a few of which are incredibly difficult. In general, more points are awarded for more difficult tasks (or for progressing to more dramatic points in the story). You’ll have to play through the game many times to earn them all – at least twice for each of the three paths.
There is absolutely no reward whatsoever for earning any, or all, of the points – other than bragging rights, of course. An Indy Quotient of 1,000 means you’ve seen and done literally every significant thing you can possibly do in the game, including knocking out the toughest foes in the game in a legitimate fight (remember that no IQ Points will be earned for any fights ended with a sucker-punch!), as well as a few other crazy optional feats.
| Action | IQ |
|---|---|
| Go to New York | 2 |
| Convince Biff to let you in | 6 |
| Knock Biff out | 6 |
| Use the fire escape | 6 |
| Distract the stagehand | 5 |
| Get Sophia’s attention | 4 |

| Action | IQ |
|---|---|
| Go to Iceland | 3 |
| Get info about Sternhart and Costa from Heimdall | 3 |
| Get anaconda off the tree | 6 |
| Cross the chasm | 2 |
| Answer Sternhart correctly and gain access to temple | 7 |
| Distract Sternhart and obtain the kerosene lamp | 4 |
| Pick up the spiral design | 5 |
| Open the Atlantean King’s tomb | 4 |
| Unthaw and obtain eel statue | 5 |
| Convince Costa to make a trade | 3 |
| Obtain the collection name from Costa | 5 |
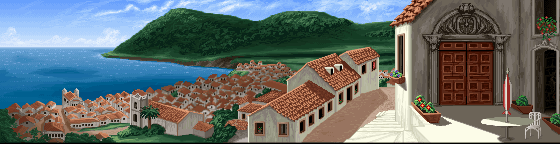
| Action | IQ |
|---|---|
| Find a way to move the totem pole | 4 |
| Unscrew backside of fallen bookshelf | 4 |
| Find a way to climb back up the coal chute | 4 |
| Dislodge the Dialogue from below | 4 |
| Obtain Plato’s Lost Dialogue | 4 |
| Choose a path | 4 |
| Action | IQ |
|---|---|
| Find Trottier (All) | 3 |
| Get Trottier to attend seance (Team) | 9 |
| Obtain the spooky mask (Team) | 2 |
| Correctly guess number of fingers Trottier’s holding up (Team) | 8 |
| Scare Trottier away from seance (Team) | 12 |
| Complete the Monte Carlo car chase (Wits) | 8 |
| Retrieve Sunstone from gutter (Wits) | 10 |
| Action | IQ |
|---|---|
| Obtain the bloodstained knife (Team) | 9 |
| Obtain camels from Omar (Team) | 3 |
| Obtain food for beggar (Team) | 7 |
| Obtain balloon ticket (Team) | 7 |
| Convince Paul to go to Omar’s house (Wits, Fists) | 3 |
| Convince Paul to wear the red fez (Wits) | 2 |
| Follow Paul to Omar’s house after giving him the fez (Wits, Fists) | 5 |
| Follow Paul to Omar’s house w/o giving him the fez (Wits) | 10 |
| Trap Omar in his closet (Wits) | 8 |
| Knock out Nazi threatening Omar (Fists) | 4 |
| Knock out Nazi at Omar’s using the pot above him (Fists) | 8 |
| Launch balloon (Team) | 8 |
| Bribe a guard with one of Omar’s statues (Wits) | 4 |
| Knock out a Nazi guard in the desert (Fists) | 4 |
| Find dig site using balloon (Team) | 13 |
| Bribe a guard using one of Omar’s statues (Wits) | 4 |
| Ride camel to dig site (Wits, Fists) | 10 |
| Action | IQ |
|---|---|
| Start the generator (All) | 6 |
| Reveal the mural (Team, Fists) | 4 |
| Open the secret door (Team, Fists) | 7 |
| Open the secret cache (Wits, Fists) | 5 |
| Disarm the Nazi at the Dig Site (Fists) | 7 |
| Knock out Nazi at dig site (Fists) | 7 |
| Get the truck running (Team) | 6 |
| Jump-start the truck using statue (Wits) | 7 |
| Fly to Crete using balloon (Fists) | 4 |
| Action | IQ |
|---|---|
| Arrive at Thera (Wits, Fists) | 2 |
| Solve locking stone puzzle (Wits) | 10 |
| Escape the dig site (Wits) | 6 |
| Obtain balloon basket (Wits) | 4 |
| Obtain fish net (Wits) | 1 |
| Obtain balloon bladder (Wits) | 4 |
| Put the balloon together (Wits) | 8 |
| Inflate the balloon (Wits) | 10 |
| Land balloon on submarine (Wits) | 10 |
| Hire a salvage boat (Fists) | 3 |
| Direct the boat to the correct location (Fists) | 10 |
| Assemble a diving suit (Fists) | 5 |
| Find Atlantis airlock before running out of air (Fists) | 10 |
| Action | IQ |
|---|---|
| Find Moonstone in Crete’s dig site (Team, Fists) | 10 |
| Gain access to the Labyrinth (All) | 9 |
| Get all three busts on the other side of the gate (All) | 6 |
| Open gate using the three busts (All) | 2 |
| Descend Labyrinth elevator with Sophia (Team) | 3 |
| Descend elevator using statue head (All) | 5 |
| Ascend elevator shaft using waterfall chain (All) | 5 |
| Ascend labyrinth elevator using staff (All) | 6 |
| Boost Sophia through hole (Team) | 7 |
| Convince Sophia to put necklace in gold box (Team) | 10 |
| Activate the microtaur using the statue (Wits) | 8 |
| Make a crude orichalcum detector (Wits) | 10 |
| Find the secret wall (Team) | 10 |
| Reveal the secret wall (Team) | 7 |
| Find the secret wall (Wits) | 9 |
| Reveal the secret wall (Wits) | 4 |
| Activate map room mechanism (All) | 10 |
| Push the door open (Fists) | 1 |
| Cross the pit (Fists) | 5 |
| Knock out Klaus (Fists) | 4 |
| Knock out Hans (Fists) | 6 |
| Kill Hans with stone slab (Fists) | 10 |
| Knock out Franz (Fists) | 5 |
| Knock out Otto (Fists) | 4 |
| Knock out Kurt (Fists) | 3 |
| Knock out Karl (Fists) | 3 |
| Knock out Anton (Fists) | 7 |
| Kill Anton with stalactite (Fists) | 9 |
| Knock out Arnold (Fists) | 10 |
| Kill Arnold with boulder (Fists) | 9 |
| Search Arnold (Fists) | 3 |
| Find pit Sophia is trapped in (Fists) | 10 |
| Pull Sophia out of the pit (Fists) | 6 |
| Escape the labyrinth (Team) | 5 |
| Activate rapid transit system to Atlantis (Wits) | 7 |
| Action | IQ |
|---|---|
| Knock out sub captain (Team) | 3 |
| Run away from sub captain (Team) | 1 |
| Order sub crew elsewhere (Team) | 3 |
| Give sandwich to guard (Wits) | 2 |
| Tempt guard with sandwich (Wits) | 4 |
| Knock out Nazi guarding Sophia (Team) | 6 |
| Get the locking stones back (Team) | 9 |
| Start a fire onboard the sub (Wits) | 9 |
| Escape sub using torpedo tube (Wits) | 9 |
| Unlock the sub’s steering wheel (Team) | 5 |
| Fix the sub’s depth lever (Team) | 8 |
| Steer sub to airlock (Team) | 15 |
| Action | IQ |
|---|---|
| Find and place the ladder | 7 |
| Obtain the light rod | 7 |
| Restore light to airlock | 3 |
| Solve airlock stone puzzle | 10 |
| Access Outer Ring | 5 |
| KO a guard in northwest Outer Ring | 5 |
| KO a guard in southwest Outer Ring | 5 |
| KO a guard in southeast Outer Ring | 5 |
| KO a guard in northeast Outer Ring | 5 |
| Obtain the bronze gear | 8 |
| Obtain bronze spoked wheel | 10 |
| Obtain robot part | 6 |
| Obtain statue head | 8 |
| Obtain cup | 7 |
| Fill cup with lava | 9 |
| Repair orichalcum factory with bronze wheel | 8 |
| Manufacture some orichalcum | 10 |
| Assemble crab trap from ribcage | 7 |
| Catch crab with trap | 9 |
| Remove the pool of water blocking door | 10 |
| Open the door to the canals | 6 |
| Distract the canal octopus | 10 |
| Power up the canal raft | 7 |
| Open a canal gateway on raft | 7 |
| Obtain the crescent-shaped gear | 6 |
| Access the Middle Ring | 14 |
| Obtain the hinge pin | 5 |
| Obtain the scepter | 5 |
| Kill Fritz using robot | 7 |
| Knock Fritz out | 7 |
| Rescue Sophia from dungeon | 9 |
| Save Sophia from Nur-Ab-Sal | 10 |
| Power up digger machine | 7 |
| Access the Inner Ring | 7 |
| Navigate inner ring door maze | 8 |
| Cross the lava pit | 6 |
| Power up the Colossus | 10 |
| Escape Atlantis | 25 |
Minimum possible IQ: 70
Maximum possible IQ: 94
Total IQ: 100
Notes:
Minimum possible IQ: 234
Maximum possible IQ: 241
Total IQ: 250
Notes:
Minimum possible IQ: 232
Maximum possible IQ: 247
Total IQ: 256
Notes:
Minimum possible IQ: 172 (206 without sucker-punching anyone)
Maximum possible IQ: 230
Total IQ: 256
Notes:
Minimum possible IQ: 254
Maximum possible IQ: 293
Total IQ: 300
Notes:
Minimum possible IQ: 496 (536 without sucker-punching anyone)
Maximum possible IQ: 634
Total IQ: 1,000
Notes:
This is a transcript of Plato’s Lost Dialogue, the Hermocrates, which will also serve as a walkthrough of how to align the locking stones.
[This section is Sternhart’s intro to the text, explaining where he found it and why he doubts it will find as much success as Plato’s other Dialogues. He also mentions the (randomly-chosen) name of the collection he sent the book to, which will serve as a minor clue when searching for it at Barnett College.]
~THE HERMOCRATES~
Now at last I have Plato’s Lost Dialogue translated entirely. The Greek original is lost, so I’ve used the Arabic text I found in an Italian monastery years ago and always thought was a hoax.
Now I wonder… could this remarkable book hold the secret to long-lost Atlantis? Probably not. No one will publish it, that’s certain. The fear of ridicule is too great.
To be safe, I’ve sent a copy to [Ashkenazy / Dunlop / Pearce / Sprague / Ward].
— Charles Sternhart
London, 1922
[This section describes Plato’s tenfold error that complicated the search for Atlantis. Here, Socrates corrects this error by rationalizing that Atlantis would only be only 300 miles away, rather than some immense distance beyond the reach of civilization.]
HERMOCRATES: In shame I hereby do recant the time and place whereof Critias spoke. In rendering Egyptian into Greek he made a tenfold error. Instead of lying 3,000 miles hence, Atlantis may well have been 30,000 miles away. Or perhaps it was less than 300 miles from our own shores. Likewise, it may be that the Lost Kingdom held sway as many as 100,000 years ago, or as few as 1,000.
SOCRATES: If a kingdom arose on Earth beyond anywhere men might travel, then we would never hear of it. We ought to accept the lesser figure.
[This important section describes the colonies of Atlantis, and their distance from the city itself, which you will use on the Fists Path to direct the salvage boat captain. The distances are randomized each game, and are also subject to Plato’s tenfold error. More prominently, however, this page describes the locking stones and their correct combinations, which are also random every time. All known texts and solutions are provided.]
(…) so glorious Atlantis founded two colonies, the Lesser 2?0 miles [northeast/northwest] of the City and the Greater 5?0 miles away [southeast/southwest]. Gates of the kingdom opened only with the aid of special stones.
At many outposts, a Sunstone sufficed…
At the Greater Colony, a Moonstone was also needed…
To approach Atlantis itself, a Worldstone was required as well…
Final entrance yielded only to contrary minds. [To access Atlantis’s Outer Ring, align the stones to the correct combination, but turn them all upside down (180 degrees) before pressing the spindle.]
[This page describes the Atlantean practice of making orichalcum beads, and reveals that devices made of amber can detect the metal.]
(…) and it is said that dwellers in Atlantis had no horses nor any need of them.
Orichalcum, the metal that glittered like fire, this they had instead. They cast it into shiny beads and used them as we do minted coins, paying statues to do their work as if by magic.
When their colonies were failing, wise men carved strange devices out of amber to search for the metal, but only proud Atlantis ever yielded a supply.
SOCRATES: You have called the kingdom wealthy, but surely this is absurd.
[This ominous page serves as a partial insight into both the fall of Atlantis and the workings of the machine through which the Atlantean Kings thought they might achieve godhood.]
(…) as the waters rose around their city, the Kings of Atlantis, one after another, sought to hold off fate.
Knowing mortal men would never rule the sea, they planned a huge colossus, which by use of orichalcum, ten beads at a time, would make them like the gods themselves.
Nur-Ab-Sal was one such king. He it was, say the wise men of Egypt, who first put men in the colossus, making many freaks of nature at times when the celestial spheres were well aligned. [The colossus will only function when the locking stones are set to a special combination shown on the walls of the lava pit maze.]
SOCRATES: This I doubt. We are hearing a child’s tale.
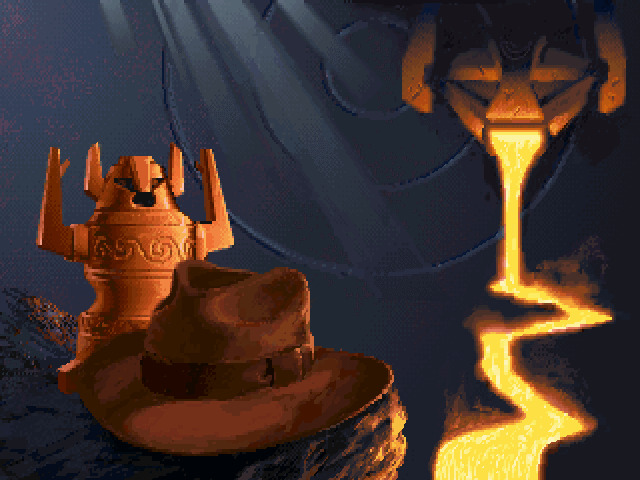
Indy’s quest to stop the Nazis and their plans for Atlantis is a dangerous one, and it might not always end well. If that happens, you’ll be presented with a Game Over screen. Here, a message in the upper left will be displayed, telling you what happened shortly after. Your IQ Points for the current playthrough, as well as your total IQ Points, are also displayed here. After that, you’ll be kicked back to the title screen. (Fortunately, you have been saving often and in multiple slots… right?)
As you probably expect, quite a few of the death messages are grim and gruesome. Some, however, might surprise you. For instance, what if Indy’s death actually prevented the Nazis from finding Atlantis in the first place, or caused them some other inadvertent harm? Some of the death messages are brief explorations on that, instead of telling you Indy’s fate outright.
Still other messages are legitimately funny (as is usually the case with old-school adventure games [tvtropes.org]). Perhaps your killer died a much more pathetic death shortly afterward? It’s certainly possible. If you died by losing a very easy fight, or simply by displaying an extraordinary lack of common sense, a decidedly tongue-in-cheek message just might be in store for you.
On to the list!
[There are no possible deaths before the game splits up into the Paths. Even if you lose the fight against Biff, Indy will just wake up a few minutes later, thankful his opponent wasn’t a Nazi spy. Incidentally, this is the only fight in the game that isn’t a Game Over if you lose. Save often during the Fists path!]
Location: Labyrinth
Requirement: Refuse to give Kerner the stone disks, and call his bluff when he threatens to shoot you.
Death Message: With the stone disks in his possession, Kerner discovered Atlantis and drowned.
Location: Crete – Docked Submarine
Requirement: Intentionally lose the fight against the submarine captain. It only takes a single punch to KO him, and a lot of punches for him to KO you (plus there’s no way to lose any health beforehand), so yes, this has to be done on purpose.
Death Message: Indy’s failure to subdue a sixty-year-old U-boat captain allowed the Nazis to conquer the world.
Location: Submarine
Requirement: Order the sub’s crew right below you using the control tower’s intercom, then climb down. “Uh-oh”, indeed.
Death Message: Because the sailors proved to be reasonably alert, Indy soon found himself in deep, deep water.
Location: Submarine
Requirement: Instead of cluing Sophia in to bash the guard over the head with a bucket, tell him you’re “selling these fine leather jackets” (an Easter Egg-like line from several other LucasArts games).
Death Message: Unfortunately, Sophia’s guard knew a wise guy when he met one.
Location: Submarine
Requirement: After Kerner orders his men to shoot anyone suspicious who comes out of the sub’s hatch, go to the head after making the distraction, change back into Indy’s regular clothes, and exit the submarine via the hatch.
Death Message: Kerner recovered the stone disks and blew himself up tinkering with the orichalcum he found in Atlantis.
Location: Algiers – Omar’s House
Requirement: Get knocked out by Horst.
Death Message: Indy’s savage beating convinced Omar to cooperate with the Nazis. Later he traded Indy’s whip for a clay pot.
Location: Algiers – Desert
Requirement: Get knocked out by a guard on the way to the dig site.
Death Message: After losing the fight, Indy was devoured by vultures and scorpions.
Location: Algiers – Dig Site
Requirement: Fail to disarm Rolf while he has you at gunpoint. (Time limit: 15 minutes.)
Death Message: Indy’s overly reckless behavior won Rolf a medal for bravery.
Location: Algiers – Dig Site
Requirement: Get knocked out by Rolf.
Death Message: Rolf was easily fooled, but not so easily felled.
Location: Crete – Docks
Requirement: Get knocked out by Klaus.
Death Message: Klaus dragged Indy into the Labyrinth, where someday someone will find the bones.
Location: Labyrinth
Requirement: Get knocked out by Hans.
Death Message: Hans turned Indy over to Kerner and was decorated for valor. Indy was shot on the spot.
Location: Labyrinth
Requirement: Get knocked out by Franz.
Death Message: Taking revenge for Hans, Franz hurled Indy into a bottomless pit, where his remains remain to this day.
Location: Labyrinth
Requirement: Get knocked out by Otto.
Death Message: Otto tried to hurl Indy into a bottomless pit, but tripped and fell in himself. No one knows what happened to Indy.
Location: Labyrinth
Requirement: Get knocked out by Karl.
Death Message: Karl summoned his superiors, who shot Indy on sight.
Location: Labyrinth
Requirement: Get knocked out by Kurt.
Death Message: Kurt summoned his superiors, who interrogated Indy, then tortured and shot him. But they never did find Atlantis.
Location: Labyrinth
Requirement: Get knocked out by Anton.
Death Message: After flattening Indy, Anton received a field promotion. Later, he led the charge on Stalingrad.
Location: Labyrinth
Requirement: Get knocked out by Arnold.
Death Message: After flattening Indy, Arnold went on to become a world-famous opera singer.
Location: Mediterranean – Sea Floor
Requirement: Fail to find and enter the Atlantis airlock after Kerner cuts off Indy’s air supply. (Time limit: 3 minutes.)
Death Message: Unfortunately, Indy couldn’t hold his breath as long as Guybrush Threepwood [en.wikipedia.org].
Location: Outer Ring (any quadrant)
Requirement: Lose a fight against any of the patrolling guards.
Death Message: Indy discovered Atlantis, but the Nazis won the race to unearth its secrets.
Location: Outer Ring – Dungeon
Requirement: Lose the fight against Fritz.
Death Message: After defeating Indy, Fritz boxed his way to a gold medal in the 1948 Olympic Games.
Location: Inner Ring – Lava Maze
Requirement: Fall into the lava in the lava tiles puzzle.
Death Message: Indy was swallowed up just moments before discovering the final secret of Atlantis.
Location: Inner Ring – The Colossus
Requirement: Fail to convince Ubermann to test the god machine on himself first.
Death Message: After Indy’s fatal transformation, Atlantis shook itself to pieces, sealing its secrets and the Nazis in molten lava.
The game’s files also contain an unused message, which was too amusing not to post:
Suddenly, Indy forgot everything he knew about handling a bullwhip and flogged himself to death.
SirNinja, thanks for the best and most detailed solution of FoA I’ve ever seen. I have some (really tiny) notices and updates to your text – if you want, you may use them to make your text yet better.
1. “For max IQ, punch Biff out then make your way to the fire escape anyway for 12 points total” – you may also get on Biff’s good side, and next get out from the building and use the fire escape.
2. It is worth adding that such double ways to get into the theater cause Sophia to propose Indy the wits path (so, using the fire escape, made as the second way, is more important).
3. «Sometimes, in places like extremely dark areas, “Pick up” will be replaced with “Touch”.» – not exactly. It is “Look at” which is replaced with “Touch”.
4. “You’ll automatically take a look at the Lost Dialogue when you find it” – yes but not at once. You must bring the Dialogue to your office first. The automatical show of the Dialogue contents takes place during your conversation with Sophia.
5. It seems that some of the foes, especially in the Fists path, have unique features during the fight. For example Anton, the tough guy under the stalactite, doesn’t seem to be as dangerous as he may look. Not being especially good in fighting, I’ve managed to defeat him just by using the high punch (Num 9) during all the fight, without applying any blocks or pauses. This trick does not help much with other Nazis, though. Anyway, each of them may need unique tactic.
Thanks again!
Indiana Jones and the Fate of Atlantis – gra przygodowa wydana w roku 1992 na platformy: Amiga, Mac, PC. Gra posiada własną fabułę, nie bazującą na żadnym z filmów. W 1993 roku grę wydano w wersji CD z mówioną ścieżką dźwiękową. W 2009 roku gra została dołączona jako dodatek do wersji Wii gry Indiana Jones i Berło Królów.
Opis gry
Jest to typowa gra wskaż i kliknij (ang. „Point’n’Click”). Sterowanie odbywa się przy pomocy myszki komputerowej, czyli jest dokładnie takie same, jak w jej prequelu (Indiana Jones and the Last Crusade: The Graphic Adventure). Znacząco polepszono grafikę i uporządkowano menu czynności oraz ekwipunku. Możliwe jest sterowanie dwoma postaciami, Indianą Jonesem, a także jego towarzyszką Sophią Hapgood.
Głównymi przeszkodami, z którymi przyjdzie się zmierzyć graczowi, są rozmaite zagadki logiczne, a także takie, w których liczy się spostrzegawczość.
Gra posiada kilka sposobów jej ukończenia, które różnią się nie tylko wykonywanym zestawem czynności, ale także techniką postępowania. W zależności od tego czy gracz zdecyduje się na ścieżkę z pomocą Sophii, czy bez lub też nastawiając się na siłę mięśni lub siłę umysłu, z takimi zagadkami przyjdzie mu się zmierzyć. Od wyboru ścieżki zależą również pewne przyszłe okoliczności, których gracz doświadczy, jak również zakończenie gry.
Gra została uznana za bardzo dobrą, ze względu na poprawioną grafikę i sterowanie, a także na oryginalną fabułę, długość gry i oczywiście dużą grywalność. Podobnie jak poprzedniczka doczekała się także wersji zręcznościowej: Indiana Jones and the Fate of Atlantis: The Action Game
Opis fabuły
Rok 1939. W przededniu drugiej wojny światowej naziści chcą odnaleźć zaginioną Atlantydę – miasto, które przed wiekami zostało zmiecione z powierzchni Ziemi w tajemniczych okolicznościach. Podobno w ruinach Atlantydy znajduje się potężna broń, dlatego Indiana Jones i Sophia Hapgood, podążają tropem Niemców, by nie dopuścić do jej odnalezienia i wykorzystania przeciwko ludzkości.
Sophia jest w posiadaniu niezwykłego artefaktu – medalionu boga Nur-Ab-Sala. Przy użyciu medalionu oraz kulek z niezwykle cennego metalu, orichalcum, przywołuje ducha Nur-Ab-Sala, który nakierowuje dalsze poszukiwania na Zaginione Dialogi Platona. Indiana i Sophia odnajdują tłumaczenie dialogów, które wskazuje, iż Atlantyda znajdowała się na Morzu Śródziemnym.
A drawn image showing the logo of the game and a horned gargoyle head emanating lava from its mouth. Several scenes from the story are superimposed over the drawing: A camel chase, a uniformed Nazi soldier holding the red-headed Sophia Hapgood who wears a glowing amulet, and the main protagonist Indiana Jones with his fedora and bullwhip.
Indiana Jones and the Fate of Atlantis is a point-and-click adventure game by LucasArts originally released in 1992. Almost a year later, it was reissued on CD-ROM as an enhanced “talkie” edition with full voice acting and digitized sound effects. In 2009, this version was also released as an unlockable extra of the Wii action game Indiana Jones and the Staff of Kings, and as a digitally distributed Steam title. The seventh game to use the script language SCUMM, Fate of Atlantis has the player explore environments and interact with objects and characters by using commands constructed with predetermined verbs. It features three unique paths to select, influencing story development, gameplay and puzzles. The game used an updated SCUMM engine and required a 286-based PC, although it still runs as a real-mode DOS application. The CD talkie version required EMS memory enabled to load the voice data.
The plot is set in the fictional Indiana Jones universe and revolves around the eponymous protagonist’s global search for the legendary sunken city of Atlantis. Sophia Hapgood, an old co-worker of Indiana Jones who gave up her archaeological career to become a psychic, supports him along the journey. The two partners are pursued by the Nazis who seek to use the power of Atlantis for warfare, and serve as the adventure’s antagonists. The story was written by Hal Barwood and Noah Falstein, the game’s designers, who had rejected the original plan to base it on an unused movie script. They came up with the final concept while researching real-world sources for a suitable plot device.
Fate of Atlantis was praised by critics and received several awards for best adventure game of the year. It became a million-unit seller and is widely regarded as a classic of its genre today. Two concepts for a supposed sequel were conceived, but both projects were eventually canceled due to unforeseen problems during development. They were later reworked into two separate Dark Horse Comics series by Lee Marrs and Elaine Lee, respectively.
Fate of Atlantis is based on the SCUMM story system by Ron Gilbert, Aric Wilmunder, Brad P. Taylor, and Vince Lee,[4] thus employing similar gameplay to other point-and-click adventures developed by LucasArts in the 1980s and 1990s.[5] The player explores the game’s static environments while interacting with sprite-based characters and objects; they may use the pointer to construct and give commands with a number of predetermined verbs such as “Pick up”, “Use” and “Talk to”.[6] Conversations with non-playable characters unfold in a series of selectable questions and answers.[7]
Early on, the player is given the choice between three different game modes, each with unique cutscenes, puzzles to solve and locations to visit: the Team Path, the Wits Path, and the Fists Path.[8] In the Team Path, protagonist Indiana Jones is joined by his partner Sophia Hapgood who will provide support throughout the game.[8] The Wits Path features an abundance of complex puzzles, while the Fists Path focuses heavily on action sequences and fist fighting, the latter of which is completely optional in the other two modes.[8] Atypical for LucasArts titles, it is possible for the player character to die at certain points in the game, though dangerous situations were designed to be easily recognizable.[9] A score system, the Indy Quotient points, keeps track of the puzzles solved, the obstacles overcome and the important objects found.[9]
The story of Fate of Atlantis is set in 1939, on the eve of World War II.[10] At the request of a visitor named Mr. Smith, archaeology professor and adventurer Indiana Jones tries to find a small statue in the archives of his workplace Barnett College. After Indy retrieves the horned figurine, Smith uses a key to open it,[11] revealing a sparkling metal bead inside. Smith then pulls out a gun and escapes with the two artifacts, but he loses his coat in the process. The identity card inside reveals “Smith” to be Klaus Kerner, an agent of the Third Reich.[12] Another pocket of the coat holds an old magazine containing an article about an expedition on which Jones collaborated with a young woman named Sophia Hapgood, who has since given up archeology to become a psychic.[13]
Fearing that she might be Kerner’s next target, Indy travels to New York City in order to warn her and to find out more about the mysterious statue.[14] There, he interrupts her lecture on the culture and downfall of Atlantis,[15] and the two return to Sophia’s apartment. They discover that Kerner ransacked her office in search of Atlantean artifacts, but Sophia says that she keeps her most valuable item, her necklace, with her.[16] She owns another of the shiny beads, now identified as the mystical metal orichalcum, and places it in the medallion’s mouth, invoking the spirit of the Atlantean god Nur-Ab-Sal.[17] She explains that a Nazi scientist called Dr. Hans Ubermann is searching for the power of Atlantis to use it as an energy source for warfare.[18]
A video game screenshot showing the two protagonists in the middle of a crowded marketplace. The lower part of the image shows a variety of objects on the right side and a number of verbs such as “Pick up”, “Use” and “Talk to” on the left side. The mouse cursor is pointing at Sophia, making the current command “Talk to Sophia”.
Indiana and Sophia in an Algerian marketplace. Below the scene the game displays the core of the SCUMM system, the verbs and objects that the player may construct commands with.
Sophia then gets a telepathic message from Nur-Ab-Sal, instructing them to find the Lost Dialogue of Plato, the Hermocrates, a book that will guide them to the city.[19] After gathering information, Indy and Sophia eventually find it in a collection of Barnett College.[20] Correcting Plato’s “tenfold error”, a mistranslation from Egyptian to Greek, the document pinpoints the location of Atlantis in the Mediterranean, 300 miles from Greece, instead of 3000 as mentioned in the dialogue Critias.[21][22] It also says that in order to gain access to the Lost City and its colonies, three special stones are required.[23] At this point, the player has to choose between the Team, Wits, or Fists Path, which influences the way the stones are acquired. In all three paths, Sophia gets captured by the Nazis, and Indiana makes his way to the underwater entrance of Atlantis near Thera.[24]
The individual scenarios converge at this point and Jones starts to explore the Lost City. He saves Sophia from a prison, and they make their way to the center of Atlantis, where her medallion guides them to the home of Nur-Ab-Sal. The Atlantean god takes full possession of Sophia[25] and it is only by a trick that Indy rids her of the necklace and destroys it, thus freeing her. Meanwhile, they notice grotesquely deformed bones all over the place. They advance further and eventually reach a large colossus the inhabitants of the city built to transform themselves into gods.
Using ten orichalcum beads at a time would enable them to control the water with the powers they gained, keeping the sea level down to prevent an impending catastrophe.[26] Unknowingly, Indiana starts the machine with the stones, upon which Kerner, Ubermann, and the Nazi troops invade the place and announce their intention to use the machine to become gods. The machine was responsible for creating the mutated skeletons seen earlier, but the Nazis believe that it will work on them due to their Aryan qualities. Ubermann wants to use Jones as a test subject, but Kerner steps onto the platform first, claiming himself to be most suitable for godhood. Just as Ubermann wants to start the machine, Jones mentions Plato’s tenfold error, which convinces Kerner to use one bead instead of ten. He is then turned into a horribly deformed and horned creature, and falls into the lava.[26] Indiana is forced to step on the platform next but threatens Ubermann with eternal damnation once he is a god. Fearing his wrath, Ubermann uses the machine on himself, feeding it one hundred beads. He is turned into a green ethereal being, but his form becomes unstable and he flies apart with an agonized scream.
Three bad endings see one of the protagonists undergo the second transformation if Indiana could not convince Ubermann to use the machine instead, or if Sophia was not freed from her prison or Nur-Ab-Sal’s influence. In the good ending, Atlantis succumbs to the eruption of the still active volcano as the duo flees from the city. The final scene depicts Indiana kissing Sophia on top of the escape submarine, to comfort himself for the lack of evidence for their discovery.[27]
Former film writer and producer Hal Barwood (left) served as the project leader, designed the game and was the principal creator of the storyline and the script; Co-designer Noah Falstein (right) helped write the story and conceived the idea of the three different paths.
At the time a sequel to Indiana Jones and the Last Crusade: The Graphic Adventure was decided, most of the staff of Lucasfilm Games was occupied with other projects such as The Secret of Monkey Island and The Dig.[28][29] Designer Hal Barwood had only created two computer games on his own before, but was put in charge of the project because of his experience as a producer and writer of feature films.[28][29] The company originally wanted him to create a game based on Indiana Jones and the Monkey King/Garden of Life, a rejected script written by Chris Columbus for the third movie[29] that would have seen Indiana looking for Chinese artifacts in Africa.[29][30] However, after reading the script Barwood decided that the idea was substandard, and requested to create an original story for the game instead.[29] Along with co-worker Noah Falstein, he visited the library of George Lucas’ workplace Skywalker Ranch to look for possible plot devices.[29] They eventually decided upon Atlantis when they looked at a diagram in “some cheap coffee-table book on the world’s unsolved mysteries”, which depicted the city as built in three concentric circles.[29]
Writing the story involved extensive research on a plethora of pseudo-scientific books.[31] Inspiration for the mythology in the game, such as the description of the city and the appearance of the metal orichalcum, was primarily drawn from Plato’s dialogues Timaeus and Critias, and from Ignatius Loyola Donnelly’s book Atlantis: The Antediluvian World that revived interest in the myth during the nineteenth century.[28] The magical properties of orichalcum and the Atlantean technology depicted in the game were partly adopted from Russian spiritualist Helena Blavatsky’s publications on the force vril.[28] The giant colossus producing gods was based on a power-concentrating device called “firestone”, formerly described by American psychic Edgar Cayce.[28]
Once Barwood and Falstein completed the rough outline of the story, Barwood wrote the actual script,[32] and the team began to conceive the puzzles and to design the environments.[28] The Atlantean artifacts and architecture devised by lead artist William Eaken were made to resemble those of the Minoan civilization, while the game in turn implies that the Minoans were inspired by Atlantis.[33][34] Barwood intended for the Atlantean art to have an “alien” feel to it, with the machines seemingly operating on as yet unknown physics rather than on magic.[34] The majority of the 256–color backgrounds in the game were mostly mouse-drawn with Deluxe Paint, though roughly ten percent were paintings scanned at the end of the development cycle.[33] As a consequence of regular design changes, the images often had to be revised by the artists.[34] Character animations were fully rotoscoped with video footage of Steve Purcell for Indiana’s and Collette Michaud for Sophia’s motions.[29] The main art team that consisted of Eaken, James Dollar and Avril Harrison was sometimes consulted by Barwood to help out with the more graphical puzzles in the game, such as a broken robot in Atlantis.[33][34]
The addition of three different paths was suggested by Falstein and added about six more months of development time, mainly because of all the extra dialogue that had to be implemented for the interaction between Indiana and Sophia.[29] Altogether, the game took around two years to finish, starting in early 1990,[29] and lasting up to the floppy disk release in June 1992.[1] The only aspect Barwood was not involved in at all was the production of voices for the enhanced “talkie” edition released on CD-ROM in May 1993, which was instead handled by Tamlynn Barra.[29][35] The voice-over recordings for the approximately 8000 lines of dialogue took about four weeks, and were done with actors from the American Federation of Television and Radio Artists. Harrison Ford was not available to record Indiana Jones’s voice, so a substitute actor Doug Lee was used.[36] The “talkie” version was later included as an extra game mode in the Wii version of the 2009 action game. Indiana Jones and the Staff of Kings,[37] and distributed via the digital content delivery software Steam as a port for Windows XP, Windows Vista and Mac OS X that same year. The versions on the Wii and available on Steam have improved MIDI versions of the soundtrack, along with both voices and text.[3][38]
The package illustration for Fate of Atlantis was inspired by the Indiana Jones movie posters of Drew Struzan.[33] It was drawn by Eaken within three days, following disagreements with the marketing department and an external art director over which concept to use.[29][33][34] Clint Bajakian, Peter McConnell and Michael Land created the soundtrack for the game, arranging John Williams’ main theme “The Raiders March” for a variety of compositions.[4] The DOS version uses sequenced music played back by either an internal speaker, the FM synthesis of an AdLib or Sound Blaster sound card, or the sample-based synthesis of a Roland MT–32 sound module.[39] During development of the game, William Messner-Loebs and Dan Barry wrote a Dark Horse Comics series based on Barwood’s and Falstein’s story, then titled Indiana Jones and the Keys to Atlantis.[40] In an interview, Eaken mentioned hour-long meetings of the development team trying to come up with a better title than Fate of Atlantis, though the staff members could never think of one and always ended up with names such as “Indiana Jones Does Atlantis”.[33][34] The final title was Barwood’s idea, who first had to convince the company’s management and the marketing team not to simply call the game “Indy’s Next Adventure”.[29]
LucasArts developed a port of the enhanced edition for the Sega CD,[41] but the release was eventually canceled because The Secret of Monkey Island failed to be much of a commercial success on the platform.[42] The arcade-style game Indiana Jones and the Fate of Atlantis: The Action Game designed by Attention To Detail was released almost simultaneously with its adventure counterpart, and loosely follows its plot.[43]
After the release of the game, a story for a supposed successor in the adventure genre was conceived by Joe Pinney, Hal Barwood, Bill Stoneham, and Aric Wilmunder.[44] Titled Indiana Jones and the Iron Phoenix, it was set after World War II and featured Nazis seeking refuge in Bolivia, trying to resurrect Adolf Hitler with the philosophers’ stone.[31] The game was in development for 15 months before it was showcased at the European Computer Trade Show.[31]
However, when the German coordinators discovered how extensively the game dealt with Neo-Nazism, they informed LucasArts about the difficulty of marketing the game in their country.[45] As Germany was an important overseas market for adventure games, LucasArts feared that the lower revenues would not recoup development costs, and subsequently canceled the game.[45] The plot was later adapted into a four-part Dark Horse Comics series by Lee Marrs,[44] published monthly from December 1994 to March 1995.[46][47] In an interview, Barwood commented that the development team should have thought about the story more thoroughly beforehand, calling it insensitive and not regretting the cancellation of the title.[45]
Another follow-up game called Indiana Jones and the Spear of Destiny was planned, which revolved around the Spear of Longinus.[45] Development was outsourced to a small Canadian studio, but eventually stopped as LucasArts did not have experience with the supervision of external teams.[45] Elaine Lee loosely reworked the story into another four-part comic book series, released from April to July 1995.[48][49]
Fate of Atlantis was met with critical acclaim, and it sold one million units across all platforms on which it was released. Reviewers from Game Informer, Computer Game Review, Games Magazine and Game Players Magazine named it the best adventure game of the year, and it was later labeled a “classic” by IGN.[2][29][55] Patricia Hartley and Kirk Lesser of Dragon called it “terrific” and “thought-provoking”. They lauded the “Team, Wits, Fists” system for increasing the game’s replay value, but believed that the Team option was the best. The reviewers summarized it as a “must-buy”.[50] Lim Choon Wee of the New Straits Times praised the game’s graphics and arcade-style sequences. About the former, he wrote, “The attention to detail is excellent, with great colours and brilliant sprite animation”. He echoed Hartley’s and Lesser’s opinion that “Team” was the best mode of the game. Wee ended his review by calling Fate of Atlantis “a brilliant game, even beating Secret of Monkey Island 2”.[56]
Charles Ardai of Computer Gaming World in 1992 praised its setting for containing the “right combination of gravity, silliness, genuine scholarship and mystical mumbo-jumbo”, and called it a “strong enough storyline to hold its own next to any of the Indy films”. He highly praised the game’s Team, Wits, Fists system, about which he wrote, “Never before has a game paid this much attention to what the player wants”. He also enjoyed its graphics and varied locales. Although he cited the pixelated character sprites and lack of voice acting as low points, Ardai summarized Fate of Atlantis as an “exuberant, funny, well-crafted and clever game” that bettered its predecessor, The Last Crusade.[57] QuestBusters also praised the game, stating that it “is not only the best adventure ever done by LucasArts – but is also probably the nicest graphic adventure ever – just about perfect in all areas”. The reviewer wrote “Atlantis shines in 256 colors” and that “the musicians and sound effects specialists deserve a tip of the hat”, stating that the audio “completes the effect of playing a movie”. He described the puzzles as “quite creative and certainly fair” and liked the multiple solutions. The reviewer concluded that the game was “a must-buy for all adventurers” and “gets my vote – for «Best Quest of the Year»”, tied with Ultima Underworld, “both of which redefine the state-of-the-art in their respective genres”.[58]
The following year, Ardai stated that “Unlike many recent CD-ROM upgrades, which have been embarrassing and amateurish”, the CD-ROM version “has the stamp of quality all over it”, with the added dialogue and sound effects “like taking a silent film and turning it into a talkie… It’s hard to go back to reading text off a monitor after experiencing a game like this”. He concluded that “LucasArts has done an impeccable job – a must-see”.[59] In 1992 the magazine named the title as one of the year’s four best adventure games.[60] Andy Nuttal of Amiga Format wrote, “The puzzles are very well thought-out, with some exquisite, subtle elements that give you a real kick when you solve them”. He noted that the game is “littered with elements that are genuinely funny”. His sole complaint was about the game’s linearity compared to Monkey Island 2; but he finished by saying, “It’s a minor point, anyway, and it shouldn’t put you off buying what is one of the best Amiga adventures ever”.[53] In 2008, Retro Gamer Magazine praised it as “a masterful piece of storytelling, and a spellbinding adventure”.[29]
Indiana Jones and the Fate of Atlantis was nominated for an award at the 1993 Game Developers Conference.[61]
Complete Walkthrough
By: Felipe “GrayKnife” Gaboardi
E-mail: felipecgaboardi@hotmail.com
Version: 1.0
22:37 January 18th 2008
Legal Stuff:
This may be not be reproduced under any circumstances except for personal,
private use. It may not be placed on any web site or otherwise distributed
publicly without advance written permission. Use of this guide on any other
web site or as a part of any public display is strictly prohibited, and a
violation of copyright.

+*+*+*+*+*+*+*+*+*+*+*+*+*+*
* CONTENT +
+*+*+*+*+*+*+*+*+*+*+*+*+*+*
1-0 - Introduction -1- I.Q. Points -2- Fighting
2-0 - Walkthrough -1- The Beggining -2- Plato’s Lost Dialogue -3- The Team Path -4- The Fists Path -5- The Wits Path -6- The Lost Kingdom
3- - Credits
+*+*+*+*+*+*+*+*+*+*+*+*+*+*
* 1-0 -- INTRODUCTION -- +
+*+*+*+*+*+*+*+*+*+*+*+*+*+*
Ah, yes… Indiana Jones And The Fate Of Atlantis… one of the great
adventure games from the time LucasArts wouldn’t make every single game
about Star Wars. I remember when I was little kid my brother bought this
“chest” that had this game plus Day Of The Tentacle and Sam & Max Hit
The Road. I didn’t really play it back then, but I just loved watching my
brother beat it. Now, after over 10 years and playing Fate Of Atlantis dozens
of times, I’ve finally decided do write this FAQ about it. I hope it’s useful
and help any gamers, like me, that love the adventure genre. If you have any
doubts, problems or comments just send me an e-mail.

+*+*+*+*+*+*+*+*+*+*+*+*+*+*
* 1-1 -- I.Q. Points -- +
+*+*+*+*+*+*+*+*+*+*+*+*+*+*
Unlike most of LucasArts adventure games (and, ironically, like most Sierra
ones), Fate Of Atlantis has a points system, the Indy Quotient (I.Q.). You
can see how many points you’ve made so far in the game by pressing “I”.
Like in any other adventure game, the I.Q. points don’t really have any
relevant purpose, they just add fun to the game, if you want to try to
complete it 100%.

+*+*+*+*+*+*+*+*+*+*+*+*+*+*
* 1-2 -- Fighting -- +
+*+*+*+*+*+*+*+*+*+*+*+*+*+*
Probably the only flaw in the entire game. Although the fighting system has
improved a lot ever since Indiana Jones And The Last Crusade, it’s still a
real pain. You have to be quick enough to know how and when to block and to
punch. There’s also that blue bar on top of Indy’s health. It indicates the
strength of Indy’s punch and, after you throw a punch, it will go empty,
making any hits you give in a row very weak and making you have to defend
yourself until de bar fills up again.
You use the Numpad to fight. The commands are:
7, 4 and 1 - Step back (if you do this several times, Indy will run away
from the battle)
8- Block up
5- Block in the middle
2- Block down
9- Punch up
6- Punch in the middle
3- Punch down
Note: These are the commands if the enemy is on Indy’s right. When you fight
them on Indy’s left, swap the Step back and the Punch commands

Fortunately, there’s the Instant Knock-Out punch. If you press insert (Num 0)
during a fight, Indy will throw a punch that will knock the opponent out
right away. It works against almost all enemies, except Arnold (the singing
guy you meet at the Fists Path) and the guy that’s guarding Sophia’s cell at
Atlantis. You must be warned, though, that when you use it, you won’t get
any I.Q. points.

+*+*+*+*+*+*+*+*+*+*+*+*+*+*
* 2-0 --WALKTHROUGH-- +
+*+*+*+*+*+*+*+*+*+*+*+*+*+*
Now that we’re done with the introduction, it’s time for what we’ve all be
waiting for! But, before that, a little warning: THIS WALKTHROUGH CONTAINS
SPOILERS! READ CAREFULLY!

+*+*+*+*+*+*+*+*+*+*+*+*+*+*
* 2-1 --The Beginning-- +
+*+*+*+*+*+*+*+*+*+*+*+*+*+*
Indy’s adventure begins in an amazing… attic. If you’re asking yourself why
the hell did he break in through the window, it’s because the stairway is
under repairs (although that wouldn’t stop anyone from going through them in
real life). Look around as much as you like. When you’re done, check the
Peculiar Statue. Indy will fall through a hole and land in another room.
Now, check the rope dangling inside the hole and the statue will fall on top
of him and he’ll fall down the hole (again). You’ll land in some kind of
library. If you try to go through the exit, you’ll know that (like I’ve
mentioned earlier) the stairway is closed for repairs. Check the shelf that
has books on statues. it’ll tip over on top of Indy (ouch) and make him fall
into a room filled with cat statues. There’s a table in the room with four
of them. Check any of them and you’ll learn it’s a cat statue of a god or
something. It depends on which statue you pick. Anyways, choose another cat
and it’ll turn out to be a real cat! (oh, crap!) it’ll scare Indy to death,
making him roll down the coal shute into the furnace room. There are three
lockers down here. Open all of them. It doesn’t matter in which order you
open then, as soon as you open the last one, you’ll find the statue you were
looking for (what the hell is it doing down here?). Now, Indy will go to his
office where a scene will start. Marcus and some guy named Smith will be
waiting.

So, basically, that Smith guy has some sort of key to the statue you’ve just
got. After they open it, some kind of small coppery bead comes out of it.
Suddenly, Smith points a gun at both Indy and Marcus and ask for the statue
and the bead! But Indy finds an opportunity to fight. After some punches,
“Smith”, if that’s his real name, escapes, but leaves his coat behind.
You’ll then learn that he’s actually a nazi spy called Klaus Kerner! And
that he’s after Sophia, Indy’s assistant from an escavation on Iceland that
decided do give up archeology and become a psychic. Well, off to warn her we
go! Now you’re heading to New York City!

+*+*+*+*+*+*+*+*+*+*+*+*+*+*+*+*+*+*
* 2-2 --Plato’s Lost Dialogue-- +
+*+*+*+*+*+*+*+*+*+*+*+*+*+*+*+*+*+*

--------------
New York City
--------------
Now the game starts for real! Notice that the action buttons and the inventory
are now showing. I’m guessing you’re smart enough to know how to use those,
so I won’t explain. You can also see your I.Q. points now. You’re somewhere
in New York, standing in front of the theater where Sophia’s giving her
lecture. The only item you have with you is that magazine Kerner had (you’ll
keep it for the entire game, which doesn’t really make sense, considering you
won’t need it for ANYTHING). You can use the taxi and go back to Barnett
College, if you like, but you don’t have to.

Anyways, you have to get in the theater, but, unfortunately, they’re sold out
and the gates are locked. What to do… what to do… first of all, there’s a
newspaper in front of the newspaper stand (duh). Grab it. There are actually
three ways to get inside:

A)Open the door on the back and the security guy (Biff) will show up. When
talking to him, choose all the options that say good stuff about Sophia (she’s smart, she makes things easy to understand, etc.) and he will let you in.

B)Well… you’re going to have to be a little rude… open the back door and
talk to Biff. Choose all options that offend him, then you’ll have to fight
him. If he knocks you out, don’t worry, you won’t die. As soon as you get to
beat him, enter through the door (he’ll disappear after you leave the screen…
weird).

C)Instead of going through the door, you’ll go through the fire escape on the
right. But you’ll have to move a couple of crates first (two of them). Push
the first one, walk to the right and push the second one. walk to the left
and push the first one again and then push the second one again. Now use the
fire escape and you’re in.

Now, you’re in. But you can’t talk to Sophia because she’s still giving the
lecture. Try walking towards her and the stagehand will stop you and you’ll
watch Sophia talk a little about Atlantis. When it’s done, try walking there
again and you’ll learn more about Atlantis. Now, to get rid of that stagehand.
If you’ve talked to him, you already know that reading is one of his hobbies,
so give him the newspaper and he’ll leave (you could try to give him the
magazine, but he wouldn’t take it). Even though he’s not here anymore, he’ll
pop up if you try to head to the stage and still stop you… but now he won’t
stop you from using the machine on your left. Push the left and right levers,
use the button and watch the fireworks. After that whole “burning ghost”
show, Sophia will take you to her room to have a chat.

As soon as you enter her room, you’ll see that someone has searched through
Sophia’s things! Everything is a mess! Indy try to find who did, but doesn’t
see anybody on the streets. As soon as he goes back to the room, Kerner will
show up (he was hiding behind the crates) and will call some guy called
Ubermann to tell he’s found the “treasure” they seek. Later, Sophia will
tell you about the Nazis searching for new sources of energy, and that they’re
looking for the power of Atlantis! Obviously, Indy doesn’t take her seriously.
She, then, tells him to search for a small coppery bead in her drawer.
It is just like the one Kerner stole! Sophia will then show her necklace and
put the bead in the medallion’s mouth. Suddenly, some weird stuff happens and
some kind of ghost shows up and disappears! According to Sophia, tha was
Nur-Ab-Sal, her spiritual guide. She then says that you that the spirit says
that they must find a book… the Lost Dialogue Of Plato! She found the
Atlantean stuff on Iceland, so that’s where you’re heading to.

--------
Iceland
--------
Now, you’re on Iceland and Indy is now wearing the proper “Indiana Jones”
clothes. You also have your trustworthy whip with you now.

Walk into the old dig site and talk to Dr. Bjorn Heimdall. He’s kinda
unfriendly and wants you to get out of there as soon as possible. Just chat
with him a little. Eventually, you’ll be able to ask him about the Lost
Dialogue. He tells you to visit Dr. Sternhart on Tikal and Felipe Costa on
the Azores Islands. Well, that’s all we’ve got to do here. Exit the dig site,
use the truck and head to Tikal.

------
Tikal
------
Enter the jungle to your left. Besides the entrance you’ve just come through,
there are five dark paths here. The third one, starting from the left to right,
leads you out of the jungle to a tree with a huge snake (why it had to be
snakes? …). You’ve probably noticed there’s a rotent here. Try to get close
to him and make him stay in front of the exit path. Get a little close (but
not too much) and use the whip on it. The rotent will run into the path and
out of the jungle. The snake will attack it and both of them will fall into
the chasm. Now that the tree is free, use it. Indy will climb it and get to
the other side of the chasm. Then Sophia will show up and say she’d found a
path (what a waste of time that was, huh?).

Try to get inside the temple. Dr. Sternhart will stop you and say that only
scholars are allowed inside the temple. He also says he translated the Lost
Dialogue, but someone called Smith took it! (D’oh!) Just keep talking to him.
Eventually he’ll say that he’ll only let you go inside the temple if you tell
the name of Plato’s Lost Dialogue. You’ll have a bunch of options (like
Socrates or Gluteus Maximus), but, why try to guess? Just be honest and say
you don’t know the title (notice that the parrot on the tree will say
“title”) and Dr. Sternhart will leave. Now, talk to the parrot (you heard
me) and select “title?” and it will say Hermocrates, which is the right
answer. Try to get inside the temple again and Dr. Sternhart will show up.
Talk to him, tell you want to explore the temple and select Hermocrates. He’ll
let you in.

Well… you’re inside the temple, but there’s nothing really interesting here.
..or is there? Talk to Sophia and tell her to keep Sternhart busy. Leave the
temple and grab the lamp on the souvenir stand. Now go back to the temple,
open the lamp and use it on the left spiral desing. The kerosene will eat
away the tarnish and now you can pick it up, so do it.You can give the lamp
back to Sternhart, if you like. Now use the spiral desing on the head on your
left. Now it looks like an elephant! Pull the “nose” and the wall will open, showing the tomb of an atlantean king! Now, that’s something! Sternhart will
head to the tomb and grab something he calls a Worldstone. Then, he’ll leave
through a secret door, which you don’t have any way to open (damn it..). Luck
you, he left an orichalcum bead behind. Just grab it and leave the temple.
Head back to the truck and use it. Before going to The Azores, why don’t we
pay Bjorn a visit? Go to Iceland.

--------
Iceland
--------
Enter the dig site and you’ll find out that Professor Heimdall froze to death.
.. oh, well, too bad. Before turning into a popsicle, he was able to expose
part of something that’s trapped inside the ice. It seems to be an eel
figurine, and it’s head is out. Use the bead inside the eel’s mouth and it’ll
melt itself right out of the ice. Grab it and head back to the truck. NOW it’s
time to go to The Azores

-------------------
The Azores Islands
-------------------
Well, not much to do around here except talking to the old man. Talk to Sophia
and tell her to talk to the guy (you could try talking to him with Indy, but
Mr. Costa wouldn’t take him much seriously). You are controlling Sophia now.
Use the open command on the door. Sophia will just knock. Mr. Costa will show
up. Just talk everything with him. Eventually, you’ll learn that he’s willing
to trade information on where’s the Lost Dialogue in exchange for a priceless
artifact. Considering that Sophia would NEVER trade away her necklace, we’ll
just trade the eel figurine we’ve just got. Talk to Indy and put him back in
command. Knock the door and talk to Mr. Costa about a trade and trade the
figurine. The old man will say that the Dialogue is in the *Random name that
changes with every game* collection, which happens to be at Barnett College
(wow, what are the odds?).

---------------------
Somewhere In Germany
---------------------
After learning where the Dialogue is, a cutscene starts. It shows Kerner
showing Dr. Ubermann the orichalcum bead, some experiments with that
Atlantean stuff happening and the idea of Ubermann making orichalcum bombs.
I won’t get in much details, it’s something that’s easier to see than describe.

----------------
Barnett College
----------------
Time to get the Dialogue! It’s location changes with every game. If you look
around and remember the name of the collection that Mr. Costa said, you’ll
find it more quickly. Anyway, here are the possible locations and how to get
it.

A)Inside one of the cat statues:
You’ve probably noticed that the stairway is already repaired, so go through
there. You’ll be back at the library. Check the school desk and pick the gum
up (ew). Now go down to the furnace and use the gum on the coal shute. Now you
can walk up it! Yay! (although that doesn’t seem to be possible in real life).
Now that you’re up here, check each of the cat statues. One of them will look
different, so pick it up and you’ll learn it’s made out of wax. Head down to
the furnace room, open the furnace and use the statue on it. The cat will melt down and you’ll be able to get Plato’s Lost Dialogue.

B)Inside the shelf that fell over on top of Indy:
There are, actually, two ways of getting this one:
I-Go down to the furnace room and pick up the rag lying around. Go all the way
up to the library and use the rope to get to the room up. There’s an arrowhead
on one of the shelves. Pick it up. Now go down back to the library and use the
rag with the arrowhead. Use the arrowhead with each one of the screws to
unscrew them (if you did that without the rag, it’d hurt Indy’s hand and he’d
only do it with the first screw). Now, open the back of the shelf and you’ll
get the Dialogue.

II-You’ve probably noticed that the stairway is already repaired, so go through
there. You’ll be back at the library. Check the school desk and pick the gum
up (ew). Now go down to the furnace and use the gum on the coal shute. Now you can walk up it! Yay! (although that doesn’t seem to be possible in real life).
Before climbing it, pick up some coal, first. Go up the shute. You’ll notice
that there’s a book dangling at the hole you made. Throw the coal at it and
it’ll fall down. Now, pick it up. It’s the Lost Dialogue!

C)Inside a chest:
Head to Indy’s office and open the ice box. Pick up the mayonnaise jar and
head all the way to the library and use the rope to get to the room up. Use
the mayonnaise with the statue at the corner of the room and pull it as much
as you can and climb it. You’ll be where you started the game. Open the
funeral urn that’s on the floor and pick up the ashes… for some reason there was a key in there. Head back to the floor below and push the box to your
left. There’s a chest behind it. Use the key with it and open it. The Dialogue
is inside it.

Now that you have the Dialogue with you, head to Indy’s office and read it (it
has some important clues you’ll need to know). Now you know what to do next…
find Atlantis” outposts and colonies, find the stone disks and, finally, find
Atlantis itself! After reading the Dialogue, Sophia will read your fortune and
now you have three choices of paths:
Take Sophia with you (Team Path)
Fight your way through (Fists Path)
Think your way through (Wits Path)
Each path has different puzzles and gameplay, so I recommend you save here in
a different file so you can pick a different path after you’ve reached Atlantis
on the one you choose now.

+*+*+*+*+*+*+*+*+*+*+*+*+*+*+*+*+*+*
* 2-3 --The Team Path-- +
+*+*+*+*+*+*+*+*+*+*+*+*+*+*+*+*+*+*

In the team path, you’re with Sophia. You’ll have to work together to get the
stone disks and reach Atlantis.

First of all, visit Algiers

--------
Algiers
--------
Not much to do here now… just head all the way left and up the back alley.
Take the mask and give it to the shopkeeper to ask how much it cost. He’ll let you have it. You can also ask him if he’s Omar al-Jabbar, but he won’t say
anything until you show evidence that you’re serious about Atlantis. Now head
back to the airport and go to Monte Carlo.

------------
Monte Carlo
------------
Sophia will ask you to find some guy named Trottier and bring him up to her
room. The only problem is that you don’t know how he looks like, because him
and Sophia did all their business through mail (oh great… like a needle in
a hay loft). She’ll wait in her room, so just go around asking people passing
by if they know him. Some people will give tips on how he looks like. I’ll be
straight, it’s the balding guy wearing brown clothes and a flower. Talk to him
and ask if he’s Trottier. While talking to him, say your name and try to be as
modest as possible, or else he’ll get annoyed and will leave. While talking to
him, PAY ATTENTION to whatever he says! Eventually, he’ll ask something about
Plato’s Lost Dialogue and you have to answer it right. If you’ve read it, you
shouldn’t have any problems answering. When you tell him to visist Sophia,
he’ll refuse, thinking that she’ll steal his secrets… damn it… enter the
hotel and tell Sophia about that. She’ll tell you to drop Nur-Ab-Sal’s name
the next time you talk to him, so do it. Now that you have Trottier in your
room, there are two ways of getting his Sunstone:

A)Tell Sophia that Trottier is all her’s and you’ll get control of her. Tell
the old man to show proof or faith or something and he’ll put the stone disk
on the table. But, before starting the session, he’ll want to test Sophia to
see if she’s a faker or not. He’ll ask four questions, three of them related
to what he told Indy, so if you remember everything clearly, it shouldn’t be
much of a problem. The fourth question depends on pure chance, so save when
you’re on it and try every single option. If you’ve tried all the possible
answers for the last question and Trottier won’t give you the stone, it means
you got at least one of the others wrong (he doesn’t tell you which one,
though). When you get all of them right, tell him that the path of Atlantis is
too risky and he’ll leave the Sunstone behind.

B)Tell Sophia to keep Trottier busy. Now, you have control of Indy while
Sophia talks to the old man. Pick up the bedsheet, open the cabinet and grab
the flashlight. Now open the fusebox and use the circuit breaker to turn off
the lights. Use the sheet, the flashlight and the mask and Indy will scare the
crap out of Trottier, making him run out of the room, leaving the Sunstone
behind.

Now that you have the first stone, you can get out of here. Leave the hotel,
use the taxi and head back to Algiers.

--------
Algiers
--------
Head to the shop where you got the mask and show the stone disk to the
shopkeeper. He’ll reveal that he’s, in fact, Omar al-Jabbar. He’ll also say
that there’s a dig site of an Atlantean outpost in the middle of the desert.
He’ll give you a map (without any names, unfortunately) and a pair of camels
(what a nice guy). Too bad for you, the camels die a mile outside the city and
Omar doesn’t have any others… as a way to apologize, he offers you a
baseball in exchange of your mask. Just take it.
RANDOM TRIVIA: If you look at the ball, Indy will say that someone signed
“Ron Gilbert” on it. He’s the guy that made The Secret Of Monkey Island,
Maniac Mansion, and some other of Lucasarts’ adventure games.

Now, pay attention, because this part is rather hard to explain. On your way
to the back alley you came across a grocer. He’s selling squabs-on-a-stick
(whatever that is) and you’ll need one. The guy won’t take US currency, so
you’ll have to trade. Try offering your baseball. It’s rather rare to happen,
but he can accept the baseball right away. In most of the cases he won’t take
it, so head back to the back alley and trade the baseball with Omar for
something else. Try giving the new object you’ve just got to the grocer. If he
doesn’t want it, go back to Omar and trade it for something else. Keep doing
this until the grocer accepts your offer (remember that the object he wants
change with every game) and he’ll give you the squab. Also, notice that
sometimes he gives you a hint about what he wants (like color, for example),
it’ll make your “search” easier.

Now that you have the squab, talk to the knifethrower and tell he has nice
knives (well, that’s the only useful thing you can say). Seems like he needs
an assistent… talk to Sophia and suggest she do it and tell it’s perfectly
safe. While she’s watching the knifethrower, push her (what a mean person you
are!). After the little show, she’ll give you the souvenir knife the thrower
gave her (probably to keep her from killing you). Now, go to the right and
give the squab to the beggar on the floor and you’ll get a balloon ticket. Go
up the stairs and give the ticket to the guy guarding the balloon. Hop on it
and cut the rope with your knife (you stole the balloon! You really are mean!).

Riding the balloon can be a real pain… press the left mouse button to lower
the balloon and change your direction counter-clockwise or press the right
button to make the balloon go higher and change it’s direction clockwise. Now
you have to find where the dig site is. Land on the first nomad camp you see
and show the guy your map. He’ll say some directions, so follow them and land
on the next camp you see. Eventually, one of the nomads will say that the site
is VERY close. When you leave the camp, you’ll see an X on the map. That’s the
dig site. Try landing on it and some nazi guy will shoot down your balloon.
You’ll fall on top of him, so don’t worry about it, but you don’t have any way
to get back to the city now… go to the left, and here’s the dig site!

---------
Dig Site
---------

It’s abandoned, also. Sophia will say something about feeling Nur-Ab-Sal’s
presence and will fall inside a hole. Now you have to find a way to get her
out of there. This is the TEAM path, after all, so you can’t just leave her
there.

Go down the ladder into the dig. Now you’re alone in the dark! (oh, wait,
that’s another game…) It’s rather hard to see, but Indy’s vision will start
getting used to the dark and you’ll be able to see better. Anyways, pick up
the long, tubular thing (a hose) and the clay thing (a jar). Now, get outside.
You should’ve noticed there’s a truck here (it won’t start, though). Open the
gas tank and put the hose in it. Now use the clay jar with the end of the hose
to get some fuel. Pick the hose up and close the gas tank. Go back to the dig.
Search for some kind of metal cap and open it, Empty the jar into the pipe and
use the little metal thing (if you’re wondering what the hell you’re doing,
that thing is a generator that had no fuel. Now you’re turning it on). Yay!
Now you can see! Get the ship rib and the wooden peg on the table. There’s a
crumbling wall on the right of the room, use the ship rib on it and it’ll
reveal a mural with the island of Crete on it! That’s where you’re heading
next! You also noticed that there’s a hole on the mural. Use the peg on it and
then the Sunstone. Now check the Lost Dialogue, it tells how the stone must be
positioned. It shouldn’t be hard to figure it out how, so just look at the
stone, put it in the right position and press the peg. A wall will open and
Sophia will get out of it. Good thing you’ve released her, because she found
a distributor cap that you need to make the truck work! Also she’s found an…
amber fish on a string… if you’re wondering what the hell this is, it’s an
orichalcum detector.

That’s all we had to do here. Grab the Sunstone (you can leave the peg), open
the generator, turn it off and grab one of it’s spark plugs. Leave the dig
and use the distributor cap and the spark plug on the truck’s engine. Use the
truck and now we’re off to Crete!

------
Crete
------
Well, doesn’t this place look… empty? Anyways, head left down the path and
you’ll be on a bunch of ruins. Walk up to the stairs to your right and walk
left across the bridge. Someone left a surveyor’s instrument (transit) here.
Grab it and make all the way back. Check around the chambers, if you like. If
you do, you’ll probably notice a very interesting mural on one of them. Check
the crumbling rocks around. If Indy says that the stones seem to be lose, push
them to reveal a statue. There are two statues. One of a tail, other of the
head of a bull. Put the transit on the tail statue and use it. Align the
center with the right horn you see, and then do the same with the head statue,
but aligning it with the left horn. If you’re having any problems, you have to
align them like this:
|-Horn’s sides *-transit center

Right Horn Left Horn |* | |* |* | |* |* | |* |* | |* |* | |* |* | |* |* | |* |* | |* |* | |*

After you do it, a X will appear on the floor. Use the ship rib on it (yeah…
as if you really could use a piece of wood as a shovel…) and you’ll get the
Moonstone! Two down, one more to go. Now, go all the way back to the beginning
of Crete. You’ll see a stone pedestal around. Yep, you’ve guessed right. You
have to use your stone disks on it. So do it, and check the Lost Dialogue to
know how to align both stones and press the spindle when you’re done. What do
you know! A secret door! Grab the stone disks and go inside.

----------
Labyrinth
----------
Wow, this place is creepy… anyways, grab two of the stone heads on the shelf
and go through the door. You’ll be able to see the head you left behind, so
use your whip on it. Now you’re trapped inside here… too bad! You need that
head, and, besides, you’ll find another way out, so don’t worry. This is a
labyrinth, so pay attention to my directions. Go up, right and then left. Go
to the center of this room, and… the floor will sink! Well, not really…
it’s just some kind of primitive elevator. As soon as you and Sophia leave it,
it’ll go straight upwards. Look at the skeleton. Does it look familiar? Yep,
it’s professor Sternhart… he got stuck down here and starved to death… too
bad for him. And this can also happen to you if you don’t get out of here. By
the way, remember when he got the Worldstone on Tikal? Yep, it’s right next to
him, so just grab it. Grab his staff too. Now, how to get out of here… take
a look at the waterfall to your right and you’ll find a chain running behind
it! It’s holding the elevator’s counterweight! Climb the chain to go back up.
Sophia will wait for you down here.
Go left and you’ll see a closed door with a shelf next to it. Seems familiar?
Put all the stone heads on the shelf and go inside.Go up and left and use the
staff on the chock to free the counterweight, now go left and up and go right
this time. Use the staff on the statue’s mouth and the elevator will go up.
Take the golden box and you’ll find two beads underneath it! Indy will
automatically grab them. Put the beads inside the box and go all the way back
to the elevator room (not this one, the other). You do remember the way back,
don’t you? Just go left, up, left and straight up. If you try to step on the
elevator, it won’t move. Hmmmm… I guess Indy is not heavy enough to activate
it. You’ve probably noticed there’s a statue in this room. Use the whip on
it’s head and it’ll fall off and land on the elevator. Now you can use it.

Now that you’re back down here, go up. Hmmm… the gate is closed… but
there’s a hole right up there. Talk to Sophia and tell her to climb up the
hole. She’ll refuse it, so just tell her she’s afraid of a few bugs. She’ll
say that Indy is scared of snakes. Say “What if I am?“ and she’ll let Indy
boost her up, because they weren’t going anywhere with that. She’ll get to the
other side and open the gate by using a pulley on the other side. Keep on
going. Close your golden box (with the beads inside) and try using the fish.
it’ll point at Sophia’s necklace. Talk to her and ask for her necklace because
it’s throwing the orichalcum detector off and you need to hide it. Tell her
the plan is to put the necklace inside the golden box. Indy will give the
golden box to her and she’ll put the necklace inside. Now, go to each one of
the rooms here and try using the detector. Eventually, it’ll point at the wall.
Use the ship rib on it and it’ll reveal a door. Open it and go inside to find
an orichalcum bead on the floor. Sophia will give you the gold box back. Move
on to the door to your left. You are now in a room with some kind of Atlantis
scale model. And there’s a spindle in the middle! You probably know what to do.
Use the stone disks on it and check the Lost dialogue to know how to align
them and press the spindle. As soon as you do it, a little statue will move
around and one of the doors will open. Go inside to find… a dead end… oh
well… Indy calls for Sophia and… Kerner shows up! Damn it! They have
Sophia now! He’ll ask for the stone disks. Just give them to him. Don’t dare
him to shoot, or else he will.
Now you’re stuck here with no wait out… or are you? Did you notice how the
wall here is crumbling? Use the ship rib on it. Now you’ll see a scene of
Sophia boarding the nazi U-boat. Nothing much interesting.

------
Crete
------
Now that you’re finally out of the Labyrinth, just go to the nazi submarine.
Go up the ladder and open the hatch and the captain will come out. Just select
the first option and Indy will automatically be the hell out of him. Now,
you’re inside the sub, which is underwater, so there’s no way out now.

------------
Nazi U-boat
------------
Try pushing the big lever and it’ll snap right off (oh, great…) if you try
to go downstairs, you’ll see a load of nazi sailors down there! Indy will go
back up straight away. If you try going down again, Indy won’t stop this time
and it’s game over. Use the intercom and tell all the sailors to go to the bow.
Now it’s safe to go down. You’ll see Sophia with a guard, but don’t go down
there yet. First, go left and push the lever. Select the sub to go back in.
Now, open the trap door and go down. Use the clay jar with the battery acid
and go right (still down there). Now you can talk to Sophia without the guard
knowing. Tell her you’ve got a plan and to distract the guard. Now go down to
where Sophia and the guard are standing. Try getting close and the guard will
see you. Select any option EXCEPT the last one. Sophia will knock him out with
a bucket.
Now grab the plunger and stay close to the door to eavesdrop Kerner Ubermann’s
conversation, if you want. Now go up, right, open the trap door and go down.
Use the acid-filled jar on the strongbox and you’ll get the stone disks, plus
a key. Go back to where Sophia is and use the key with the wheel and push it.
Return to the sub and go all the way up this time. Use the plunger on where
the lever used to be and push it. Now you have full control of the sub! The
plunger controls the depth, the lever controls the speed and the wheel
controls the position and direction of the sub. You have to find a hole
around the landscape and go inside. It may seem kinda hard to do it, but
you’ll be able to do it, eventually. When you finally arrive at Atlantis’
airlock, go a bit into the dark and… someone will kidnap Sophia! Again!
Well… now you’re alone in the dark… again…

Now, unless you’re going to try the Fists Path or the Wits Path, skip straight
to the Atlantis section.

+*+*+*+*+*+*+*+*+*+*+*+*+*+*+*+*+*+*
* 2-4 --The Fists Path-- +
+*+*+*+*+*+*+*+*+*+*+*+*+*+*+*+*+*+*

So, you think you’re a tough guy/girl, huh? Well, get ready for all of the
horrible fighting this game has to show… or just get ready to press insert.

Visit Monte Carlo first

------------
Monte Carlo
------------
You need to find some guy named Trottier. The only problem is that you don’t
know how he looks like, so just go around asking people passing by if they
know him. Some people will give tips on how he looks like. I’ll be straight,
it’s the balding guy wearing brown clothes and a flower. Talk to him and ask
if he’s Trottier. While talking to him, say your name and try to be as modest
as possible, or else he’ll get annoyed and will leave. Eventually, he’ll ask
something about Plato’s Lost Dialogue and you have to answer it right. If
you’ve read it, you shouldn’t have any problems answering. After you give the
correct answer, he’ll give you his business card. Unlike the other paths,
Trottier doesn’t have the Sunstone on this one, so that’s all you have to do
here. Use the taxi and go to Algiers.

--------
Algiers
--------
Now you have to find some guy called Omar al-Jabbar. Go left and up to the
back alley. There’s some guy wearing a red fez here. Hand him the business
card and you’ll learn he’s Omar’s servant, Paul Abdul. Ask him to arrange a
meeting with al-Jabbar and he’ll leave the store. Follow him out of the alley
and into the streets. He’s the red dot, so keep following here. Although it
won’t seem that Paul know where he’s going to (he’ll keep moving back and
forth), he’ll eventually enter one of the houses. Go inside too. There’s a
Nazi agent here! What to do… well, you could either fight him or use your
whip on the hanging crockery just above him to knock him out. Omar will be
thankful and he’ll offer you a map to a Dig Site and a camel. The only problem
is that he’ll leave before giving you the map… pick up the pole (a bamboo
stick) and use it with the hanging cloth to get the map. Grab the blackbird
statue and the statue, if you want, but I don’t think you’ll need them. Use
the camel to leave the city.

As you move around the desert, you’ll probably bump into more Nazi agents,
who’ll try to make you go back to the city. Just fight them and carry on,
looking around. Now you have to find where the dig site is. Go to the first
nomad camp you see and show the guy your map. He’ll say some directions, so
follow them and land on the next camp you see. Eventually, one of the nomads
will say that the site is VERY close. When you leave the camp, you’ll see an
X on the map. That’s the dig site, so go there.

---------
Dig Site
---------
Go left and you’ll see the Dig Site! Also, your camel will run away, so now
you’re stuck here. If you go little to the left, you’ll se a rope ladder, but
if you try to get close, someone will try to shoot at you! Head down the
ladder into the dig. Now, if you try to exit back up, the guy who was shooting
outside will shoot down here and will keep you from getting out! What to do
now… first of all, search for a little metal thing and use it. it’ll turn
the generator on and now you’re able to see. Grab the ship rib, the wooden peg
and the clay jar (there’s an orichalcum bead inside). Do you see the painting
on the wall to your left? Press the round object on it and a secret opening
will open! Grab the Sunstone inside. There’s a crumbling wall on the right of
the room, use the ship rib on it and it’ll reveal a mural with the island of
Crete on it! That’s where you’re heading next! You also noticed that there’s
a hole on the mural. Use the peg on it and then the Sunstone. Now check the
Lost Dialogue, it tells how the stone must be positioned. It shouldn’t be hard
to figure it out how, so just look at the stone, put it in the right position
and press the peg. A wall will open. Grab the stone disk and leave through the
open wall. A Nazi agent will be waiting for you outside! And with a gun
pointing at you! Use the whip on him to get him disarmed and you’ll have to
fight. After you beat the guy, use the rope ladder and you’ll get on a balloon.

Riding the balloon can be a real pain… press the left mouse button to lower
the balloon and change your direction counter-clockwise or press the right
button to make the balloon go higher and change it’s direction clockwise. All
you have to do now is head all the way up and you’ll eventually arrive at the
island of Crete.

------
Crete
------
Well, doesn’t this place look… empty? Anyways, head left down the path and
you’ll be on a bunch of ruins. Walk up to the stairs to your right and walk
left across the bridge. Someone left a surveyor’s instrument (transit) here.
Grab it and make all the way back. Check around the chambers, if you like. If
you do, you’ll probably notice a very interesting mural on one of them. Check
the crumbling rocks around. If Indy says that the stones seem to be lose, push
them to reveal a statue. There are two statues. One of a tail, other of the
head of a bull. Put the transit on the tail statue and use it. Align the
center with the right horn you see, and then do the same with the head statue,
but aligning it with the left horn. If you’re having any problems, you have to
align them like this:
|-Horn’s sides *-transit center

Right Horn Left Horn |* | |* |* | |* |* | |* |* | |* |* | |* |* | |* |* | |* |* | |* |* | |*

After you do it, a X will appear on the floor. Use the ship rib on it (yeah…
as if you really could use a piece of wood as a shovel…) and you’ll get the
Moonstone! Two down, one more to go. Now, go all the way back to the beginning
of Crete. You’ll see a stone pedestal around. Yep, you’ve guessed right. You
have to use your stone disks on it. So do it, and check the Lost Dialogue to
know how to align both stones and press the spindle when you’re done. What do
you know! A secret door! And a Nazi agent! Just beat him, grab the stone disks
and go inside.

----------
Labyrinth
----------
Wow, this place is creepy… anyways, grab two of the stone heads on the shelf
and go through the door. You’ll be able to see the head you left behind, so
use your whip on it. Now you’re trapped inside here… too bad! You need that
head, and, besides, you’ll find another way out, so don’t worry. This is a
labyrinth, so pay attention to my directions. Go up, right and then left. See
that statue up there? Use thw whip on it’s head and it’ll roll down and make
the floor… sink a little… Go to the center of this room, and… the floor
will sink! Well, not really… it’s just some kind of primitive elevator. As
soon as you leave it, it’ll go straight upwards. Look at the skeleton. Does it
look familiar? Yep, it’s professor Sternhart… he got stuck down here and
starved to death… too bad for him. And this can also happen to you if you
don’t get out of here. By the way, remember when he got the Worldstone on
Tikal? Nope, it’s not with him… then, where is it? Grab his staff. Now, how
to get out of here… take a look at the waterfall to your right and you’ll
find a chain running behind it! It’s holding the elevator’s counterweight!
Climb the chain to go back up.

Go left, being careful not to step on the elevator, or else you’ll go down
again. You’ll see a closed door with a shelf next to it. Seems familiar? Put
all the stone heads on the shelf and go inside.Go up and left and use the
staff on the chock to free the counterweight, now go left and up and go right
this time. Use the staff on the statue’s mouth and the elevator will go up.
Take the golden box and you’ll find a bead underneath it! Indy will
automatically grab it. Put the beads inside the box and go all the way back to
the elevator room (not this one, the other). You do remember the way back,
don’t you? Just go left, up, left and straight up. Go right, now. See that
door? Push it four times and it’ll fall over. Go inside and… damn… there’s
a chasm here. But, hey, you’re Indiana Jones! See the stone outcropping up
there? Use your whip on it to get to the other side.

Now, get ready for A LOT of fighting. Go up first.You’ll see a couple of Nazi
guards in a distance. Walk a little to the left and one of them will hear you
and come in your direction! Hide behind the slab on the right and wait for him
to come. When he arrives, push it on top of him! Now go the way he came from
and fight his buddy. Go up and then go through the fifth doorway, from left to
right. Beat the guy, go through the next doorway and beat the other guy and go
through the other doorway. Push the hanging column of rock and it’ll kill the
guy beneath it. Go all the way back to the room with five doorways and head
right. Grab the stalactite you dropped on the guard and head right again.
You’ll hear someone singing. That’s Arnold, and, although it’s really hard to do it, it is possible to beat him (thanks steve williams). Be warned
though that the Instant Knock-Out punch won’t work on him. In my opinion, it’d
be best to take the smart way out of this one instead of using your muscles.
Head right and you’ll see a so convenient well placed bolder! Usethe ship rib
on it and it’ll break… not only that, but the bolder will roll
to the wrong direction and block your way back! D’oh!Go down the tunnel and
you’ll face Arnold. He won’t fight you at first, just ask you to name a song.
Just try picking one. If he’s OK with it, he’ll let you go and Indy will go
through the doorway automatically. If he’s not… well… RUN! Just keep
pressing the Step Back button (see the Fighting part of this guide) to escape.
Now, what to do… you already know that the bolder is on the doorway to your
right. Also, if you put the cursor on the right most part of the screen,
you’ll see that it indicates the bolder. Use your stalactite on it and it’ll
broke, but the bolder will move and land on top of Arnold! Now look at Arnold’s
body to find a couple of orichaclucm beads and… a fish? Why, that’s an
orichalcum detector!
Close your gold box (with your beads inside it) and use the detector on every
single room that has a pit on it. Eventually, the detector will point
downwards… weird… if you try talking to the pit, you’ll see that Sophia is
down there! Use your whip on the pit to get her out and she’ll hand you a
Worldstone! Go all the way back to where Arnold is and go right.

You are now in a room with some kind of Atlantis scale model. And there’s a
spindle in the middle! You probably know what to do. Use the stone disks on
it and check the Lost dialogue to know how to align them and press the spindle.
As soon as you do it, a little statue will move around and one of the doors
will open. Go inside to find… The way out! Finally! But, wait! There’s more!
There’s a rock here pointing towards the island of Thera. That’s where you’re
heading next!

------
Thera
------
Not much to do here… go left and up the path away from dock (Sophia will
wait for you on the dock). Check the mountain’s gap, notch and cleft until
Indy finds a truck next to a collapsed entrance. Just grab the tire repair kit
and head back to the dock. Now, off to find Atlantis! Thera, according to
Plato’s Lost Dialogue, is Atlantis’ lesser colony, and there’s the direction
and distance between Thera and the entrance to the Lost Kingdom written on it.
Don’t forget, though, about Plato’s tenfold error. You have to divide the
distance by ten. Also, the direction is in relation to Atlantis, so if the
Dialogue says, for example, that the lesser colony is northwest of Atlantis,
it means you have to head southeast. Talk to the guy on the boat and give him
the directions you want to go. You’ll arrive in the middle of the sea, which
makes sense, considering the city has SUNKEN. Good news is, there’s a diving
suit here. Bad news is, there’s a big hole in it. Just use the tire repair kit
on it, use the air-hose on it and put it on. But the thing is way too heavy
for Indy to move! Now you’re controlling Sophia. Turn the air compressor on
by pulling the lever and use the hoist with Indy. If you got the direction
wrong, you’ll go back to Thera. If you got it right, you’ll see a bunch of
doorways down there… but Indy will stop in the middle of the way… weird…
then you’ll see a huge shadow coming next to the boat! It’s a Nazi U-boat!
Kerner will kidnap Sophia and unplug Indy’s air supply. Now, you gotta be
quick and find Atlantis entrance! Check all the doorways until you find the
right one… and arrive at Atlantis.
RANDOM TRIVIA: If you let Indy drown, you’ll see a Monkey Island reference on
the Game Over screen.
You’re done with the Fists Path. Unless you’re going to try the Team Path or
the Wits Path, skip straight to the Atlantis section.

+*+*+*+*+*+*+*+*+*+*+*+*+*+*+*+*+*+*
* 2-5 --The Wits Path-- +
+*+*+*+*+*+*+*+*+*+*+*+*+*+*+*+*+*+*
My favourite path! So you’ve decided to use your brains, huh? Get ready, this
path has more puzzles than the other two!

------------
Monte Carlo
------------
You need to find some guy named Trottier. The only problem is that you don’t
know how he looks like, so just go around asking people passing by if they
know him. Some people will give tips on how he looks like. I’ll be straight,
it’s the balding guy wearing brown clothes and a flower. Talk to him and ask
if he’s Trottier. While talking to him, say your name and try to be as modest
as possible, or else he’ll get annoyed and will leave. Eventually, he’ll ask
something about Plato’s Lost Dialogue and you have to answer it right. If
you’ve read it, you shouldn’t have any problems answering. After you give the
correct answer, he’ll give you his business card. That’s all you have to do
here for now. Use the taxi and go to Algiers.

--------
Algiers
--------
Now you have to find some guy called Omar al-Jabbar. Go left and up to the
back alley. There’s some guy here. Hand him the business card and you’ll learn
he’s Omar’s servant, Paul Abdul. Ask him to arrange a meeting with al-Jabbar
and he’ll leave the store. Follow him out of the alley and into the streets.
He’s the gray dot. You COULD try following him (for I’ve done it once) but
it’s REALLY hard, so just follow the red dot back into the market. It’s just
some guy wearing a red fez. Now, wouldn’t it be good if you could just put
that fez on Paul’s head? Talk to the guy wearing the fez. Say “Nice fez”, “no,
but that’s quite a hat”, “it’s better than a sharp stick in the eye”,
“it’s kind of festive” and “I am a little frustrated”, than select either
option and the guy will give you the fez. Go back to the back alley and wait
for Paul. When he comes back, he’ll say Omar isn’t available. Hand him the red
fez. Just try selecting each one of the options until he accepts the hat (or
you could ask him who business is to get a hint). Now, ask him to arrange a
meeting with Omar and follow him this time (he’ll be the red dot). Now, you’re
at Omar’s house… but he’s b*tching about you touching anything in his house!
Just enter the closet and he’ll enter too. Get out of the closet and close the
door to trap him inside! Pick up the pole (a bamboo stick) and use it with the
hanging cloth to get a map (without names… damn!). Grab the blackbird statue
and the statue and use the camel to leave the city.

Now, there are a bunch of foreign legion officers hanging around. Avoid them,
or else they’ll send you back to the city! If one of them stop you ,select the
first option twice to try to bribe him (it won’t work every time). Give him
either statue you’ve stolen from Omar and the officer will let you go. Also,
selecting the second option will work now and then and the guy will let you go.
Now you have to find where the dig site is. Go to the first nomad camp you see
and show the guy your map. He’ll say some directions, so follow them and land
on the next camp you see. Eventually, one of the nomads will say that the site
is VERY close. When you leave the camp, you’ll see an X on the map. That’s the
dig site, so go there.

---------
Dig Site
---------
Go left and you’ll see the Dig Site! Also, your camel will run away, so now
you’re stuck here. There’s a truck here, but it’s low on battery… also,
there’s a spark plug missing.
Go down the ladder into the dig. It’s rather hard to see, but Indy’s vision
will start getting used to the dark and you’ll be able to see better. Anyways,
pick up the long, tubular thing (a hose) and the clay thing (a jar, and with
an orichalcum bead inside!). Now, get outside. Open the truck’s gas tank and
put the hose in it. Now use the clay jar with the end of the hose to get some
fuel. Pick the hose up and close the gas tank. Go back to the dig. Search for
some kind of metal cap and open it, Empty the jar into the pipe and use the
little metal thing (if you’re wondering what the hell you’re doing, that thing
is a generator that had no fuel. Now you’re turning it on). Yay! Now you can
see! Grab the ship rib and use it on the crumbling wall to your left to
find… an unreadable mural… too bad. To your left is a painting of some
kind. Push the round object to open a secret opening on the wall! There’s some
kind of statue inside here… oh, well. Nothing much more to do here. Open the
generator, turn it off and get one of the spark plugs. Go back up and open the
truck’s hood. Use the spark plug with the engine. Now, use the orichalcum bead
with the statue you’ve just got and it’ll get all warm and tingly. Use it with
the spark plugs and the truck’s engine will start! Well… nothing more to do
here, and now you’re clueless. Use the truck and… hey! There’s a telegram
here! The Nazi’s are going to kidnap Trottier! Better head to Monte Carlo!

------------
Monte Carlo
------------
Try warning Trottier about the Nazis a couple of times, but the old man won’t
listen! He’ll say that you’re trying to fool him to grab his Sunstone!… And
5 seconds later a couple of thugs will drag him into a car and drive away!
Well… you better chase them! Now, this can take a while… you have to drive
through the streets and try to smash your car against the Nazi’s one. When you
finally do it, the agents will run away. Talk to Trottier and as a way of
thanking you, he’ll give you the Sunstone! Unfortunately, he threw it out the
window during the chase. He’ll give you the address of where he threw it so
you kind find it. Also, he’ll give a tip about Atlantis. He believes one of
it’s lesser colonies is the island of Thera! That’s your next stop! Now, off
to find the stonedisk… just stop by the street corners and check the
addresses to see if they match with the one Trottier gave you. It’s kinda hard
to happen, but sometimes the stonedisk may end up landing on a corner without
the sign on it. Just try to find the name of the streets out and match them
with the corner you’re on. When you finally get to the right place, check the
drains. One of them should have something down there, so open it to (finally)
grab the Sunstone! Head back to the hotel, use the taxi and head to Thera.

------
Thera
------
Go left and up the path away from dock. Check the mountain’s gap, notch and
cleft until Indy finds an entrance to a cave or something. Go inside and left.
After a little while, the entrance will cave in! You’re trapped! Oh well…
grab the entrenching tool and close the door and a small opening with a peg on
it will open. Use the Sunstone on it. Now check the Lost Dialogue, it tells
how the stone must be positioned. It shouldn’t be hard to figure it out how,
so just look at the stone, put it in the right position and press the peg.
You’ll hear some kind of click. Open the door and grab the carved sign. Close
the door again and grab the Sunstone back. Time to get out of here! Go back to
the entrance and open the entrenching tool. There’s a note inside! Kerner got
Sophia! Use the entrenching tool on the bolcked door! While Indy is digging
his way out, you’ll watch a scene of Kerner and Ubermann taking Sophia to a
Nazi sub. After Indy gets out, close the box and pick the balloon invoice. Go
back to the docks and show the port authority the invoice and he’ll let you
have the balloon. Hand him the carved sign and he’ll translate it. It seems
the greater colony is on Crete! That’s where Kerner is heading! Only problem
is… you have no way out the island… or do you? The port authority will
give you the large basket in trade of the sign, so grab it. Open the crate and
grab the balloon. Also, get the fish net. Combine the basket, the balloon, the
fish net and the hose and you have your way out of here! All that’s left is
inflate this thing… you’ve probably noticed there was some crater with some
kind of gas coming out of it next to the cave you got the sign, haven’t you?
Go back there and use the balloon with it to inflate it and get out of here!

Riding the balloon can be a real pain… press the left mouse button to lower
the balloon and change your direction counter-clockwise or press the right
button to make the balloon go higher and change it’s direction clockwise. You
have to float around the screens until you find the sub. When you do, land on
it. Indy will beat the hell of an officer and steal his clothes. Now, get
inside the sub.

------------
Nazi U-boat
------------
Unlike the Team Path, you’re disguised this time, so don’t worry about the
Nazi agents. There’s some guy guarding a locker down here. If you talk to him,
he’ll say it’s a rock! Probably a stonedisk! Go left and grab some bread and
cold slices. Combine them to make a sandwich (yummy). Now, use it to have a
bite. Give it to the guy guarding the lockers and he’ll leave to make one for
himself. Open the lockers and grab the Moonstone! Grab the torpedo instructions,
while you’re at it. Try heading left and the sub will change it’s course.
You’ll see a scene showing Ubermann b*tching about Kerner losing the Moonstone.
Now, the sub is on the island of Crete, but Kerner put a guard on the exit to
keep anyone from leaving! What to do… It wouldn’t be a bad idea to leave
through the torpedo tubes. The only problem is that the captain won’t let you
come near them. There’s another tube on the back, but it’s broken… Go to the
torpedo room to the furthest right, that’s where the captain and his men are.
There’s an oily rag on the tail of one of the torpedos. Grab it and go to the
torpedo room to the furthest left. Use the rag on the exposed wires. Use the
torpedo instructions on the control panel and push the lever. Now that the
captain and all his men are busy with the mess you’ve caused (shame on you!)
go all the way back. Before heading to the torpedo room, open the head (the
bathroom) go inside and close the door so you can put the Indy clothes back on.
Go out again and get the clothesline. Go to the torpedo room, use the torpedo
instructions on the control panel, tie the clothesline to the lever, open the
torpedo tube, go inside and pull the clothesline to launch yourself to freedom!

------
Crete
------
You already have the Moonstone, so you don’t have to do all that sentry
equipment stuff like the other paths.You’ll see a stone pedestal around. Yep,
you’ve guessed right. You have to use your stone disks on it. So do it, and
check the Lost Dialogue to know how to align both stones and press the spindle
when you’re done. What do you know! A secret door! Grab the stone disks and go
inside.

----------
Labyrinth
----------

Wow, this place is creepy… anyways, grab two of the stone heads on the shelf
and go through the door. You’ll be able to see the head you left behind, so
use your whip on it. Now you’re trapped inside here… too bad! You need that
head, and, besides, you’ll find another way out, so don’t worry. This is a
labyrinth, so pay attention to my directions. Go up, right and then left. See
that statue up there? Use the whip on it’s head and it’ll roll down and make
the floor… sink a little… Go to the center of this room, and… the floor
will sink! Well, not really… it’s just some kind of primitive elevator. As
soon as you leave it, it’ll go straight upwards. Look at the skeleton. Does it
look familiar? Yep, it’s professor Sternhart… he got stuck down here and
starved to death… too bad for him. And this can also happen to you if you
don’t get out of here. By the way, remember when he got the Worldstone on
Tikal? It’s right next to him, so grab it! Also, grab his staff and his scarf,
with a comb on it. If you read his note, you’ll learn that orichalcum can be
detected through static electricity. Remember that. Now, how to get out of
here… take a look at the waterfall to your right and you’ll find a chain
running behind it! It’s holding the elevator’s counterweight! Climb the chain
to go back up.

Go left, being careful not to step on the elevator, or else you’ll go down
again. You’ll see a closed door with a shelf next to it. Seems familiar? Put
all the stone heads on the shelf and go inside.Go up and left and use the
staff on the chock to free the counterweight, now go left and up and go right
this time. Use the staff on the statue’s mouth and the elevator will go up.
Take the golden box and you’ll find a couple of beads underneath it! Indy will
automatically grab it. Put the beads inside the box and go up. There’s some
kind of machine here, and it has a part missing. Against all odds, the statue
you got at the Dig Site fits perfectly! What a coincidence! Use it with the
hatch and use a bead on the statue. The machine will turn on and dig a hole on
the wall. Go inside.

You are now in a room with some kind of Atlantis scale model. And there’s a
spindle in the middle! You probably know what to do. Use the stone disks on it
and check the Lost dialogue to know how to align them and press the spindle.
As soon as you do it, a little statue will move around and one of the doors
will open. Go inside to find… apparently not much… just a room with a
waterfall and one with some bones next to it… check the bones to find two
orichalcum beads! Now, go up, back to the waterfall room… remember
Sternhart’s note? Close your golden box (with the beads inside). Now, tie the
string to the comb and rub it against the scarf to create static electricity.
Use the comb and it’ll point towards the blank wall on the back… interesting.
Use the entrenching tool or the ship rib on it to reveal a door! Open it and
go inside. It’s an Atlantean subway car! it’ll take you straight to Atlantis!
Grab the bead on the floor and use it on it’s mouth. Enjoy the ride!

That’s the end of the Wits Path. Unless you’re going to try the Team Path or
the Fists Path, just keep on reading.

+*+*+*+*+*+*+*+*+*+*+*+*+*+*+*+*+*+*
* 2-6 --The Lost Kingdom-- +
+*+*+*+*+*+*+*+*+*+*+*+*+*+*+*+*+*+*

---------
Air Lock
---------
So, now you’re at Atlantis’ entrance, but can’t see a damn thing… Just like
in the Dig Site, Indy’s vision will gradually get used to the dark. Look for a
wood thing (ladder) and grab it. Use it on the stone rubble and go up it. Now,
look for a stone thing (stone box) and open it. Grab the rod inside and use an
orichalcum bead with it. Now you can see! Grab the ladder (you’ll need it
later, and, believe me, you DOn’t want to go all the way back here). There’s a
statue with a spindle on it here, so use the stone disks. Plato’s Lost
Dialogue mentions that final entrance yelded only to contrary minds. Hmmmm…
align the disks the same way you did at the Labyrinth, but turn them 180
degrees this time. Now, press the spindle and the statue’s mouth should open.
Use an orichalcum bead with it and the door will open. Go inside.

------------
Outter Ring
------------
Atlantis, at last! Nearly everything here is moved on orichalcum beads. The
only problem is that you’re running low on beads… and you’ll need them.

There are a bunch of things you need to know about Atlantis’ outter ring:
-With the exception of both subways, the dungeon and the Sentry room, the
placement of all rooms change every game.

-There are two rooms at the Northeast section of the ring that can’t be
accessed by walking there. You’ll have to find the right vent to reach that.

-speaking of vents, everytime you enter a room that has a vent on it, go
inside. Two of them can be used as shortcuts, at least one of them take you to
a room with an important item, two of them take you to the dungeon where
Sophia is (you won’t be able to get out of the vent, though) and one of them
takes you to the inaccessible rooms.

-Before you enter them, all rooms will be marked with a “?”. After you go
inside them, usually they’ll be named “room” from there on, unless it’s a
room which needs an item to be used somewhere in it. In this case, they’ll
have a different name, like “Machine room”, for example.

-There are Nazi guards hanging around. You can fight them or run, it’s your
choice. But if you don’t have the sandwich (made in the Nazi sub), you’ll have
to fight one of them to grab his rations.

-A bead used on the fish at the Sentry room before you remove the water is a
bead gone to waste, so, unless you wanna see the statue’s head fall down THAT
badly, don’t do it.

-There are rooms here that don’t have ANYTHING. You’ll know when you find them.

Needless to say the first thing you have to do here is explore all rooms. It’s
going to be kinda hard to tell you what to do here, considering I can’t tell
how the rooms in your game are going to be set. I’ll just follow the way I
find them in mine, skipping the empty rooms. Also, I usually explore the place
clockwise, starting from the Northwest section.

-------------
Vent Room #1
-------------
Open the grate and go inside. You’ll end up in the dungeon, underneath the
cells. You can’t do much here, so go back through the vent.

-------------
Machine Room
-------------
This is where you’ll get more orichalcum beads. You’ll need the spoked wheel
and the cup filled with lava. If you don’t have either of them, skip to the
next room. If you have both, use the spooked wheel on the peg and the
lava-filled cup with the funnel. The machine will generate a bunch of
orichalcum beads (ten, to be more specific). Grab the beads and don’t forget
the spoked wheel! You really really REALLY won’t want to get all the way back
here to grab it.

-------------
Vent Room #2
-------------
Open the grate and go inside. It takes you to a room with a bunch of robot
parts. There’s a bronze gear around, so grab it. In my game it also is a
shortcut to the southwest section.

-------------
Vent Room #3
-------------
This one was a shortcut vent room. Ironically, the room it takes me was right
next to the other I’ve just mentioned… maybe you’ll get more lucky than me.

-------------
Vent Room #4
-------------
This one took me to the inaccessible room. Remember, the room next to this one
ALWAYS has an important item.

------------------
Inaccessible Room
------------------
The room had the robot parts with the bronze spoked wheel this time. Of course,
this room can aways change, so expect a different item.

-------------
Vent Room #5
-------------
This one took me to the dungeon again, but on the uppermost vent. From here,
you can put an orichalcum bead inside the statue’s mouth and it’ll kill the
guard. Of course, you could try fighting him when you got here through the
door, but he’s VERY tough. Instant knock-out punches won’t work on him, also.

------------
Statue Room
------------
There’s a big hole here separating you from the statue. Use the ladder on it
so you can get to the other side and grab the cup. Don’t forget the ladder
before you leave!

----------
SE Subway
----------
If you’re on the Northeast section of Atlantis, you’ll be able to go to the
gray path surrounding the whole place, so do it and head south. Now go to the
“?” there, it’s the subway. All you have to do here is grab the skeleton’s
rib cage, then you can leave.

---------
Crabroom
---------
You’ll need to have the rib cage and the rations/sandwich here (in case you
forgot, you can get the rations by beating one of the soldiers walking around).
Use the ration/sandwich on the rib cage and put it inside the pool. Just wait
for a *snap!* and grab the rib cage with the trapped crab.

-------------
Vent Room #6
-------------
This one took me to a room with an eel figurine that’s just like the one you
found on Iceland. Grab it and leave.

---------------
Bull-fish Room
---------------
There’s a statue that seems like a cross between a bull and a fish here. Grab
the head and leave.

----------
Lava Room
----------
You’ll need the cup and the statue head here. Put the cup on the pedestal and
put the statue head on the plaque. Grab the lava-filled cup and leave. (Note:
You could try using the clay jar instead of the cup, but it’d, obviously, melt)

------------
Sentry Room
------------
Go here only after you’ve already had got the eel figurine, the orichalcum
beads, the trapped crab, the bronze gear, the spoked wheel and, preferibly,
had killed Sophia’s guard. Remember how Iceland’s eel figurine melted itself
out of the ice? Use the orichalcum bead with the eel you have now and it’ll
get very hot! Indy will automatically throw it in the water blocking the door,
making it evaporate! Use an orichalcum bead on the fish statue and the door
will open. Go through it, then head to the dungeon.

--------
Dungeon
--------
Sophia’s in here. You can’t do much to help her now, though… Grab the statue
part on the floor and leave. Now, head to the canal.

------
Canal
------
That’s a pretty hungry looking octopus. Throw him the crab to calm him down a
little and swim to the other side. Hop on the crab-like raft and use an
orichalcum bead in it’s mouth. Seems like this thing has a motor. Float to the
left door and use the Sunstone on the spindle to open it and float through it.
Check the bones to see how bizarre Atlanteans were, if you want. Use the
Moonstone on the next gate’s spindle and keep floating. Go upstairs into the
door and grab the crescent-shaped gear. Close the cupboard and look it closely
to learn some important stuff. They’re instructions to use some kind of statue
you’ll find in the next room. Go back to the raft and use the Worldstone on
the spindle. Go through the gate and enter the archway. That statue used to
open that door, but it seems like the right arm is broken… Use the ladder on
it and climb. Open the chest plate and look closely at it. Use the spoked
wheel and the statue part on the peg on the center. Use the crescent-shaped
gear on the right side and use the bronze gear on the upper left peg. Now put
a bead inside the mouth. The left arm will move a little. Get down of the
ladder and use one side of the chain on the statue’s arm and the other on the
bronze loop. Get back to the statue’s chest plate. Put the bronze gear on the
other left peg and use an orichalcum bead in the mouth to open the door in a
very rude way. A hinge pin will fall off when the door collapses. Pick it up.
Now you have what you need to go save Sophia! Head back to the dungeon. (Note:
You don’t need Sophia to finish the game. You can be mean enough to leave her
there and get a slightly different ending)

--------
Dungeon
--------
Hand Sophia the hinge pin. Try opening the gate. Tell Sophia that you have a
plan and that it’s bracing the gate with the hinge pin. After the little
“love and hate” scene, open the gate to release the hinge pin and grab it.
Go all the way back to the door you’ve just opened and go inside.

-----------
Inner Ring
-----------
Sophia will start acting… weird. She’ll mention Nur-Ab-Sal’s presence and
her voice is kinda… funny. She’ll go in a room around and she’ll get even
more creepier. If you talk to her, you’ll realise she’s been possessed by
Nur-Ab-Sal! You gotta get rid of that necklace of hers! (Note: Again, you can
just ditch Sophia here and carry on.) Take a close look at her necklace. The
eyes are flashing red… weird. Use an orichalcum bead and the medallion will
get really evil and creppy like! (seriously, this used to scare the hell out
of me when I was a kid.) it’ll also get very hot. Sophia will take it off
until it colds off. Quickly, use the gold box (it has to be open) on the
necklace! Indy will put it inside the box and throw it into the lava pit.
Phew… so long, Nur-Ab-Sal! Now that we got rid of him, go left, up the
stairs and get the scepter. Now leave this (very creppy) room.

Go down the hallway. There’s a door to your right, but before going there,
check the strange marks on the wall. There are 9 squares here, being 2 bigger
than the others. There’s also an arrow next to it. These are the instructions
for the machine you see coming out of the earlier mentioned door. The big
squares represent levers. Each vertical row represents a slot. The horizontal
rows represent the position of the levers. The arrow indicates that doing this
will make the machine go forwards, so remember this. Now go inside the room
with the machine.

If you’ve played through the Wits Path, you’ll notice that this thing looks a
lot like the one you’ve found in the Labyrinth, only bigger. If you look at
the floor, you’ll see more instructions, except it’ll make the machine spin
around. Anyways, remember both instructions and hop on this big thing. Put a
bead inside the mouth. Hang on, this thing has no levers… or does it? The
hinge pin and the scepter are going to be the levers. Following the “going
forward” instructions, put both of them on their slots and set them on the
right position. The machine will start moving around the inner ring. Now, set
the levers to “spin around” and the machine will… well… spin around and
dig into the wall… and fall into a lava pit! Thankfully, Sophia (if you’ve
saved her) and Indy hopped off the thing before it fell down. Head through the
door you see down there

-----
Core
-----
Oh, great… there’s lava all over the place… You have to pick the right
doorways so you don’t end up on a dead-end or having to start all over again.
I won’t consider the doorway you’ve just come through, just the other two.
First go right, then go right again, then left and left again. Go through the
next doorway and go left. See that pattern on the wall? Write it down, you’ll
need it in a little while. Go up the stairs on your right and go through the
left doorway. Now, time for a little game… you have to cross the lava river
by hoping around those pieces of solid lava. There’s a catch though…
everytime you step on one of them, the other right in front of it will break.
The path changes randomly everytime, so good luck! And be careful, you can die
on this one. If Sophia’s with you, she’ll go through automatically, so don’t
worry. Go down the stairs to your right. Well, well, well… if it isn’t the
huge colossus Plato mentioned. Go inside.

--------------
Huge Colossus
--------------
See the spindle? Yep, you guessed right. Put the stone disks on it. Now, align
then just like the pattern you’ve just seen a while ago and press the spindle…
it’ll turn the thing on… and the Nazis will show up! Damn them! Now, when
talking to those guys, just keep choosing any choice you fell like until
Kerner step on the machine and gets turned into a half-man half-goat creature
and falls down into the lava pit (owned! It serves him right, if you ask me).
When Indy stands on top of the platform, whenever Ubermann asks you how many
beads you want to use, always, ALWAYS say “no beads”! Otherwise, it’s game
over! Just talk to him until “For your sake, I hope this doesn’t works”
shows up. Select it and tell Ubermann you’ll send him straight to hell and
some stuff about angry god. He’ll make you step aside, insert 100 beads in
the machine and get on the platform. He’ll turn into a powerful god! Oh no!…
but, suddenly, he’ll just vanish in thin air… maybe it was too much for him
to handle. (if you didn’t rescue Sophia, all this stuff will happen to HER,
while she’s possessed by Nur-Ab-Sal). After Ubermann is gone, the place will
start to collapse! Indy and Sophia will run all the way back to the entrance
and hop on the sub. They’ll be able to escape just at the nick of time. Now,
after some kissing they’ll just watch as the volcano destroys what’s left of
Atlantis… if you didn’t rescue Sophia, Indy will be saying something about
how she should’ve listened to him, even though it was his, more like YOUR,
fault of leaving her behind. Either way just enjoy the credits. You’ve
finished Indiana Jones And The Fate Of Atlantis!

+*+*+*+*+*+*+*+*+*+*+*+*+*+*+*+*+*+*
* 3 --CREDITS-- +
+*+*+*+*+*+*+*+*+*+*+*+*+*+*+*+*+*+*
I thank my brother for showing this and a lot of other awesome games, let
alone showing me how to beat them at least halfway. Thanks for LucasArts for
the adventure games… except Zak McKracken, I gotta admit I didn’t really
like it. Thanks for all the FAQs writers out there for inspiring me. Thank YOU
for reading it, or else there wouldn’t be any point on writing it in the first
place. Very special thanks for the three-headed monkey. I’d also like to say
that I’m not a natural English speaker, so I’m sorry for any grammar mistakes.
Peace to you all. And, just to remember, if you have any doubts, problems or
comments just send me an e-mail. (felipecgaboardi@hotmail.com)
![]()
![]()